Welcome to a tutorial on how to create a simple user login system with PHP and MYSQL. So you have just started a project and want to secure the administration panel? Maybe create a “members only” section?
A simple user login system consists of the following essential components:
- A user database table to keep the emails and passwords.
- PHP user library to manage the users.
- The login page itself.
- Finally, protecting all the pages.
This guide will walk you through an example of how to do these exactly – Read on to find out!
TABLE OF CONTENTS
DOWNLOAD & NOTES
Here is the download link to the example code, so you don’t have to copy-paste everything.
EXAMPLE CODE DOWNLOAD
Just click on “download zip” or do a git clone. I have released it under the MIT license, so feel free to build on top of it or use it in your own project.
SORRY FOR THE ADS...
But someone has to pay the bills, and sponsors are paying for it. I insist on not turning Code Boxx into a "paid scripts" business, and I don't "block people with Adblock". Every little bit of support helps.
Buy Me A Coffee Code Boxx eBooks
LOGIN SYSTEM WITH PHP MYSQL
All right, let us now get into the details of building a login system with PHP and MYSQL.
TUTORIAL VIDEO
STEP 1) CREATE A USER DATABASE TABLE
CREATE TABLE `users` (
  `user_id` bigint(20) NOT NULL,
  `user_name` varchar(255) NOT NULL,
  `user_email` varchar(255) NOT NULL,
  `user_password` varchar(255) NOT NULL
) ENGINE=InnoDB DEFAULT CHARSET=utf8mb4;

ALTER TABLE `users`
  ADD PRIMARY KEY (`user_id`),
  ADD UNIQUE KEY `user_email` (`user_email`);

ALTER TABLE `users`
  MODIFY `user_id` bigint(20) NOT NULL AUTO_INCREMENT;

INSERT INTO `users` (`user_id`, `user_name`, `user_email`, `user_password`) VALUES
  (1, 'Jon Doe', 'jon@doe.com', '$2y$10$eGdnkD1EcFdLmPtm0eqQ8OqjjRo6NWrXKDmbieFPKHmRUTmz7iYzi');
| Field | Description |
user_id |
Primary key, and auto-increment. |
user_name |
The user’s name. |
user_email |
The user’s email address. Unique field to prevent multiple registrations. |
user_password |
The password. This should be encrypted. |
Yep, it’s as simple as that. Feel free to add more fields as required.
STEP 2) PHP USER CLASS
<?php
class Users {
  // (A) CONSTRUCTOR - CONNECT TO DATABASE
  private $pdo = null;
  private $stmt = null;
  public $error = null;
  function __construct () {
    $this->pdo = new PDO(
      "mysql:host=".DB_HOST.";dbname=".DB_NAME.";charset=".DB_CHARSET,
      DB_USER, DB_PASSWORD, [
      PDO::ATTR_ERRMODE => PDO::ERRMODE_EXCEPTION,
      PDO::ATTR_DEFAULT_FETCH_MODE => PDO::FETCH_ASSOC
    ]);
  }

  // (B) DESTRUCTOR - CLOSE DATABASE CONNECTION
  function __destruct () {
    if ($this->stmt !== null) { $this->stmt = null; }
    if ($this->pdo !== null) { $this->pdo = null; }
  }

  // (C) RUN SQL QUERY
  function query ($sql, $data=null) : void {
    $this->stmt = $this->pdo->prepare($sql);
    $this->stmt->execute($data);
  }

  // (D) GET USER
  function get ($id) {
    $this->query(sprintf("SELECT * FROM `users` WHERE `user_%s`=?", is_numeric($id) ? "id" : "email"), [$id]);
    return $this->stmt->fetch();
  }

  // (E) VERIFY EMAIL PASSWORD - SESSION MUST BE STARTED!
  function login ($email, $password) {
    // (E1) ALREADY SIGNED IN
    if (isset($_SESSION["user"])) { return true; }

    // (E2) GET USER
    $user = $this->get($email);
    if (!is_array($user)) { return false; }

    // (E3) VERIFY PASSWORD + REGISTER SESSION
    if (password_verify($password, $user["user_password"])) {
      $_SESSION["user"] = [];
      foreach ($user as $k=>$v) { if ($k!="user_password") { $_SESSION["user"][$k] = $v; }}
      return true;
    }
    return false;
  }

  // (F) SAVE USER
  function save ($name, $email, $pass, $id=null) {
    // (F1) ADD/UPDATE SQL
    if ($id===null) {
      $sql = "INSERT INTO `users` (`user_name`, `user_email`, `user_password`) VALUES (?,?,?)";
      $data = [$name, $email, password_hash($pass, PASSWORD_DEFAULT)];
    } else {
      $sql = "UPDATE `users` SET `user_name`=?, `user_email`=?, `user_password`=? WHERE `user_id`=?";
      $data = [$name, $email, password_hash($pass, PASSWORD_DEFAULT), $id];
    }

    // (F2) PROCESS SAVE
    $this->stmt = $this->pdo->prepare($sql);
    $this->stmt->execute($data);
    return true;
  }
}

// (G) DATABASE SETTINGS - CHANGE TO YOUR OWN!
define("DB_HOST", "localhost");
define("DB_NAME", "test");
define("DB_CHARSET", "utf8mb4");
define("DB_USER", "root");
define("DB_PASSWORD", "");

// (H) CREATE USER OBJECT
$USR = new Users();
Yikes! This looks massive, but keep calm and study closely.
- (A, B, H) When
$USR = new Users()is created, the constructor will connect to the database. The destructor closes the connection. - (C)
query()A support function to run an SQL query. - (D To F) There are only 3 user functions!
get()Self-explanatory. Get the user with the given email address or user ID.login()Check the given email/password and process login.save()To add or update a user. For example,$USR->save("Jane Doe", "jane@doe.com", "123456");
- (G) Database settings, remember to change these to your own.
STEP 3) USER LOGIN PAGE
<?php
// (A) PROCESS LOGIN ON SUBMIT
session_start();
if (isset($_POST["email"])) {
  require "2-user-lib.php";
  $USR->login($_POST["email"], $_POST["password"]);
}

// (B) REDIRECT USER IF SIGNED IN
if (isset($_SESSION["user"])) {
  header("Location: 4-index.php");
  exit();
}

// (C) SHOW LOGIN FORM OTHERWISE ?>
<!-- (C1) ERROR MESSAGES (IF ANY) -->
<?php
if (isset($_POST["email"])) { echo "<div id='notify'>Invalid user/password</div>"; }
?>

<!-- (C2) LOGIN FORM -->
<form id="login" method="post">
  <h2>MEMBER LOGIN</h2>
  <input type="email" name="email" placeholder="Email" required>
  <input type="password" name="password" placeholder="Password" required>
  <input type="submit" value="Sign In">
</form>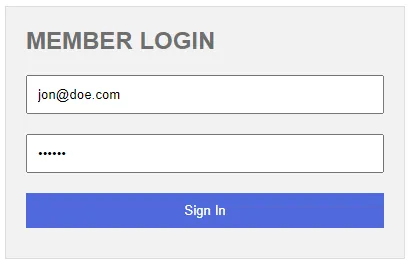
- When the login form is submitted, we use the user library to process the login.
- If the user is signed in, redirect to the home page.
- The login form itself.
STEP 4) SECURE ALL THE PAGES
<?php
// (A) "LISTEN" FOR LOGOUT
session_start();
if (isset($_POST["logout"])) { unset($_SESSION["user"]); }

// (B) REDIRECT TO LOGIN PAGE IF NOT SIGNED IN
if (!isset($_SESSION["user"])) {
  header("Location: 3-login.php");
  exit();
}
Yes, just include this snippet at the top of all the pages that you want to secure. This should be self-explanatory again – Redirect all users who are not signed in to the login page.
EXTRA) HOW TO LOGOUT
<?php require "4-protect.php"; ?>
<h1>Congrats! You have signed in.</h1>
<form method="post">
  <input type="submit" name="logout" value="Logout">
</form>
Captain Obvious to the rescue! Notice that if (isset($_POST["logout"])) { unset($_SESSION["user"]); } in 4-protect.php? Simply create a form that will POST a log out to itself.
EXTRAS
That’s it for the tutorial, and here are some stuff and links that might be useful to you.
USE HTTPS!
It is not very smart to use http:// and post clear text passwords across the Internet… Switch to use https:// when you can – Most hosting companies should provide a free SSL certificate nowadays, and there are a few affordable ones anyway.
LINKS & REFERENCES
- Ways to protect passwords in PHP – Code Boxx
- Simple PHP MYSQL User Registration – Code Boxx
- PHP MYSQL User Registration With Email Verification – Code Boxx
- Login System Without A Database – Code Boxx
- JWT Login & Auth – Code Boxx
- User Role Management With PHP MYSQL – Code Boxx
THE END
Thank you for reading, and that’s it for this tutorial. I hope it has helped you with your project, but please do remember that this guide is ultimately a skeleton frame only – You have to beef up the security and add access control in your own project. If you have anything to share, feel free to comment below. Good luck, and happy coding!
Hey man i got php v5? Do i need to update it before using this code?
Not tested on PHP5, but it should work. It’s time to update though – There are a lot of security and performance upgrades in PHP7.
Great tutorial, as always.
Just a question: why die() after header(“Location: …”)?
Is it really necessary?
With die() or exit() – Will immediately stop and send the redirect header alone.
Without die() or exit()- Will send redirect header AND HTML. Does not make sense, just a waste of system resources.
hello, excellent tutorial and easy to implement for a novice like me.
also, can you tell me how to display different content to different user after successul login?
i want to manually set different url redirection to different user after successful login.
it will be of great help. thanks in advance.
Just change 3d-index.php to load different PHP pages.
Thanks so much for the guide, it’s very helpful. Wondering if you could please help me with something – I want to display the user_name on the page when a user logs in successfully but I’m having trouble accessing the array data – I have the sessions set :
and have tried each of these but with no success..
<?php
echo $users[1]['user_name'];
echo $users[' user_name'];
foreach($results['user'] as $result) {
echo $result['user_name'], '’;
}
print_r(array_column($user, ‘user_name’));
?>
Thanks in advance!
The user information is stored in the session once the user is signed in, I.E. $_SESSION[‘user’][‘name’]. You might want to follow up a little bit more on PHP sessions – https://www.php.net/manual/en/session.examples.php
you are a life saver