Welcome to a tutorial on how to create a simple user registration system with PHP MySQL. Want to open your website for user registrations? It’s not really that difficult, let us walk through a simple registration system in this guide – Read on!
TABLE OF CONTENTS
DOWNLOAD & NOTES
Here is the download link to the example code, so you don’t have to copy-paste everything.
EXAMPLE CODE DOWNLOAD
Just click on “download zip” or do a git clone. I have released it under the MIT license, so feel free to build on top of it or use it in your own project.
SORRY FOR THE ADS...
But someone has to pay the bills, and sponsors are paying for it. I insist on not turning Code Boxx into a "paid scripts" business, and I don't "block people with Adblock". Every little bit of support helps.
Buy Me A Coffee Code Boxx eBooks
PHP MYSQL USER REGISTRATION
All right, let us now walk through the simple PHP MYSQL user registration.
PART 1) USER DATABASE
CREATE TABLE `users` (
  `user_id` bigint(20) NOT NULL,
  `user_name` varchar(255) NOT NULL,
  `user_email` varchar(255) NOT NULL,
  `user_password` varchar(255) NOT NULL
) ENGINE=InnoDB DEFAULT CHARSET=utf8mb4;

ALTER TABLE `users`
  ADD PRIMARY KEY (`user_id`),
  ADD UNIQUE KEY `user_email` (`user_email`);

ALTER TABLE `users`
  MODIFY `user_id` bigint(20) NOT NULL AUTO_INCREMENT, AUTO_INCREMENT=1;
First, we are going to need a user table, here is a simple one.
user_idPrimary key, auto-increment.user_nameThe user’s name.user_emailThe user’s email. Set to unique to prevent duplicate registrations.user_passwordCaptain Obvious, the password.
PART 2) USER LIBRARY
<?php
class Users {
  // (A) CONSTRUCTOR - CONNECT TO DATABASE
  private $pdo = null;
  private $stmt = null;
  public $error = null;
  function __construct () {
    $this->pdo = new PDO(
      "mysql:host=".DB_HOST.";dbname=".DB_NAME.";charset=".DB_CHARSET,
      DB_USER, DB_PASSWORD, [
      PDO::ATTR_ERRMODE => PDO::ERRMODE_EXCEPTION,
      PDO::ATTR_DEFAULT_FETCH_MODE => PDO::FETCH_ASSOC
    ]);
  }

  // (B) DESTRUCTOR - CLOSE DATABASE CONNECTION
  function __destruct () {
    if ($this->stmt !== null) { $this->stmt = null; }
    if ($this->pdo !== null) { $this->pdo = null; }
  }

  // (C) RUN SQL QUERY
  // $sql : sql to run
  // $data : data to bind
  function query ($sql, $data=null) : void {
    $this->stmt = $this->pdo->prepare($sql);
    $this->stmt->execute($data);
  }

  // (D) GET USER BY ID OR EMAIL
  // $id : email or user id
  function get ($id) {
    $this->query(sprintf("SELECT * FROM `users` WHERE `user_%s`=?",
      is_numeric($id) ? "id" : "email"
    ), [$id]);
    return $this->stmt->fetch();
  }

  // (E) REGISTER USER
  // $name : user name
  // $email : user email
  // $pass : password
  function register ($name, $email, $pass) {
    // (E1) CHECK
    if (is_array($this->get($email))) {
      $this->error = "$email is already registered";
      return false;
    }

    // (E2) ADD NEW USER
    $this->query(
      "INSERT INTO `users` (`user_name`, `user_email`, `user_password`) VALUES (?,?,?)",
      [$name, $email, password_hash($pass, PASSWORD_DEFAULT)]
    );
    return true;
  }
}

// (F) DATABASE SETTINGS - CHANGE TO YOUR OWN!
define("DB_HOST", "localhost");
define("DB_NAME", "test");
define("DB_CHARSET", "utf8mb4");
define("DB_USER", "root");
define("DB_PASSWORD", "");

// (G) CREATE USER OBJECT
$USR = new Users();
With the database in place, the next step is to build a user library to work with it. This looks complicated at first, but keep calm and look carefully.
- The constructor automatically connects to the database when
$USR = new Users()is created. - The destructor closes the connection when
$USRis destroyed. query()A helper function to run an SQL statement.get()Get user with the given user ID or email.register()Register user.
PART 3) REGISTRATION PAGE
3A) THE HTML
<?php
/* (A) ALREADY SIGNED IN - TO HOME PAGE
if (isset($_SESSION["user"])) {
header("Location: HOME.PAGE");
exit();
}
*/
// (B) PROCESS REGISTRATION
if (count($_POST)>0) {
require "2-user-lib.php";
$pass = $USR->register($_POST["name"], $_POST["email"], $_POST["pass"]);
if ($pass) {
// header("Location: HOME.PAGE");
exit("SUCCESSFUL!");
}
}
// (C) REGISTRATION FORM ?>
<!DOCTYPE html>
<html>
<head>
<title>User Registration</title>
<meta charset="utf-8">
<link rel="stylesheet" href="3-register.css">
<script src="3-register.js"></script>
</head>
<body>
<!-- (C1) ERROR MESSAGE (IF ANY) -->
<?php
if (isset($pass) && $pass==false) {
echo "<div class='error'>$USR->error</div>";
} ?>
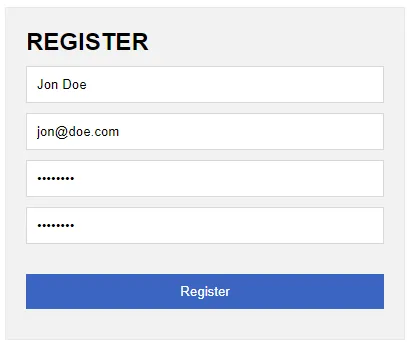
<!-- (C2) REGISTRATION FORM -->
<form method="post" id="register" onsubmit="return check()">
<h2>REGISTER</h2>
<input type="text" name="name" placeholder="Name" required value="Jon">
<input type="email" name="email" placeholder="Email" required value="jon@doe.com">
<input type="password" name="pass" placeholder="Password" required value="12345">
<input type="password" name="cpass" placeholder="Confirm Password" required value="12345">
<input type="submit" value="Register">
</form>
</body>
</html>
The process order here is a little jumbled, but here’s how it works:
- (C2) The HTML registration form.
- (B) Process the registration form when it is being submitted. Redirect the user to a “welcome” or home page after a successful registration.
- (C1) Show the error message, if the registration fails.
- (A) Enable this section after you are done with the login. If the user is already signed in, redirect to the home page, or whatever page you want.
3B) THE JAVASCRIPT
function check () {
  let pass = document.getElementsByName("pass")[0].value,
  cpass = document.getElementsByName("cpass")[0].value;
  if (pass != cpass) {
    alert("Passwords do not match");
    return false;
  } else { return true; }
}
Just a small bit to check if the passwords match. I will recommend doing this on the server side though (in the PHP library register()), along with a password strength check.
EXTRAS
That’s all for the tutorial, and here is a small section on some extras and links that may be useful to you.
HOW ABOUT THE USER LOGIN?
To verify the password, simply get the user from the database and do a password check – if (password_verify($_POST["password"], DATABASE PASSWORD)) { OK - LOGIN }. But the login mechanism is another story.
- Simple Login With PHP Session – The “traditional” and “simple” way.
- JWT Login WIth PHP MySQL – This is better for you guys who want to develop and support mobile apps in the future.
LINKS & REFERENCES
- Google reCAPTCHA – Fight spam.
- How to Validate Password Strength in PHP – Codex World
- Check Username Availability In PHP MYSQL – Code Boxx
THE END
Thank you for reading, and we have come to the end. I hope that it has helped you to better understand, and if you want to share anything with this guide, please feel free to comment below. Good luck and happy coding!
Hi,
so great tutos and style of explaining things in your website.
I’am wondering why all input,checkbox etc …. of forms in your tutorials are not sanitize,cleaned etc…
For security concern never trust input data.
Glad to hear from you on this point.
Again great thanks fro our work.
Really!? This is called “parameter binding”, and there’s a good reason why we do this:
https://code-boxx.com/php-mysql-injection-prevention/
https://www.php.net/manual/en/pdo.prepare.php
https://www.php.net/manual/en/pdostatement.execute.php
https://www.php.net/manual/en/function.filter-var.php
https://www.php.net/manual/en/function.preg-match.php
P.S. If you mean “check valid email/telephone/name” – Please help yourself with
filter_var() preg_match(), I only create simple tutorials. Things will never end if I add dummy proof checks to 500++ tutorials.Please login?
See “HOW ABOUT THE USER LOGIN?” above.
Download link not working.
https://code-boxx.com/wp-content/uploads/2022/10/php-user-reg.zip
It does – Probably a server cache hiccup or bad connection. Reload and try again.