Storage Boxx is an open-source PHP Inventory Management System. With a built-in webcam QR scanner, NFC scanner, passwordless login, and an optional experimental AI assistant.
TABLE OF CONTENTS
DOWNLOAD & INSTALLATION
First, here are the download links for the impatient folks who don’t want to read through everything.
SYSTEM REQUIREMENTS
- LAMP/WAMP/MAMP/XAMPP
- Apache Mod Rewrite
- PHP MYSQL PDO Extension
- PHP OpenSSL Extension
- At least PHP 8.0
- Take note – Webcam, NFC and Passwordless (Web Authentication) support depends on the user’s device and browser.
LICENSE & DOWNLOAD
GitHub | GitHub – AI Assistant | SourceForge
Storage Boxx is released under the MIT License. You are free to use it for personal and commercial projects, and modify it as you see fit. On the condition that the software is provided “as-is”. There are no warranties provided and “no strings attached”. Code Boxx and the authors are not liable for any claims, damages, or liabilities.
INSTALLATION
- Download from GitHub/Sourceforge into your HTTP folder.
- Access
http://your-site.comin the browser and walk through the installer.
SORRY FOR THE ADS...
But someone has to pay the bills, and sponsors are paying for it. I insist on not turning Code Boxx into a "paid scripts" business, and I don't "block people with Adblock". Every little bit of support helps.
Buy Me A Coffee Code Boxx eBooks
HOW TO USE
So far so good? Let us now go through a quick crash course on how to use Storage Boxx.
QUICKSTART GUIDE
EQUIPMENT RECOMMENDATIONS
- Webcam – If you are using a desktop without a webcam, a simple one only costs about $20~30.
- USB QR Code scanner – Alternatively, a “dedicated barcode scanner” will cost about $30~40 bucks.
- NFC tags – 10 pieces of Ntag213 only cost 2-3 bucks. Buy them in bulk, and one piece will only cost a few cents.
- Fingerprint sensors – These are kind of expensive… But I got lucky with a $25 “Made in China” that works just fine.
- Label printer – Print your QR codes. There are Bluetooth ones that can pair with smartphones.
FOR THE DEVELOPERS
This section is for the developers, with a couple of development notes for customization.
FAQ
“AJAX error”? Migrating to another domain? NFC “not working”? Check out the FAQ section.
BUILT ON CORE BOXX
- At least go through the very short tutorial.
- Thereafter, go into the deeper concepts:
- Storage Boxx has also adopted the following modules:
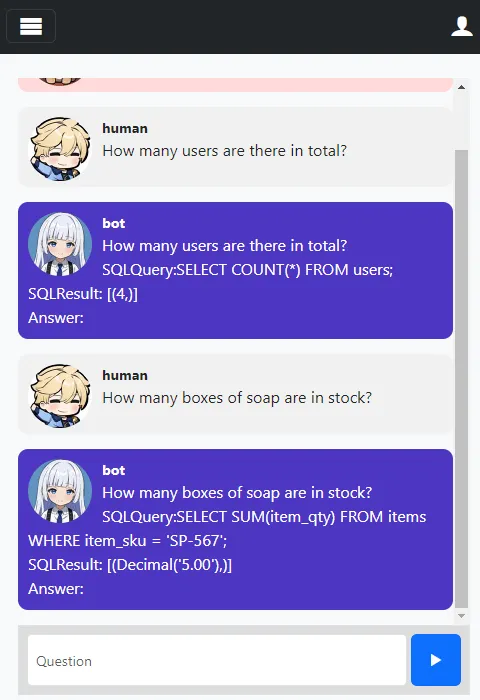
AI ASSISTANT
So, you may have noticed that the AI Assistant is “missing” or “not working” out of the box. It’s a long story.
REQUIREMENTS
- Python – Yes, Python. Not PHP. Version 3.9 to 3.10 seems to work fine at the time of writing.
- Microsoft C++ Build Tools
- CMake
- Nvidia CUDA Toolkit – If you have an Nvidia graphics card.
- An Nvidia graphics card with at least 8GB VRAM is highly recommended. You can TRY to run on CPU, but it is painfully slow and practically useless.
INSTALLATION
- Copy/unzip this module into your existing Storage Boxx folder.
- I have tried multiple AI models, codellama-7b-instruct.Q5_K_M.gguf is the only one that produced decent(ish) results – Download that into
chatbot/modelsor choose a better/larger/smarter model on your own. - Edit
chatbot/a_settings.py, change themodel_nameto your own. - BE WARNED, GIGABYTES WORTH OF DOWNLOAD! –
0-setup.bat(Windows)0-setup.sh(Linux).
LAUNCH
- Run
1-bot.bat(Windows)1-bot.sh(Linux/Mac), this will deploy the bot athttp://your-site.com:8008. - Just access
http://your-site.com/ai(must be signed in).
Hi, when ever i am trying to install it on localhost with xampp i get below error.
“Fatal error: Uncaught RuntimeException: Unable to create the key in C:\xampp\htdocs\inventory\lib\webpush\web-token\jwt-core\Util\ECKey.php:98 Stack trace: #0 C:\xampp\htdocs\inventory\lib\webpush\web-token\jwt-core\Util\ECKey.php(72): Jose\Component\Core\Util\ECKey::createECKeyUsingOpenSSL(‘P-256’) #1 C:\xampp\htdocs\inventory\lib\webpush\web-token\jwt-key-mgmt\JWKFactory.php(69): Jose\Component\Core\Util\ECKey::createECKey(‘P-256’, Array) #2 C:\xampp\htdocs\inventory\lib\webpush\minishlink\web-push\src\VAPID.php(165): Jose\Component\KeyManagement\JWKFactory::createECKey(‘P-256’) #3 C:\xampp\htdocs\inventory\lib\CORE-Install.php(135): Minishlink\WebPush\VAPID::createVapidKeys() #4 C:\xampp\htdocs\inventory\index.php(2): require(‘C:\\xampp\\htdocs…’) #5 {main} thrown in C:\xampp\htdocs\inventory\lib\webpush\web-token\jwt-core\Util\ECKey.php on line 98″
And when i am trying to install it on server without apache [Hostinger domain Shared] edited .htaccess file I get error ” AJAX ERROR | Bad server response”
I have got older version too ie. 2022 it’s working fine on localhost but it could not be installed on server, it shows error while creating data base, and when I first create database then try to install, it shows error that ” Could not create database with name, as it is already available” same old version is working fine on localhost.
Help !
See https://code-boxx.com/core-boxx-php-framework/#sec-faq – “UNABLE TO GENERATE VAPID KEYS” and “PAGES ARE NOT RESOLVING OR SHOWING PROPERLY”. Sorry, I cannot give free troubleshooting for personal projects and hosting…
HI, i just installed it and after login it shows ” Service worker not supported. “
As it is – You are either using an outdated browser or your domain is not using https.
https://caniuse.com/serviceworkers
I am using it on localhost , so it must be reason for showing it. Will it work without any problem if it shows that error ?
Thanks.
Service workers are installed in the browser. Still works without service workers, but no advanced caching and push notifications.
P.S. So long as the url is not http://localhost, it NEEDS to be https://. Even if it is an IP address.
P.P.S. If it is a half-eaten rotten Apple – They don’t quite follow the international standards. I don’t have a Mac to verify the workers and push. Too lazy to create a Hackintosh VM…
AJAX ERROR
Bad server response
Any tips how to fix please? Thank you
https://code-boxx.com/faq/#notwork
Hi, can you help me with this problem?
It says “The installer cannot verify if you are running Apache Web Server, or if MOD_REWRITE is enabled. You can still try to proceed if you want. If you are not running Apache, you need to create your own “translated” .htaccess file. See lib/LIB-Route.php > function htaccess().”
And I followed your instruction to create init.php, and it keep showign this error message, {“status”:0,”message”:”Call to a member function init() on null”,”data”:{“code”:0,”file”:”/public_html\/init.php”,”line”:3,”trace”:”#0 {main}”},”more”:null,”page”:null}
As it is.
1) If you are using Apache – Enable MOD_REWRITE
2) If you are not using Apache – Create your own translated .htaccess equivalent as in $_CORE->Route->init()
But after I have successfully installed, when I login, it says AJAX ERROR, Failed to parse JSON data.
Did some small updates to the Javascript and installer – API calls will show more details other than “JSON error” now.
Chances are, mod_rewrite is not properly configured on your server – See “PAGES ARE NOT RESOLVING OR SHOWING PROPERLY” above.
Hi did you manage to resolve the AJAX Error and if how? Im using a litespeed server which is proving difficult
Don’t quite remember, but there are some mod_rewrite differences for Litespeed – You have to do some research on your own.
Hello, I am hosting it on localhost using xampp, and got this error
Notifications denied – Manually enable permissions to allow low stock warning.
How do I fix this problem? Thank you
As it is, you have previously denied push notifications or a security plugin did it automatically. If the URL is not http://localhost, make sure that you use https.
https://support.google.com/chrome/answer/114662?hl=en&co=GENIE.Platform%3DAndroid
https://support.mozilla.org/en-US/kb/site-permissions-panel
https://www.windowscentral.com/how-manage-site-permissions-new-microsoft-edge