Welcome to a tutorial and example of how to send push notifications with NodeJS. It is no secret by now that browsers are capable of handling push notifications. But just how is it done? It is by all means not a walk in the park, but here’s a quick overview.
There are 3 main components when it comes to working with push notifications.
- Client-side – The web page itself. Get the user’s consent to send push notifications and register a service worker.
- Service Worker – Listen to push requests, and show the notifications.
- Server-side – Send out push notifications.
That covers the quick basics, read on for the step-by-step example!
TABLE OF CONTENTS
DOWNLOAD & NOTES
Here is the download link to the example code, so you don’t have to copy-paste everything.
EXAMPLE CODE DOWNLOAD
Just click on “download zip” or do a git clone. I have released it under the MIT license, so feel free to build on top of it or use it in your own project.
SORRY FOR THE ADS...
But someone has to pay the bills, and sponsors are paying for it. I insist on not turning Code Boxx into a "paid scripts" business, and I don't "block people with Adblock". Every little bit of support helps.
Buy Me A Coffee Code Boxx eBooks
PUSH NOTIFICATIONS
All right, let us now get into the steps of building a simple push notification app using NodeJS.
QUICK SETUP
Run npm i express body-parser web-push to install the required modules.
STEP 1) GENERATE VAPID KEYS
const vapidKeys = require("web-push").generateVAPIDKeys();
console.log(vapidKeys);
Run this little snippet to generate your own pair of public/private keys – node 1-vapid-keys.js. Keep the keys somewhere first, we will use them later. This script only needs to run once, but you can regenerate your keys at any time.
P.S. VAPID stands for Voluntary Application Server Identification. In simple terms, security and authentication to prevent your push notifications from getting hijacked.
P.P.S. We only use the private key on the server side. Do not expose it publicly.
STEP 2) HTML PAGE
2A) GET PERMISSION TO SHOW NOTIFICATIONS
// (A) OBTAIN USER PERMISSION TO SHOW NOTIFICATION
window.onload = () => {
  // (A1) ASK FOR PERMISSION
  if (Notification.permission === "default") {
    Notification.requestPermission().then(perm => {
      if (Notification.permission === "granted") {
        regWorker().catch(err => console.error(err));
      } else {
        alert("Please allow notifications.");
      }
    });
  }

  // (A2) GRANTED
  else if (Notification.permission === "granted") {
    regWorker().catch(err => console.error(err));
  }

  // (A3) DENIED
  else { alert("Please allow notifications."); }
};
The first thing we do is to get the user’s permission to show notifications. This is actually pretty straightforward:
Notification.permissioncontains the status to show notifications.defaultThe user has neither granted nor denied permission.grantedThe user has allowed notifications to show.deniedUser disallowed notifications to show.
- So what we are doing in this section:
- If the user has not chosen to allow/deny, we show the prompt with
Notification.requestPermission(). - When the permission is granted, we proceed to register the service worker
regWorker(). - Lastly, prompt the user to allow notifications if denied. This is actually a bad annoying example, leave the users alone and respect their decision in your own project…
- If the user has not chosen to allow/deny, we show the prompt with
2B) REGISTER SERVICE WORKER
 // (B) REGISTER SERVICE WORKER
async function regWorker () {
  // (B1) YOUR PUBLIC KEY - CHANGE TO YOUR OWN!
  const publicKey = "YOUR-PUBLIC-KEY";

  // (B2) REGISTER SERVICE WORKER
  navigator.serviceWorker.register("3-sw.js", { scope: "/" });

  // (B3) SUBSCRIBE TO PUSH SERVER
  navigator.serviceWorker.ready
  .then(reg => {
    reg.pushManager.subscribe({
      userVisibleOnly: true,
      applicationServerKey: publicKey
    }).then(
      // (B3-1) OK - TEST PUSH NOTIFICATION
      sub => {
        fetch("/mypush", {
          method: "POST",
          body: JSON.stringify(sub),
          headers: { "content-type": "application/json" }
        })
        .then(res => res.text())
        .then(txt => console.log(txt))
        .catch(err => console.error(err));
      },

      // (B3-2) ERROR!
      err => console.error(err)
    );
  });
}- (B1) Remember the VAPID keys? Insert your public key here.
- (B2) Register a service worker to listen to push calls, and handle the notifications. For the uninitiated, service workers run in the background, even after the page is closed; Push notifications will show even after the page is closed.
- (B3) Subscribe to the push server. Take note, a subscription object
const subis being returned here. - (B3-1)
/mypushis an endpoint that we will build on the server to send out a dummy push notification. Here, we are just doing the lazy thing of “instantly send a test notification when all client setup is complete”. Take note that the subscription objectconst subis being JSON encoded and passed to the server.
STEP 3) SERVICE WORKER PUSH HANDLER
// (A) INSTANT WORKER ACTIVATION
self.addEventListener("install", evt => self.skipWaiting());

// (B) CLAIM CONTROL INSTANTLY
self.addEventListener("activate", evt => self.clients.claim());

// (C) LISTEN TO PUSH
self.addEventListener("push", evt => {
  const data = evt.data.json();
  // console.log("Push", data);
  self.registration.showNotification(data.title, {
    body: data.body,
    icon: data.icon,
    image: data.image
  });
});- (A & B) A small irritating part with service workers is the state – “installing, installed, activating, activated”. To prevent this example from failing, we will instantly activate the worker and skip waiting.
- (C) Well, Captain Obvious to the rescue – Parse received JSON data from the server, and show it in a notification with
registration.showNotification().
STEP 4) NODE PUSH SERVER
// (A) SETTINGS - CHANGE TO YOUR OWN!
const port = 80,
mail = "your@email.com",
publicKey = "YOUR-PUBLIC-KEY",
privateKey = "YOUR-PRIVATE-KEY";
// (B) LOAD MODULES
const express = require("express"),
bodyParser = require("body-parser"),
path = require("path"),
webpush = require("web-push");
// (C) SETUP SERVER
webpush.setVapidDetails("mailto:" + mail, publicKey, privateKey);
const app = express();
app.use(express.static(__dirname)); // serve static files
app.use(bodyParser.json()); // json parser
// (D) SERVE TEST HOME PAGE
app.get("/", (req, res) => res.sendFile(path.join(__dirname, "/2-perm-sw.html")));
// (E) SEND TEST PUSH NOTIFICATION
app.post("/mypush", (req, res) => {
res.status(201).json({}); // reply with 201 (created)
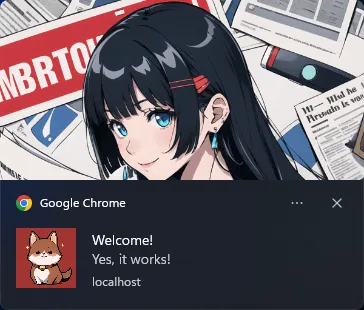
webpush.sendNotification(req.body, JSON.stringify({
title: "Welcome!",
body: "Yes, it works!",
icon: "i-ico.png",
image: "i-banner.png"
}))
.catch(err => console.log(err));
});
// (F) START!
app.listen(port, () => console.log(`Server deployed at ${port}`));- Server settings, insert both public and private keys here.
- Load the required modules.
- Set up the HTTP and push server.
- Set express to serve
3-perm-sw.htmlonhttp://localhost/ - Remember that the subscription object is sent back to this push server? Notice how it is “reused” and “forwarded” in
webpush.sendNotification(req.body, NOTIFICATION). - Start the HTTP server.
P.S. In your own project, mypush/ should be a protected “admin only” endpoint. Also, use the absolute URL for the icon and image… Just being lazy here.
STEP 5) LAUNCH!
All that’s left is to launch the server.
- Run
node 4-server.js. - Access
http://localhost/in your browser. - Allow the notification.
Congratulations, you have sent out your first push notification.
EXTRAS
That’s all for the tutorial, and here is a small section on some extras and links that may be useful to you.
RESTRICTIONS
- Take note that you will need a valid
https://website for push notifications to work.http://localhostis an exception for testing and development. - The same-origin policy applies.
- If the user is in incognito or privacy mode, the service worker cannot be registered and will fail.
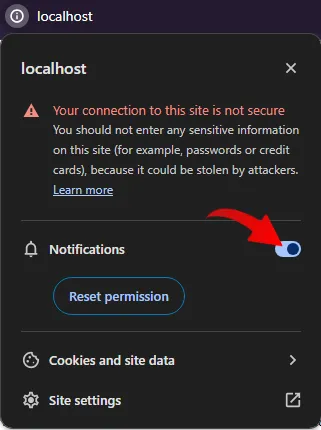
I DENIED NOTIFICATION PERMISSION, WHAT DO I DO!?
 Yep, once denied,
 Notification.requestPermission() will not prompt anymore. Click on the site icon in the URL bar, and change the permission manually.
HOW IT SHOULD ACTUALLY WORK
2-perm-sw.html (B3)On successful registration, we send the worker registration to the server.- On the server side, we save the registration into a “subscribers” database.
4-server.js (E)Call this at a later time. Retrieve all the subscriptions from the database, and send the notification to everyone.
HOW DO I IMPLEMENT THIS ON A LIVE SERVER?
It’s a rather complex situation, especially for shared hosting that already runs a web server – Apache, Nginx, IIS, etc… This demo Node push server will clash with the existing web server (both using port 80).
- Solution 1 – Get your own “dedicated Node JS” hosting or cloud server. No script changes are required.
- Solution 2 – Tweak the Node push server.
- Remove
app.use(express.static(__dirname))and the entireapp.get("/")section. Let the existing web server deal with HTTP services. - Change the port number, for example, to 8080.
- Optionally, set an HTTP proxy and/or virtual host in the webserver. I.E. Map
https://site.com/mypushtohttps://site.com:8080/mypush. Do your own research on how this works.
- Remove
- Solution 3 – Build your own push server. Yep, replace the entire step 5 with a server-side language supported on your server. NodeJS is not the only one capable of running a push server.
COMPATIBILITY CHECKS
- Notification API – CanIUse
- Service Workers – CanIUse
- Show Notification – CanIUse
LINKS & REFERENCES
- Express – NPM
- Body Parser – NPM
- Web Push – NPM
- Push API – MDN
- Notifications API – MDN
THE END
Thank you for reading, and we have come to the end. I hope that it has helped you to better understand, and if you want to share anything with this guide, please feel free to comment below. Good luck and happy coding!
Nice tutorial. Simple and straight to the point. Thank you very much!
Nice tutorial, any tips to implements backend with php ?
Do a search for “PHP web push server”. Otherwise, I will take this as a request for a new tutorial. Good luck.
https://code-boxx.com/faq/#help “Requests for new tutorials will not be immediately answered”