Welcome to a sharing of a simple admin panel template made with pure HTML and CSS. Looking to “kick start” your project with a template? Only to find crazy complicated or paid templates all over the Internet? Well, here’s a sharing of mine, with zero third-party frameworks involved. Read on!
TABLE OF CONTENTS
DOWNLOAD & NOTES
Here is the download link to the example code, so you don’t have to copy-paste everything.
EXAMPLE CODE DOWNLOAD
Click here to download. The example code is released under the MIT license, so feel free to build on top of it or use it in your own project.
SORRY FOR THE ADS...
But someone has to pay the bills, and sponsors are paying for it. I insist on not turning Code Boxx into a "paid scripts" business, and I don't "block people with Adblock". Every little bit of support helps.
Buy Me A Coffee Code Boxx eBooks
SIMPLE ADMIN PANEL
All right, let us now walk through how the admin panel works in more detail.
TUTORIAL VIDEO
PART 1) BASIC HTML LAYOUT
<!-- (A) SIDEBAR -->
<div id="pgside"></div>

<!-- (B) MAIN -->
<main id="pgmain"></main>
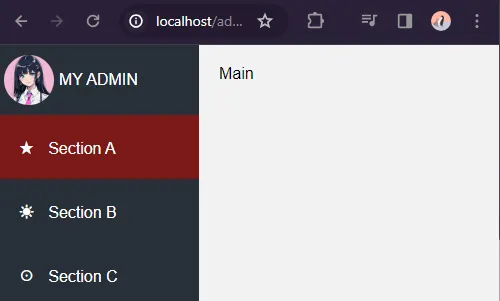
Brace yourselves, this simple admin template consists of a “very complicated” 2 columns layout.
<div id="pgside">A left sidebar.<main id="pgmain">Main contents on the right.
PART 2) SIDEBAR MENU ITEMS
<!-- (A1) BRANDING OR USER -->
<!-- LINK TO DASHBOARD OR LOGOUT -->
<div id="pguser">
<img src="potato.png">
<i class="txt">MY ADMIN</i>
</div>
<!-- (A2) MENU ITEMS -->
<a href="#" class="current">
<i class="ico">★</i>
<i class="txt">Section A</i>
</a>
<a href="#">
<i class="ico">☀</i>
<i class="txt">Section B</i>
</a>
<a href="#">
<i class="ico">☉</i>
<i class="txt">Section C</i>
</a>
- (A1)
<div id="pguser">The very first item of the sidebar. This can be your branding or current user. - (A2) The menu items.
- Use
<a class="current">to highlight the current section. <i class="ico">The icon. This is using the plain old HTML symbol, but feel free to use Font Awesome, Google Material Icons, or whatever of your own choice.<i class="txt">Menu item text.
- Use
PART 3) RESPONSIVE DESIGN
/* (B1) SIDEBAR ITSELF */
#pgside {
  width: 200px;
  transition: width 0.2s;
}

/* (B5) SMALL SCREEN TRANSFORMATION */
@media screen and (max-width:768px) {
  #pgside { width: 70px; }
  ...
  #pgside i.ico {
    font-size: 1.5em;
    margin-right: 0;
  }
  #pgside i.txt { display: none; }
}
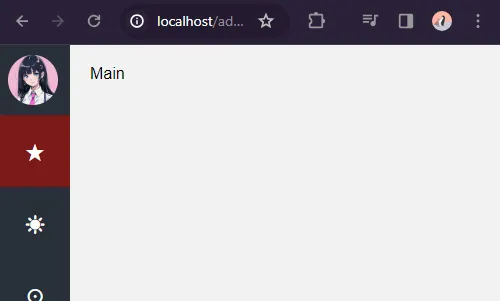
Actually, that’s about it for the simple admin panel. Just a small note on how the CSS deals with “small screen transformation”.
- The sidebar will be “shrunk”.
- The menu item text will be hidden.
- The menu item icons will be expanded.
EXTRAS
That’s all for the tutorial, and here is a small section on some extras and links that may be useful to you.
HTML CSS FORMS
<form class="form">
  <label for="demoA">Field A</label>
  <input type="text" id="demoA">

  <label for="demoB">Field B</label>
  <textarea id="demoB"></textarea>

  <label for="demoC">Field C</label>
  <select id="demoC">
    <option>Option A</option>
  </select>

  <input type="submit" value="Go">
</form>
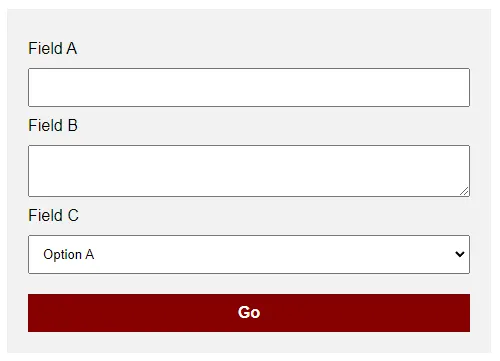
If you want some extra styles for forms, check out 1-form.html – Copy and paste the styles if you want.
ZEBRA TABLES & LIST
<!-- (A) ZEBRA TABLE -->
<table class="zebra">
  <tr>
    <td>Cell</td> <td>Cell</td> <td>Cell</td>
  </tr>
  <tr>
    <td>Cell</td> <td>Cell</td> <td>Cell</td>
  </tr>
  <tr>
    <td>Cell</td> <td>Cell</td> <td>Cell</td>
  </tr>
</table>

<!-- (B) ZEBRA LIST -->
<ul class="zebra">
  <li>Row</li> <li>Row</li>
  <li>Row</li> <li>Row</li>
</ul>

Lastly, an extra for zebra stripe tables and lists.
LINKS & REFERENCES
- Simple AJAX Login Page – Code Boxx
- Popup Dialog Box – Code Boxx
- Pure CSS Responsive Dropdown Menu – Code Boxx
- Pure CSS Hamburger Menu – Code Boxx
There’s a ton of “widgets” on this blog… Or just get my compiled widgets eBook. That will help to cover the cost of running this blog a little bit.
THE END
Thank you for reading, and we have come to the end. I hope that it has helped you to better understand, and if you want to share anything with this guide, please feel free to comment below. Good luck and happy coding!
Very nice panel! I love it!