Welcome to a quick tutorial on how to style the table borders in HTML and CSS. Just started with HTML and struggling with the table borders?
The simplest way to add borders to the entire table is to:
- Collapse the borders –
table { border-collapse: collapse } - Add borders to the cells and table itself –
table, table th, table td { border: 2px solid red }
That covers the quick basics, but table borders are not really the most straightforward to style. Read on for more examples!
ⓘ I have included a zip file with all the example source code at the start of this tutorial, so you don’t have to copy-paste everything… Or if you just want to dive straight in.
QUICK SLIDES
[web_stories_embed url=”https://code-boxx.com/web-stories/style-html-table-border/” title=”How To Style HTML Table Borders” poster=”https://code-boxx.com/wp-content/uploads/2022/03/STORY-HTML-20230505.webp” width=”360″ height=”600″ align=”center”]
TABLE OF CONTENTS
DOWNLOAD & NOTES
Firstly, here is the download link to the example code as promised.
QUICK NOTES
If you spot a bug, feel free to comment below. I try to answer short questions too, but it is one person versus the entire world… If you need answers urgently, please check out my list of websites to get help with programming.
EXAMPLE CODE DOWNLOAD
Click here to download the source code, I have released it under the MIT license, so feel free to build on top of it or use it in your own project.
STYLING TABLE BORDERS
All right, let us now get into the examples of how to style the HTML table borders.
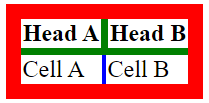
1) BORDERS ONLY APPLY TO TABLE & CELLS
<!-- (A) TABLE BORDERS -->
<style>
table { border: 3px solid red }
table th { border: 2px solid green }
table td { border: 1px solid blue }
</style>

<!-- (B) HTML TABLE -->
<table>
  <tr>
    <th>Head A</th>
    <th>Head B</th>
  </tr>
  <tr>
    <td>Cell A</td>
    <td>Cell B</td>
  </tr>
</table>

As in the introduction snippet, a table border can be easily applied by using the CSS property border: THICKNESS STYLE COLOR. But take extra note of where this can be applied –
- On the
tableitself. - On the cells
th rd.
Go ahead and test it for yourself, border will not apply on the rows and sections (tr thead tbody tfoot).
2) BORDER COLLAPSE
<!-- (A) CSS -->
<style>
  /* (A1) COLLAPSE BORDER */
  table { border-collapse: collapse; }

  /* (A2) BORDER STYLES */
  table { border: 10px solid red; }
  table th { border: 5px solid green; }
  table td { border: 3px solid blue; }
</style>

<!-- (B) HTML TABLE -->
<table>
  <tr>
    <th>Head A</th>
    <th>Head B</th>
  </tr>
  <tr>
    <td>Cell A</td>
    <td>Cell B</td>
  </tr>
</table>
Don’t want separate borders? Simply add a border-collapse: collapse to the table. But take extra note of the behavior after the collapse – The web browsers will use whichever border is thicker.
That is, notice that the outside green borders of the header cells are overridden with red from the table? Yep, test it out for yourself. Change the red border of the table to border: 1px solid red, and the header cells should return to green.
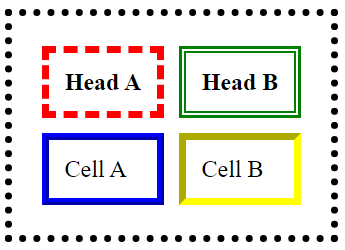
3) BORDER STYLES
<!-- (A) CSS -->
<style>
/* (A1) TABLE PADDING + SPACING */
table, table th, table td { padding: 10px; }
table { border-spacing: 10px; }

/* (A2) BORDER STYLES */
.bOne { border: 5px dotted black; }
.bTwo { border: 5px dashed red; }
.bThree { border: 5px double green; }
.bFour { border: 5px ridge blue; }
.bFive { border: 5px inset yellow; }
</style>

<!-- (B) HTML TABLE -->
<table class="bOne">
  <tr>
    <th class="bTwo">Head A</th>
    <th class="bThree">Head B</th>
  </tr>
  <tr>
    <td class="bFour">Cell A</td>
    <td class="bFive">Cell B</td>
  </tr>
</table>
Some of you sharp code ninjas may have already noticed that solid border-style above. Yes, there are many other border styles that we can apply. I will leave a link to the complete reference in the extras section below.
4) ROUNDED BORDERS
<!-- (A) CSS -->
<style>
.rounded {
  border: 5px solid red;
  border-radius: 10px;
}
</style>

<!-- (B) HTML TABLE -->
<table class="rounded">
  <tr>
    <th>Head A</th>
    <th>Head B</th>
  </tr>
  <tr>
    <td>Cell A</td>
    <td>Cell B</td>
  </tr>
</table>
Don’t like sharp corners? 😆 Simply add a border-radius to round it off.
5) DIFFERENT BORDERS ON EACH SIDE
<!-- (A) CSS -->
<style>
table.chimera {
  border-top: 5px solid red;
  border-bottom: 6px dashed green;
  border-left: 7px dotted blue;
  border-right: 8px ridge yellow;
}
</style>

<!-- (B) HTML TABLE -->
<table class="chimera">
  <tr>
    <th>Head A</th>
    <th>Head B</th>
  </tr>
  <tr>
    <td>Cell A</td>
    <td>Cell B</td>
  </tr>
</table>

For this final bit – Yes, we can also specify a different border on each side of the table.
USEFUL BITS & LINKS
That’s all for the tutorial, and here is a small section on some extras and links that may be useful to you.
SUMMARY
| CSS Property | Description | Reference Link |
border: THICKNESS STYLE COLOR |
Sets all 4 borders of the table <table> or cells <th> <td>. |
Border | Border Styles |
border-top, border-bottom, border-left, border-right |
Sets the Individual border of each side. | Border Top | Border Bottom | Border Left | Border Right |
border-collapse: separate | collapse |
Separate or combine the table borders. It is separated by default. | Border Collapse |
border-radius |
Rounded corners. | Border Radius |
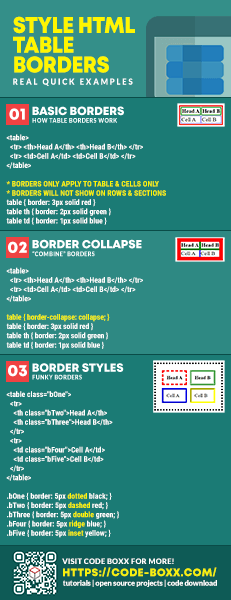
INFOGRAPHIC CHEAT SHEET

THE END
Thank you for reading, and we have come to the end. I hope that it has helped you to better understand, and if you want to share anything with this guide, please feel free to comment below. Good luck and happy coding!
