Welcome to a quick tutorial on how to add and remove list items in Javascript. Need to dynamically update an HTML list in Javascript?
- To add a list item in Javascript:
<ul id="myList"></ul>var li = document.createElement("li");li.innerHTML = "Item";document.getElementById("myList").appendChild(li);
- To remove a list item in Javascript:
var myList = document.getElementById("myList");var items = document.querySelectorAll("#myList li");- Remove first item –
myList.removeChild(items[0]); - Remove last item –
myList.removeChild(items[items.length - 1]);
That covers the basics, but read on for more examples!
TLDR – QUICK SLIDES
[web_stories_embed url=”https://code-boxx.com/web-stories/add-remove-list-items-in-javascript/” title=”Add & Remove HTML List Items In Javascript” poster=”https://code-boxx.com/wp-content/uploads/2021/11/STORY-JS-20230518.webp” width=”360″ height=”600″ align=”center”]
Fullscreen Mode – Click Here
TABLE OF CONTENTS
JAVASCRIPT LIST ITEMS

All right, let us now get into the examples of how to add and remove HTML list items in Javascript.
1) CREATE LIST ITEM ELEMENT & APPEND
<!-- (A) HTML LIST -->
<ol id="demoA">
  <li>First</li>
  <li>Second</li>
</ol>

<!-- (B) JAVASCRIPT ADD -->
<script>
function addItem () {
  // (B1) CREATE NEW LIST ITEM
  var item = document.createElement("li");
  item.innerHTML = "New";

  // (B2) APPEND TO LIST
  document.getElementById("demoA").appendChild(item);
}
</script>
<input type="button" value="Add Item" onclick="addItem()">- First
- Second
This is the “full example” of the snippet in the introduction. Add new items to an HTML list is that simple – Just create a new list item, and append it to the list.
2) APPEND POSITION
<!-- (A) HTML LIST -->
<ol id="demoB">
  <li>First</li>
  <li>Second</li>
</ol>

<!-- (B) JAVASCRIPT ADD -->
<script>
function addItemPos (top) {
  // (B1) CREATE NEW LIST ITEM
  var item = document.createElement("li");
  item.innerHTML = "New";

  // (B2) APPEND ITEM TO TOP
  if (top) {
    document.getElementById("demoB").insertAdjacentElement("afterbegin", item);
  }

  // (B3) IN THE MIDDLE
  else {
    var allItems = document.querySelectorAll("#demoB li");
    var allLength = allItems.length;
    var middle = Math.ceil(allLength/2) - 1;
    if (middle<0) { middle = 0; }
    allItems[middle].insertAdjacentElement("afterend", item);
  }
}
</script>
<input type="button" value="Add Top" onclick="addItemPos(1)">
<input type="button" value="Add Middle" onclick="addItemPos()">- First
- Second
The previous example will always append the new list item to the bottom of the list. So how do we insert to the top or somewhere in the middle? Use insertAdjacentElement() to help you do the “precise insert”.
3) ALTERNATIVE – APPEND HTML STRING
<!-- (A) HTML LIST -->
<ol id="demoC">
  <li>First</li>
  <li>Second</li>
</ol>

<!-- (B) JAVASCRIPT ADD -->
<script>
function addItemHTML () {
  document.getElementById("demoC").innerHTML += "<li>New</li>";
}
</script>
<input type="button" value="Add Item" onclick="addItemHTML()">- First
- Second
For you guys who somehow don’t like the “object-oriented” way of creating HTML elements – We can also directly append an HTML string to the existing list.
4) REMOVE LIST ITEM
<!-- (A) HTML LIST -->
<ol id="demoD">
  <li>First</li>
  <li>Second</li>
  <li>Third</li>
  <li>Forth</li>
</ol>

<!-- (B) JAVASCRIPT REMOVE -->
<script>
function delItem (first) {
  // (B1) GET LIST + ALL ITEMS
  var list = document.getElementById("demoD");
  var allItems = document.querySelectorAll("#demoD li");

  // (B2) REMOVE FIRST ITEM
  if (first) {
    list.removeChild(allItems[0]);
  }

  // (B3) REMOVE LAST ITEM
  else {
    var last = allItems.length - 1;
    list.removeChild(allItems[last]);
  }
}
</script>
<input type="button" value="Remove First" onclick="delItem(1)">
<input type="button" value="Remove Last" onclick="delItem()">- First
- Second
- Third
- Forth
Removing items can be a little confusing to some beginners, but the essentials are:
- Get all the list items –
var all = document.querySelectorAll("#LIST li"). var allis an HTML collection of all the list items, and it acts like an array. I.E.all[0]refers to the first item, andall[all.length - 1]refers to the last item.- So very simply, we just remove the corresponding item from the list itself –
document.getElementById("#LIST").removeChild(all[N]).
DOWNLOAD & NOTES

Here is the download link to the example code, so you don’t have to copy-paste everything.
SORRY FOR THE ADS...
But someone has to pay the bills, and sponsors are paying for it. I insist on not turning Code Boxx into a "paid scripts" business, and I don't "block people with Adblock". Every little bit of support helps.
Buy Me A Coffee Code Boxx eBooks
EXAMPLE CODE DOWNLOAD
Click here for the source code on GitHub gist, just click on “download zip” or do a git clone. I have released it under the MIT license, so feel free to build on top of it or use it in your own project.
EXTRA BITS & LINKS

That’s all for the tutorial, and here is a small section on some extras and links that may be useful to you.
LINKS & REFERENCES
- Create Element – MDN
- Append Child – MDN
- Remove Child – MDN
- Insert Adjacent Element – MDN
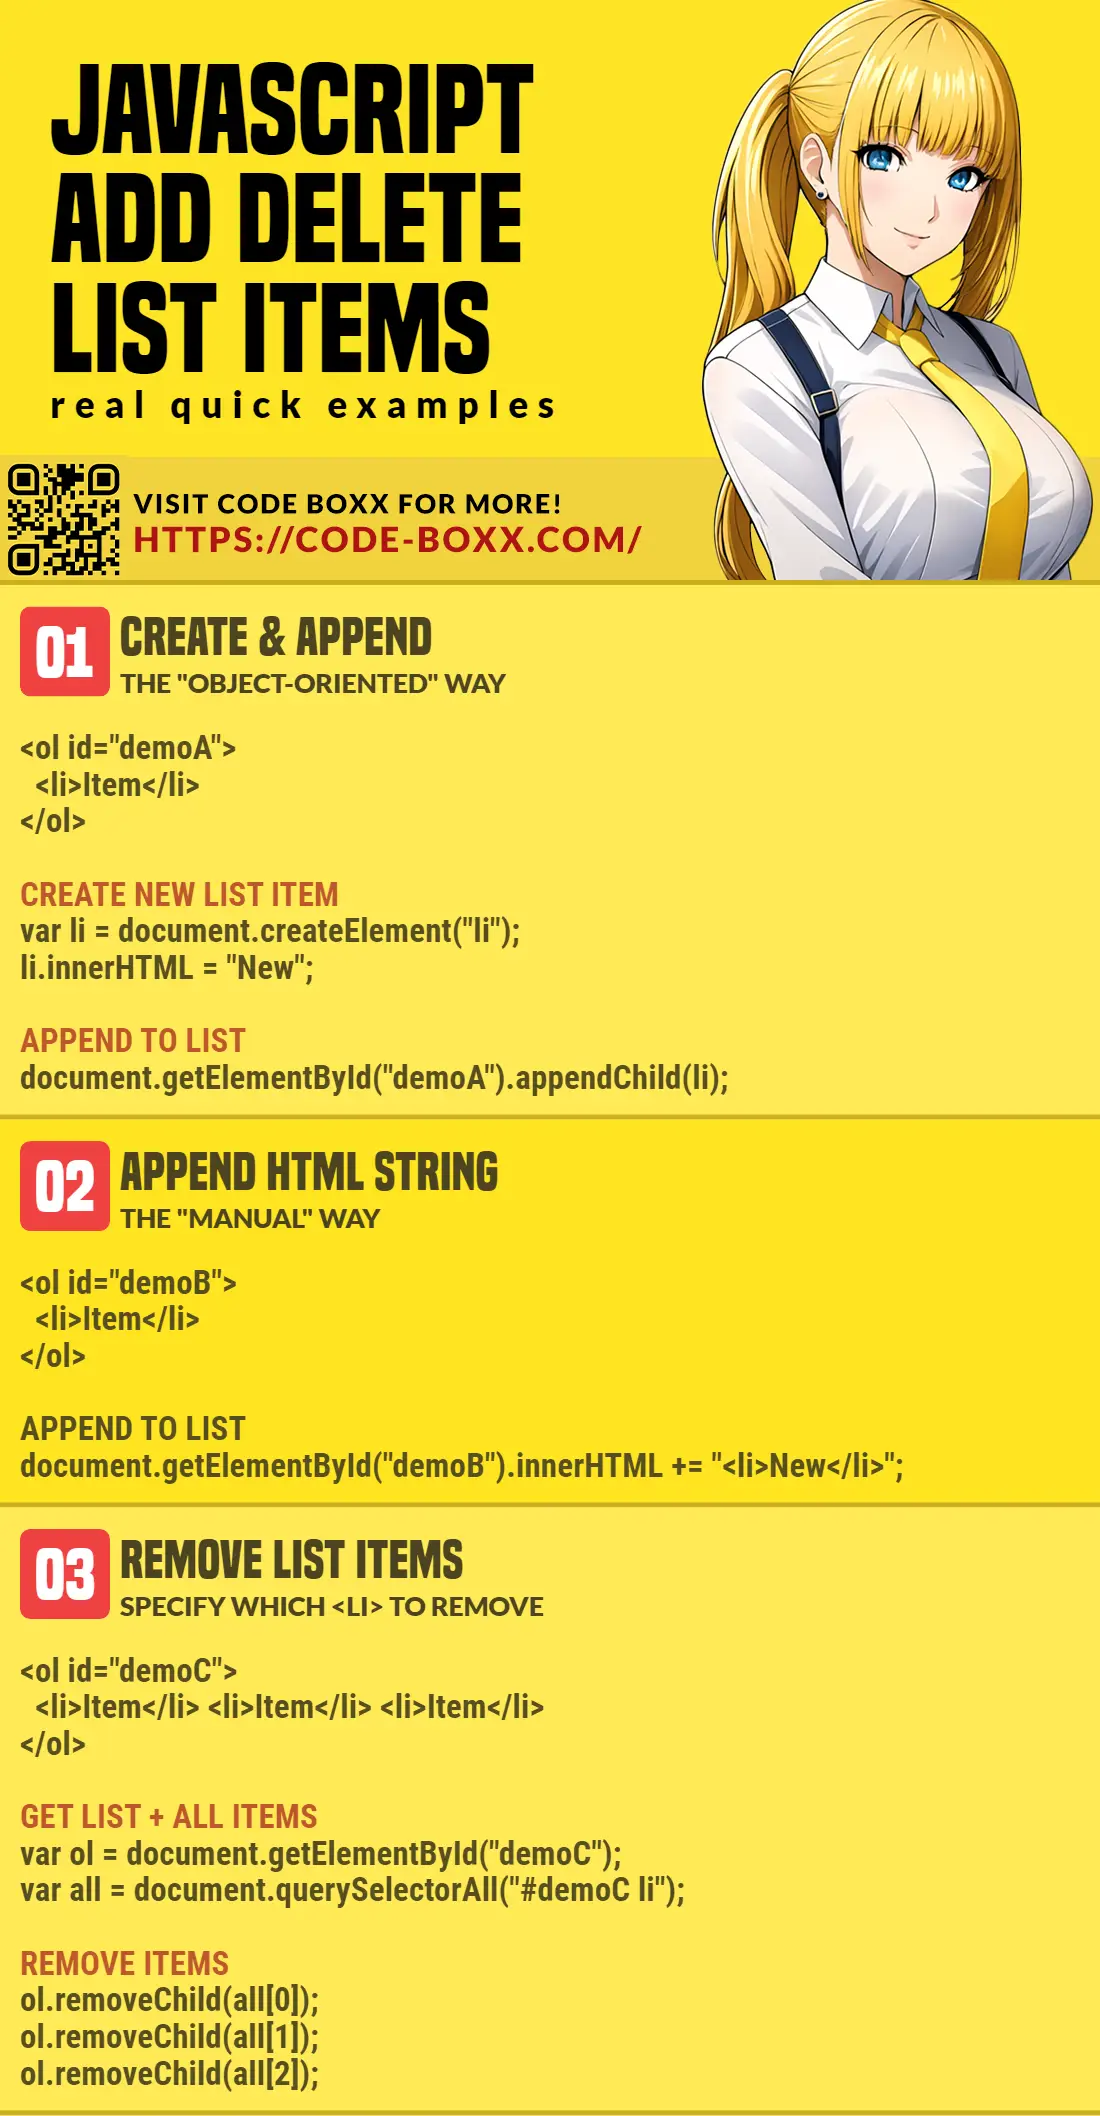
INFOGRAPHIC CHEAT SHEET
THE END

Thank you for reading, and we have come to the end. I hope that it has helped you to better understand, and if you want to share anything with this guide, please feel free to comment below. Good luck and happy coding!