Welcome to a tutorial on how to create a simple pure Javascript Calendar. Are you looking to develop a calendar web app, without using any server-side scripts? Be it for a commercial project, school project, or just curiosity – You have come to the correct place. This guide will walk you through how to create a pure Javascript calendar, all made possible with local storage. Read on!
TABLE OF CONTENTS
HOW THE CALENDAR WORKS

All right, let us now get into a little more detail on how the calendar works. Not going to explain line-by-line, but here’s a quick walk-through.
PART 1) CALENDAR HTML
<!-- (A) PERIOD SELECTOR -->
<div id="calPeriod">
<input id="calBack" type="button" value="<">
<select id="calMonth"></select>
<input type="number" id="calYear">
<input id="calNext" type="button" value=">">
</div>
<!-- (B) CALENDAR -->
<div id="calWrap"></div>
<!-- (C) EVENT FORM -->
<dialog id="calForm"><form method="dialog">
<div id="evtClose">X</div>
<h2>CALENDAR EVENT</h2>
<label>Date</label>
<input type="text" id="evtDate" readonly>
<label>Details</label>
<textarea id="evtTxt" required></textarea>
<input id="evtDel" type="button" value="Delete">
<input id="evtSave" type="submit" value="Save">
</form></dialog>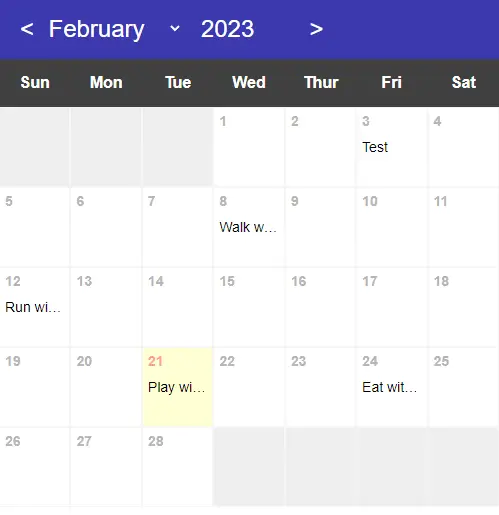
The HTML should be straightforward enough, there are only 3 sections here:
<div id="calPeriod">The month and year selector.<div id="calWrap">Where we will display the calendar for the selected month and year.<dialog id="calForm">A form to add/edit calendar events.
PART 2) CALENDAR INITIALIZE
var cal = {
  // (A) PROPERTIES
  // (A1) FLAGS & DATA
  sMon : false, // week start on monday
  data : null, // events for selected period
  sDay : 0, sMth : 0, sYear : 0, // selected day month year

  // (A2) MONTHS & DAY NAMES
  months : [
    "January", "February", "March", "April", "May", "June",
    "July", "August", "September", "October", "November", "December"
  ],
  days : ["Sun", "Mon", "Tue", "Wed", "Thur", "Fri", "Sat"],

  // (A3) HTML ELEMENTS
  hMth : null, hYear : null, // month/year selector
  hWrap : null, // calendar wrapper
  hFormWrap : null, hForm : null, // event form
  hfDate : null, hfTxt : null, hfDel : null, // form fields

  // (B) INIT CALENDAR
  init : () => {
    // (B1) GET HTML ELEMENTS
    cal.hMth = document.getElementById("calMonth");
    cal.hYear = document.getElementById("calYear");
    cal.hWrap = document.getElementById("calWrap");
    cal.hFormWrap = document.getElementById("calForm");
    cal.hForm = cal.hFormWrap.querySelector("form");
    cal.hfDate = document.getElementById("evtDate");
    cal.hfTxt = document.getElementById("evtTxt");
    cal.hfDel = document.getElementById("evtDel");

    // (B2) APPEND MONTHS/YEAR
    let now = new Date(), nowMth = now.getMonth();
    cal.hYear.value = parseInt(now.getFullYear());
    for (let i=0; i<12; i++) {
      let opt = document.createElement("option");
      opt.value = i;
      opt.innerHTML = cal.months[i];
      if (i==nowMth) { opt.selected = true; }
      cal.hMth.appendChild(opt);
    }

    // (B3) ATTACH CONTROLS
    cal.hMth.onchange = cal.draw;
    cal.hYear.onchange = cal.draw;
    document.getElementById("calBack").onclick = () => cal.pshift();
    document.getElementById("calNext").onclick = () => cal.pshift(1);
    cal.hForm.onsubmit = cal.save;
    document.getElementById("evtClose").onclick = () => cal.hFormWrap.close();
    cal.hfDel.onclick = cal.del;

    // (B4) START - DRAW CALENDAR
    if (cal.sMon) { cal.days.push(cal.days.shift()); }
    cal.draw();
  },
  // ...
};
window.onload = cal.init;
On window load, cal.init() will run to initialize the calendar. It looks complicated at first, but keep calm and look carefully. All it does is set up the HTML interface.
- Get all the HTML elements.
- Set up the month/year selector.
- Attach the add/edit event form click and submit handlers.
That’s all.
PART 3) PERIOD “SHIFTER”
 // (C) SHIFT CURRENT PERIOD BY 1 MONTH
pshift : forward => {
  cal.sMth = parseInt(cal.hMth.value);
  cal.sYear = parseInt(cal.hYear.value);
  if (forward) { cal.sMth++; } else { cal.sMth--; }
  if (cal.sMth > 11) { cal.sMth = 0; cal.sYear++; }
  if (cal.sMth < 0) { cal.sMth = 11; cal.sYear--; }
  cal.hMth.value = cal.sMth;
  cal.hYear.value = cal.sYear;
  cal.draw();
},
Next, pshift() is a simple function to shift the current period forward/backward by one month.
PART 4) DRAW THE CALENDAR
// (D) DRAW CALENDAR FOR SELECTED MONTH
draw : () => {
  // (D1) DAYS IN MONTH + START/END DAYS
  // note - jan is 0 & dec is 11
  // note - sun is 0 & sat is 6
  cal.sMth = parseInt(cal.hMth.value); // selected month
  cal.sYear = parseInt(cal.hYear.value); // selected year
  let daysInMth = new Date(cal.sYear, cal.sMth+1, 0).getDate(), // number of days in selected month
      startDay = new Date(cal.sYear, cal.sMth, 1).getDay(), // first day of the month
      endDay = new Date(cal.sYear, cal.sMth, daysInMth).getDay(), // last day of the month
      now = new Date(), // current date
      nowMth = now.getMonth(), // current month
      nowYear = parseInt(now.getFullYear()), // current year
      nowDay = cal.sMth==nowMth && cal.sYear==nowYear ? now.getDate() : null ;

  // (D2) LOAD DATA FROM LOCALSTORAGE
  cal.data = localStorage.getItem("cal-" + cal.sMth + "-" + cal.sYear);
  if (cal.data==null) {
    localStorage.setItem("cal-" + cal.sMth + "-" + cal.sYear, "{}");
    cal.data = {};
  } else { cal.data = JSON.parse(cal.data); }

  // (D3) DRAWING CALCULATIONS
  // (D3-1) BLANK SQUARES BEFORE START OF MONTH
  let squares = [];
  if (cal.sMon && startDay != 1) {
    let blanks = startDay==0 ? 7 : startDay ;
    for (let i=1; i<blanks; i++) { squares.push("b"); }
  }
  if (!cal.sMon && startDay != 0) {
    for (let i=0; i<startDay; i++) { squares.push("b"); }
  }

  // (D3-2) DAYS OF THE MONTH
  for (let i=1; i<=daysInMth; i++) { squares.push(i); }

  // (D3-3) BLANK SQUARES AFTER END OF MONTH
  if (cal.sMon && endDay != 0) {
    let blanks = endDay==6 ? 1 : 7-endDay;
    for (let i=0; i<blanks; i++) { squares.push("b"); }
  }
  if (!cal.sMon && endDay != 6) {
    let blanks = endDay==0 ? 6 : 6-endDay;
    for (let i=0; i<blanks; i++) { squares.push("b"); }
  }

  // (D4) "RESET" CALENDAR
  cal.hWrap.innerHTML = `<div class="calHead"></div>
  <div class="calBody">
    <div class="calRow"></div>
  </div>`;

  // (D5) CALENDAR HEADER - DAY NAMES
  wrap = cal.hWrap.querySelector(".calHead");
  for (let d of cal.days) {
    let cell = document.createElement("div");
    cell.className = "calCell";
    cell.innerHTML = d;
    wrap.appendChild(cell);
  }

  // (D6) CALENDAR BODY - INDIVIDUAL DAYS & EVENTS
  wrap = cal.hWrap.querySelector(".calBody");
  row = cal.hWrap.querySelector(".calRow");
  for (let i=0; i<squares.length; i++) {
    // (D6-1) GENERATE CELL
    let cell = document.createElement("div");
    cell.className = "calCell";
    if (nowDay==squares[i]) { cell.classList.add("calToday"); }
    if (squares[i]=="b") { cell.classList.add("calBlank"); }
    else {
      cell.innerHTML = `<div class="cellDate">${squares[i]}</div>`;
      if (cal.data[squares[i]]) {
        cell.innerHTML += "<div class='evt'>" + cal.data[squares[i]] + "</div>";
      }
      cell.onclick = () => { cal.show(cell); };
    }
    row.appendChild(cell);

    // (D6-2) NEXT ROW
    if (i!=(squares.length-1) && i!=0 && (i+1)%7==0) {
      row = document.createElement("div");
      row.className = "calRow";
      wrap.appendChild(row);
    }
  }
}
cal.draw() draws the calendar for the currently selected month/year, and it is the most complicated function in this project. Long story short:
- (D1) A whole bunch of day/month/year calculations.
- (D2) The events data is kept in
localStoragein a monthly manner (cal-MONTH-YEAR = JSON ENCODED OBJECT). Retrieve the events data for the selected month/year, and put it intocal.data. - (D3) Do all the calculations in
squares = []first. - (D4) “Reset” the current HTML calendar.
- (D5) Redraw the day names.
- (D6) Loop through
squaresto draw the HTML calendar.
PART 5) SHOW/EDIT CALENDAR EVENT
// (E) SHOW EDIT EVENT DOCKET FOR SELECTED DAY
show : cell => {
  cal.hForm.reset();
  cal.sDay = cell.querySelector(".cellDate").innerHTML;
  cal.hfDate.value = `${cal.sDay} ${cal.months[cal.sMth]} ${cal.sYear}`;
  if (cal.data[cal.sDay] !== undefined) {
    cal.hfTxt.value = cal.data[cal.sDay];
    cal.hfDel.classList.remove("hide");
  } else { cal.hfDel.classList.add("hide"); }
  cal.hFormWrap.show();
}
When the user clicks on a date cell, cal.show() will be called. Pretty self-explanatory – We fetch the event from cal.data, then show the add/edit event form.
PART 6) SAVE/DELETE EVENTS DATA
// (F) SAVE EVENT
save : () => {
  cal.data[cal.sDay] = cal.hfTxt.value;
  localStorage.setItem(`cal-${cal.sMth}-${cal.sYear}`, JSON.stringify(cal.data));
  cal.draw();
  cal.hFormWrap.close();
  return false;
},

// (G) DELETE EVENT FOR SELECTED DATE
del : () => { if (confirm("Delete event?")) {
  delete cal.data[cal.sDay];
  localStorage.setItem(`cal-${cal.sMth}-${cal.sYear}`, JSON.stringify(cal.data));
  cal.draw();
  cal.hFormWrap.close();
}
Lastly, these are self-explanatory functions again. We simply update the events data in localStorage.
DOWNLOAD & NOTES

Here is the download link to the example code, so you don’t have to copy-paste everything.
SORRY FOR THE ADS...
But someone has to pay the bills, and sponsors are paying for it. I insist on not turning Code Boxx into a "paid scripts" business, and I don't "block people with Adblock". Every little bit of support helps.
Buy Me A Coffee Code Boxx eBooks
EXAMPLE CODE DOWNLOAD
Click here for the source code on GitHub gist, just click on “download zip” or do a git clone. I have released it under the MIT license, so feel free to build on top of it or use it in your own project.
EXTRA BITS & LINKS
Finally, here are a few more extras that may be useful.
MULTIPLE EVENTS PER DAY?
Of course, we can. Let’s take a look at the current save() function:
cal.data[cal.sDay] = cal.hfTxt.value;We are pretty much storing the event data in data[DAY] = EVENT now. So to allow multiple events on the same day, the general idea is to change the current structure into a multi-dimensional array data[DAY] = [EVENT, EVENT, EVENT].
cal.data[cal.sDay] = [];
cal.data[cal.sDay].push(document.getElementById("evt-details").value);
Then, here comes the big problem. We have to redo all the rest of the functions to properly draw multiple events and manage them.
- Add more text field(s) in the HTML.
save()to include the extra text field(s).list()to draw the extra data.show()to also populate the extra text field(s).
As you can guess, that will increase the complexity exponentially, turning this into a “not simple tutorial”. This is why I don’t answer the “support multiple events” and “span an event across multiple days” questions – Feel free to challenge yourself though, this simple calendar is a good starting point.
LIMITATIONS
- Only one event is allowed in a day.
- The events cannot span multiple days.
- The Javascript calendar requires the use of local storage. If it is disabled on the browser or not supported, then it will not be able to save the events at all.
But of course, I have released this as an open-source. So feel free to tweak it however you see fit or check out the calendar PWA in the links below for a “better calendar”.
LINKS & REFERENCES
- Localstorage – MDN
- Date – MDN
- Calendar with PHP MySQL – Code Boxx
- Calendar Progress Web App – Code Boxx
- Example on CodePen – JS Calendar With Event
THE END

Thank you for reading, and we have come to the end of this guide. I hope that it has helped you with your project, and if you want to share anything with this guide, please feel free to comment below. Good luck and happy coding!
Cool
Wondering if you could help out on how to push the data from LocalStorage to Firebase?
Create an API endpoint to receive the data at Firebase, things can get complicated depending on your setup. Can’t work free for your personal project, good luck – https://code-boxx.com/faq/#help
Thanks for that. Thats great!
= LINK REMOVED = https://code-boxx.com/faq/#nolink
Awesome! Thank you for taking the time creating this!:D
How to make the calendar start on monday instead of sunday?
Updated the code – Just needed a small tweak to the date calculations.