Welcome to a quick tutorial and example of how to resize images in Javascript. Yes, resizing images is no longer a server-side thing. We can also do it in Javascript with just a few lines of code.
We can use the canvas API to resize images in Javascript:
- Start by creating a new image and canvas.
var img = new Image();var canvas = document.createElement("canvas");var ctx = canvas.getContext("2d");
- Resize on image load –
img.onload = () => { ctx.drawImage(img, 0, 0, NEW WIDTH, NEW HEIGHT); }; - Set the image source to start –
img.src = "IMAGE.JPG";
That covers the quick basics, but let us walk through a few actual examples – Read on!
TABLE OF CONTENTS
JAVASCRIPT RESIZE IMAGE
All right, let us now get into the examples of how to resize images in Javascript.
EXAMPLE 1) RESIZE IMAGE & SHOW ON PAGE
1A) THE HTML
<!-- (A) HTML -->
<!-- (A1) ORIGINAL IMAGE -->
<h1>Original Image (512 X 512)</h1>
<img src="demo.png">

<!-- (A2) RESIZE USING CANVAS -->
<h1>Resized Image (50%)</h1>
<canvas id="resized"></canvas>
Nothing much here… All we actually need is an empty <canvas> to draw the resized image.
1B) THE JAVASCRIPT
// (B1) NEW IMAGE OBJECT & HTML CANVAS
var img = new Image(),
    canvas = document.getElementById("resized"),
    ctx = canvas.getContext("2d");

// (B2) RESIZE ON IMAGE LOAD
img.onload = () => {
  let width = Math.floor(img.naturalWidth * 0.5),
      height = Math.floor(img.naturalHeight * 0.5);
  canvas.width = width;
  canvas.height = height;
  ctx.drawImage(img, 0, 0, width, height);
};

// (B3) GO!
img.src = "demo.png";
Yep, that’s all, and this should be pretty straightforward.
- (B1) Create a
new Image()object, get the HTML canvas. - (B2) When the image is fully loaded, we calculate the new dimensions and draw the resized version onto the
<canvas>. - (B3) Set the image source, start loading the image.
1C) THE DEMO
Original Image (512 X 512)

Resized Image (50%)
EXAMPLE 2) RESIZE IMAGE & DOWNLOAD
2A) THE HTML
<!-- (A) DOWNLOAD LINK -->
<a id="dlink"></a>
Since we are offering the resized image as a download, all we need is an empty <a> download link.
2B) THE JAVASCRIPT
// (B1) NEW IMAGE OBJECT & CANVAS
var img = new Image(),
    canvas = document.createElement("canvas"),
    ctx = canvas.getContext("2d");

// (B2) RESIZE ON IMAGE LOAD
img.onload = () => {
  // RESIZE IMAGE
  let width = Math.floor(img.naturalWidth * 0.5),
      height = Math.floor(img.naturalHeight * 0.5);
  canvas.width = width;
  canvas.height = height;
  ctx.drawImage(img, 0, 0, width, height);

  // SET DOWNLOAD LINK
  let dlink = document.getElementById("dlink");
  dlink.innerHTML = "Download";
  dlink.setAttribute("download", "resized.png");
  dlink.href = canvas.toDataURL("image/png");
};

// (B3) GO!
img.src = "demo.png";
Look no further, this is essentially the same process as the previous example. The only difference here is that we turn the canvas into a downloadable link – canvas.toDataURL("image/png").
2C) THE DEMO
DOWNLOAD & NOTES
Here is the download link to the example code, so you don’t have to copy-paste everything.
SORRY FOR THE ADS...
But someone has to pay the bills, and sponsors are paying for it. I insist on not turning Code Boxx into a "paid scripts" business, and I don't "block people with Adblock". Every little bit of support helps.
Buy Me A Coffee Code Boxx eBooks
EXAMPLE CODE DOWNLOAD
Click here to download the code. I have released it under the MIT license, so feel free to build on top of it or use it in your own project.
EXTRA BITS & LINKS
That’s all for the tutorial, and here is a small section on some extras and links that may be useful to you.
COMPATIBILITY CHECK
- Canvas – CanIUse
- Draw Image – CanIUse
- Arrow Function – CanIUse
- To Data URL – CanIUse
- Natural Width & Height – CanIUse
These examples should work on all modern browsers.
LINKS & REFERENCES
- Canvas API – MDN
- Canvas Element – MDN
- Convert Image to Data URI with JavaScript – TutorialPoint
- Download Canvas As Image – Code Boxx
TUTORIAL VIDEO
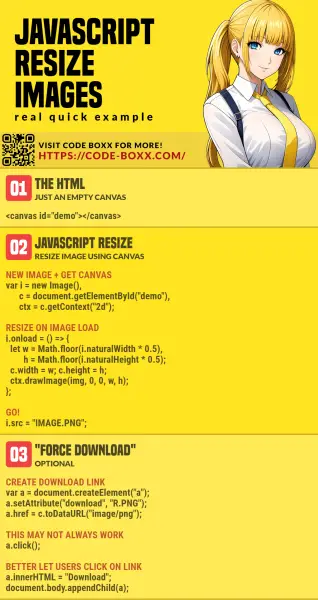
INFOGRAPHIC CHEAT SHEET

THE END
Thank you for reading, and we have come to the end. I hope that it has helped you to better understand, and if you want to share anything with this guide, please feel free to comment below. Good luck and happy coding!

Awesome website… i can clearly so much pain the author has taken in writing these posts…
css can do that with few lines.
Indeed, my dear genius. You have also completely missed out on the entire point. CSS cannot permanently reduce the image dimensions and file size.
P.S. It is best that you educate yourself on the basics of digital images to better understand – http://shutha.org/node/796