Welcome to a tutorial on how to support resumable file upload in Python Flask. First, I would like to make a quick confession. This frickin guide took me a couple of days, without proper working examples and libraries on the Internet to refer to. Had to fight with a digital dragon, but here it is, my version that is at least working on Python 3. Read on!
TABLE OF CONTENTS
DOWNLOAD & NOTES
Here is the download link to the example code, so you don’t have to copy-paste everything.
EXAMPLE CODE DOWNLOAD
Just click on “download zip” or do a git clone. I have released it under the MIT license, so feel free to build on top of it or use it in your own project.
SORRY FOR THE ADS...
But someone has to pay the bills, and sponsors are paying for it. I insist on not turning Code Boxx into a "paid scripts" business, and I don't "block people with Adblock". Every little bit of support helps.
Buy Me A Coffee Code Boxx eBooks
PYTHON FLASK MULTIPLE UPLOAD
All right, let us now walk through the steps of supporting resumable file uploads in Python Flask using Resumable JS.
QUICK SETUP
- Create a virtual environment
virtualenv venvand activate it –venv/Scripts/activate(Windows)venv/bin/activate(Linux/Mac) - Install required libraries –
pip install flask - For those who are new, the default Flask folders are –
staticPublic files (JS/CSS/images/videos/audio)templatesHTML pages
PRELUDE) RESUMABLE JS
To support resumable file uploads, we will be using a library called “Resumable JS” (links in the extras section below). How it works is actually pretty simple.
- Instead of uploading a massive file all at once, it is split into multiple smaller chunks.
- Resumable JS will first fire a
GETrequest to check if the specified chunk is already uploaded. The server should respond with HTTP200if the chunk is already uploaded, and404if not. - Then, Resumable JS will upload the missing chunks to the server using
POSTrequests.
Maybe a simple example will better explain:
- A large file is split into 100 chunks.
- 30 chunks are uploaded when the browser hangs.
- The user restarts the browser, Resumable JS will fire
GETrequests to check the upload status. - Chunks 1 to 30 will return
200since they are already uploaded. - Chunk 31 will return
404, and it resumes uploading from chunk 31 onwards.
STEP 1) FLASK SERVER
1A) INITIALIZE
# (A) INIT
# (A1) LOAD MODULES
from flask import Flask, render_template, request, abort
import os

# (A2) FLASK SETTINGS
app = Flask(__name__)
HOST_NAME = "localhost"
HOST_PORT = 80
# app.debug = True

# (A3) UPLOAD FOLDERS & FLAGS
UPLOAD_TEMP = os.path.dirname(os.path.realpath(__file__)) + "/temp"
UPLOAD_TO = os.path.dirname(os.path.realpath(__file__)) + "/upload"
UPLOAD_LOCK = {}

# (A4) CREATE UPLOAD FOLDERS IF NOT EXIST
if not os.path.isdir(UPLOAD_TEMP):
  os.mkdir(temp_dir, 0o777)
if not os.path.isdir(UPLOAD_TO):
  os.mkdir(temp_dir, 0o777)

# (A5) SUPPORT FUNCTION - GET RESUMABLE CHUNK DATA
def chunker(r):
  return {
    "chunkNumber": int(r.get("resumableChunkNumber")),
    "chunkSize": r.get("resumableChunkSize"),
    "totalChunks": int(r.get("resumableTotalChunks")),
    "identifier": r.get("resumableIdentifier"),
    "path": r.get("resumableRelativePath"),
    "fileName": r.get("resumableFilename"),
    "fileSize": r.get("resumableTotalSize"),
    "tempPath": os.path.join(UPLOAD_TEMP, r.get("resumableIdentifier")),
    "tempChunk": os.path.join(UPLOAD_TEMP, r.get("resumableIdentifier"), r.get("resumableChunkNumber") + ".part")
  }
The first part of the server-side script should be pretty self-explanatory.
- (A1) Load the required modules, Captain Obvious at your service.
- (A2 & A3) Flask settings, upload, and temporary folder path.
- (A4) Create the upload and temporary folders if not found.
- (A5) This is a support function for the upload endpoints, to get information on the current upload chunk. Take note of how the chunks are stored in running numbers in the temporary folder –
UPLOAD_TEMP/UNIQUE_IDENTIFIER/N.PART.
1B) HTML UPLOAD PAGE
# (B) HTML UPLOAD PAGE
@app.route("/")
def index():
  return render_template("S2_upload.html")
Don’t think this needs any explanation. Serve the HTML upload page at the URL root.
1C) CHUNK UPLOAD CHECK
# (C) CHECK FILE/CHUNK
@app.route("/uploads", methods=["GET"])
def checker():
  # (C1) GET CURRENT CHUNK INFORMATION
  current = chunker(request.args)

  # (C2) RESPOND 200 IF CHUNK UPLOADED, 404 IF NOT
  if os.path.isfile(current["tempChunk"]):
    return ("", 200)
  else:
    return ("", 404)
Remember the part about “using GET request to check upload status”? This part simply responds 200 if a chunk is already uploaded, or 404 if not.
1D) CHUNK UPLOAD HANDLER
# (D) HANDLE FILE CHUNK UPLOAD
@app.route("/uploads", methods=["POST"])
def uploader():
  # (D1) GET CURRENT CHUNK INFORMATION
  current = chunker(request.args)

  # (D2) CREATE TEMP FOLDER IF NOT ALREADY CREATED
  if not os.path.isdir(current["tempPath"]):
  os.mkdir(current["tempPath"], 0o777)

  # (D3) SAVE CHUNK
  request.files["file"].save(current["tempChunk"])

  # (D4) ALL CHUNKS UPLOADED?
  complete = True
  for i in range(1, current["totalChunks"] + 1):
    if not os.path.exists(os.path.join(current["tempPath"], str(i) + ".part")):
    complete = False
     break

  # (D5) ON COMPLETION OF ALL CHUNKS
  if complete and not current["identifier"] in UPLOAD_LOCK :
    # (D5-1) LOCK
    UPLOAD_LOCK[current["identifier"]] = 1

    # (D5-2) LET OUR POWERS COMBINE!
    with open(os.path.join(UPLOAD_TO, current["fileName"]), "ab") as fullfile:
      for i in range(1, current["totalChunks"] + 1):
        chunkName = os.path.join(current["tempPath"], str(i) + ".part")
        chunkFile = open(chunkName, "rb")
        fullfile.write(chunkFile.read())
        chunkFile.close()
        os.unlink(chunkName)
        fullfile.close()
        os.rmdir(current["tempPath"])

    # (D5-3) UNLOCK
    del UPLOAD_LOCK[current["identifier"]]

  # (D6) RESPONSE
  return ("", 200)
Not going to explain these step-by-step. But essentially, save the uploaded chunk into the temporary folder. On upload complete (all chunks uploaded), we combine them back together into the complete file.
1E) START
# (E) START!
if __name__ == "__main__":
  app.run(HOST_NAME, HOST_PORT)
Well, start the Flask server.
STEP 2) UPLOAD PAGE
2A) THE HTML
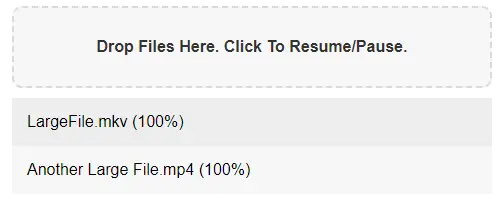
<!-- (A) UPLOAD BUTTON & LIST -->
<div id="updrop">
  Drop Files Here. Click To Resume/Pause.
</div>

<!-- (B) UPLOAD FILES LIST -->
<div id="uplist"></div>
<div id="updrop">As it is. Drop files here to upload, click to resume/pause uploads.<div id="uplist">The list of files.
2B) THE JAVASCRIPT
window.addEventListener("load", () => {
  // (A) CREATE RESUMABLE OBJECT
  let r = new Resumable({
    target: "/uploads",
    query: { key: "value" } // optional
  });

  // (B) GET HTML ELEMENTS
  let dropzone = document.getElementById("updrop"),
      listzone = document.getElementById("uplist");

  // (C) UPLOAD MECHANICS
  // (C1) PAUSE/RESUME UPLOAD
  dropzone.onclick = () => {
    if (r.isUploading()) { r.pause(); }
    else { r.upload(); }
  };

  // (C2) FILE ADDED - ADD HTML ROW & START UPLOAD
  r.on("fileAdded", (file, evt) => {
    let row = document.createElement("div");
    row.className = "row";
    row.innerHTML = `${file.fileName} (<span class="status">0%</span>)`;
    row.id = file.uniqueIdentifier;
    listzone.appendChild(row);
    r.upload();
  });

  // (C3) UPLOAD PROGRESS
  r.on("fileProgress", (file, evt) => {
    let row = document.getElementById(file.uniqueIdentifier);
    row.getElementsByTagName("span")[0].innerHTML = Math.ceil(file.progress() * 100) + "%";
  });

  // (C4) UPLOAD SUCCESFUL
  r.on("fileSuccess", (file, msg) => {
    // DO SOMETHING
  });

  // (C5) UPLOAD ERROR
  r.on("fileError", (file, msg) => {
    let row = document.getElementById(file.uniqueIdentifier);
    row.getElementsByTagName("span")[0].innerHTML = msg;
    console.error(file, msg);
  });

  // (D) ATTACH
  r.assignDrop(document.getElementById("updrop"));
  // r.assignBrowse(document.getElementById("browseButton"));
});
The Javascript looks like quite a handful, but walk through them section by section.
- Create a
new Resumable()object. Check their website for the full list of options and events. - Get the HTML drop zone and files list.
- HTML interface stuff. Create a new row in the files list when a file is added, and update the upload progress as it goes along.
- Attach the “upload dropzone” to start.
EXTRAS
That’s all for the tutorial, and here is a small section on some extras and links that may be useful to you.
LINKS & REFERENCES
THE END
Thank you for reading, and we have come to the end. I hope that it has helped you to better understand, and if you want to share anything with this guide, please feel free to comment below. Good luck and happy coding!
Thank you for a more detailed tutorial. Im about to try and implement this similar but automate with a timer. I was looking at Tus.io but since I already built majority of the the application in Flask and the flask-tus packages are kinda outdated I figured id look for a different end without too much nasty javascript or me having to run a separate daemon.
A I know you mentioned earlier you couldnt find help but for any one else that sumbles across this page I was also about to follow https://github.com/23/resumable.js/tree/master/samples
So between your blogpost and that github sample hopefully anyone else who is about to do this can get it done.
Thanks again