Welcome to a tutorial on how to create a dependent dropdown in Python Flask and SQLite. So you are dealing with 2 or more dropdowns. When one value is changed the other has to reload. Well, it’s kind of long-winded, but not really difficult. Read on for an example!
TABLE OF CONTENTS
DOWNLOAD & NOTES
Here is the download link to the example code, so you don’t have to copy-paste everything.
EXAMPLE CODE DOWNLOAD
Just click on “download zip” or do a git clone. I have released it under the MIT license, so feel free to build on top of it or use it in your own project.
SORRY FOR THE ADS...
But someone has to pay the bills, and sponsors are paying for it. I insist on not turning Code Boxx into a "paid scripts" business, and I don't "block people with Adblock". Every little bit of support helps.
Buy Me A Coffee Code Boxx eBooks
DEPENDENT DROPDOWN IN PYTHON FLASK
All right, let us now get into the example of creating a dependent dropdown in Python Flask.
QUICK SETUP
- Create a virtual environment
virtualenv venvand activate it –venv/Scripts/activate(Windows)venv/bin/activate(Linux/Mac) - Install required libraries –
pip install flask - For those who are new, the default Flask folders are –
staticPublic files (JS/CSS/images/videos/audio)templatesHTML pages
STEP 1) THE DATABASE
1A) DUMMY CATEGORIES TABLE
-- (A) CATEGORY TABLE
CREATE TABLE `category` (
  `id` INTEGER PRIMARY KEY AUTOINCREMENT,
  `parent` INTEGER DEFAULT 0 NOT NULL,
  `name` TEXT NOT NULL
);
CREATE INDEX `idx_parent` ON `category` (`parent`);

-- (B) DUMMY CATEGORIES
INSERT INTO `category` (`id`, `parent`, `name`) VALUES
(1, 0, 'Electronics'),
(2, 0, 'Sports'),
(3, 1, 'Mobile'),
(4, 1, 'Tablet'),
(5, 1, 'Laptop'),
(6, 1, 'Desktop'),
(7, 2, 'Jogging'),
(8, 2, 'Swimming'),
(9, 2, 'Cycling');
First, let us start with a simple dummy categories table.
idPrimary key, auto-increment.parentThe parent category. If this is0, it is a “root category”.nameName of the category.
For the people who are lost:
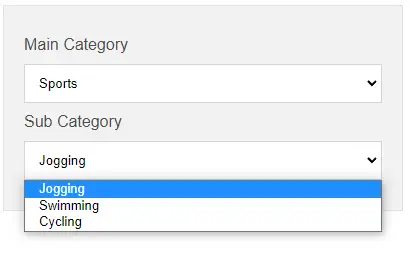
- The main categories here are “Electronics” and “Sports”.
- Electronics have sub-categories of “Mobile, Tablet, Laptop, Desktop”.
- Sports have sub-categories of “Jogging, Swimming, Cycling”.
1B) CREATE THE DATABASE
# (A) LOAD PACKAGES
import sqlite3, os
from sqlite3 import Error

# (B) DATABASE + SQL FILE
DBFILE = "cat.db"
SQLFILE = "S1A_cat.sql"

# (C) DELETE OLD DATABASE IF EXIST
if os.path.exists(DBFILE):
  os.remove(DBFILE)

# (D) IMPORT SQL
conn = sqlite3.connect(DBFILE)
with open(SQLFILE) as f:
  conn.executescript(f.read())
conn.commit()
conn.close()
print("Database created!")
Well, this should be self-explanatory. We read S1A_cat.sql above and create the actual database file itself.
STEP 2) FLASK SERVER
# (A) INIT
# (A1) LOAD MODULES
from flask import Flask, request, render_template
import sqlite3, json

# (A2) FLASK SETTINGS + INIT
DBFILE = "cat.db"
HOST_NAME = "localhost"
HOST_PORT = 80
app = Flask(__name__)
# app.debug = True

# (B) ROUTES
# (B1) SERVE DEMO PAGE
@app.route("/")
def demo():
  return render_template("S3A_selector.html")

# (B2) GET CATEGORIES FROM DATABASE
@app.route("/getcat", methods=["POST"])
def getcat():
  data = dict(request.form)
  conn = sqlite3.connect(DBFILE)
  cat = conn.cursor().execute("SELECT `id`, `name` FROM `category` WHERE `parent`=?", (data["id"],)).fetchall()
  conn.close()
  return json.dumps(cat)

# (C) START
if __name__ == "__main__":
  app.run(HOST_NAME, HOST_PORT)
With the database and library in place, we can now finally work with the HTTP server.
- Load the required modules.
- There are 2 “endpoints” here.
/will serve the demo HTML page with 2 dropdowns.- POST the (parent)
idto/getcat, and this will get the categories from the database.
- Start the HTTP server. Captain Obvious at your service.
STEP 3) DEPENDENT DROPDOWN
3A) THE HTML
<form onsubmit="return false;">
  <label>Main Category</label>
  <select id="cat1" onchange="loadcat(2)"></select>

  <label>Sub Category</label>
  <select id="cat2"></select>
</form>
This should not be much of a mystery.
<select id="cat1">The “main category”. Take note that changing this dropdown will triggerloadcat(2)that loads the sub-categories.<select id="cat2">The “sub-category”.
3B) THE JAVASCRIPT
// (A) LOAD CATEGORY SELECTOR
// level 1 = main category
// level 2 = sub category
function loadcat (level) {
  // (A1) GET SELECTED PARENT ID
  var data = new FormData();
  data.append("id", (level==1 ? 0 : document.getElementById("cat1").value));

  // (A2) AJAX FETCH CATEGORIES
  fetch("/getcat", { method: "POST", body: data })
  .then(res => res.json())
  .then(cat => {
    // (A2-1) UPDATE HTML SELECTOR
    let selector = document.getElementById("cat" + level);
    selector.innerHTML = "";
    for (let c of cat) {
      let opt = document.createElement("option");
      opt.value = c[0];
      opt.innerHTML = c[1];
      selector.appendChild(opt);
    }

    // (A2-2) CASCADE LOAD SUB-CATEGORY
    if (level==1) { loadcat(2); }
  });
}

// (B) INIT LOAD
window.onload = () => loadcat(1);
Yep, loadcat() pretty much does the “dependent dropdown” magic. Do a quick trace, and it will explain itself.
- (B) On window load,
loadcat(1)will do an AJAX fetch to/getcatto get the “main categories”. - (A2-2) When the main categories are loaded, this will cascade load the sub-categories.
- Whenever the user changes the main category,
loadcat(2)will reload the sub-categories.
The end.
EXTRAS
That’s all for the tutorial, and here is a small section on some extras and links that may be useful to you.
I HAVE SUB-SUB-CATEGORIES!
- Add the sub-sub-categories into the database.
- Add
<select id="cat3">. - Attach the change listener according –
<select id="cat2" onchange="loadcat(3)">. - Change the Javascript.
- (A1) Get the selected category –
data.append("id", document.getElementById("cat" + (level-1)).value)) - (A2-2) Change the cascade load accordingly –
level++; if (level<4) { loadcat(level); }
- (A1) Get the selected category –
LINKS & REFERENCES
THE END
Thank you for reading, and we have come to the end. I hope that it has helped you to better understand, and if you want to share anything with this guide, please feel free to comment below. Good luck and happy coding!
I thought this was a great walkthrough! I’m trying to implement this on a local server where I’m using your dropdown along with other form inputs. The other inputs are going to be just a direct text input that I’m trying to have all submit together in the form.
The webpage displays the properly functioning dropdown along with the other fields, but how would I get the form submission functionality to store to a table on the DB?
Thanks!
https://code-boxx.com/save-html-form-database-python-flask/