Welcome to a tutorial on how to save an HTML form into the database with Python Flask and SQLite. Just started with Python Flask and want to save a submitted form into the database? Well, it actually pretty easy – Read on for an example!
TABLE OF CONTENTS
DOWNLOAD & NOTES
Here is the download link to the example code, so you don’t have to copy-paste everything.
EXAMPLE CODE DOWNLOAD
Just click on “download zip” or do a git clone. I have released it under the MIT license, so feel free to build on top of it or use it in your own project.
SORRY FOR THE ADS...
But someone has to pay the bills, and sponsors are paying for it. I insist on not turning Code Boxx into a "paid scripts" business, and I don't "block people with Adblock". Every little bit of support helps.
Buy Me A Coffee Code Boxx eBooks
PYTHON FLASK SAVE HTML FORM
All right, let us now get into the details of saving an HTML form into the database on submission with Python Flask and SQLite.
QUICK SETUP
The “usual stuff”:
- Create a virtual environment
virtualenv venvand activate it –venv\Scripts\activate(Windows)venv/bin/activate(Linux/Mac) - Install required libraries –
pip install flask - For those who are new, the default Flask folders are –
staticPublic files (JS/CSS/images/videos/audio)templatesHTML pages
STEP 1) THE DATABASE
1A) DUMMY DATABASE TABLE
CREATE TABLE dummy (
  id INTEGER,
  email TEXT NOT NULL,
  txt TEXT NOT NULL,
  PRIMARY KEY("id" AUTOINCREMENT)
);
Let us start with a dummy database to work with, just a very simple one with 3 fields.
idPrimary key, auto-increment.emailThe user email.txtWhatever random text/content.
1B) CREATE THE DATABASE
# (A) LOAD PACKAGES
import sqlite3, os
from sqlite3 import Error

# (B) DATABASE + SQL FILE
DBFILE = "dummy.db"
SQLFILE = "S1A_dummy.sql"

# (C) DELETE OLD DATABASE IF EXIST
if os.path.exists(DBFILE):
  os.remove(DBFILE)

# (D) IMPORT SQL
conn = sqlite3.connect(DBFILE)
with open(SQLFILE) as f:
  conn.executescript(f.read())
conn.commit()
conn.close()
print("Database created!")
Next, this should be self-explanatory – We read the SQL file and create the actual database itself.
STEP 2) HTML FORM
<form method="post">
  <label>Email</label>
  <input type="email" name="email" required value="jon@doe.com">
  <label>Text</label>
  <input type="text" name="txt" required value="It works!">
  <input type="submit" value="Go!">
</form>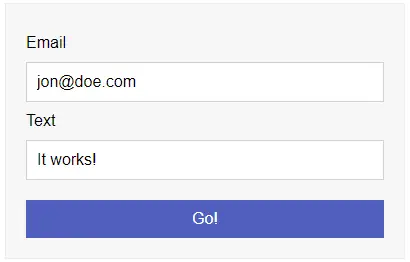
Don’t think this needs much explanation… Just a “regular Joe” HTML form.
STEP 3) FLASK SERVER
# (A) INIT
# (A1) LOAD MODULES
from flask import Flask, render_template, request
import sqlite3

# (A2) FLASK SETTINGS + INIT
HOST_NAME = "localhost"
HOST_PORT = 80
app = Flask(__name__)
# app.debug = True

# (B) DUMMY PAGE
@app.route("/", methods=["GET", "POST"])
def index():
  # (B1) SAVE ON FORM SUBMIT
  if request.method == "POST":
    conn = sqlite3.connect("dummy.db")
    cursor = conn.cursor()
    cursor.execute("INSERT INTO dummy (`email`, `txt`) VALUES (?,?)", (request.values.get("email"), request.values.get("txt")))
    conn.commit()
    conn.close()

  # (B2) RENDER PAGE
  return render_template("S2_form.html")

# (C) START
if __name__ == "__main__":
  app.run(HOST_NAME, HOST_PORT)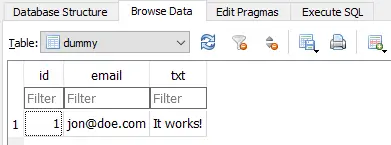
- Load the required modules (Flask and SQLite), plus a bunch of settings.
- Take note of how this works.
- (B2) When “accessed normally”, we serve the above HTML form.
- (B1) When the form is submitted, we save it into the database.
- Start the Flask server.
EXTRAS
That’s all for the tutorial, and here is a small section on some extras and links that may be useful to you.
A FEW MORE NOTES
Yes, saving an HTML form is that simple, but a couple of things to take note of:
- SQLite is a great tool for learning, but it is better to use a “professional database” for production servers.
- PostgreSQL, MySQL, Redis, or MongoDB – Pick your poison. Best to learn at least one.
LINKS & REFERENCES
THE END
Thank you for reading, and we have come to the end. I hope that it has helped you to better understand, and if you want to share anything with this guide, please feel free to comment below. Good luck and happy coding!