Welcome to a tutorial on how to create a very simple image gallery with NodeJS and Express. So you have some images that you want to share online, but don’t want to deal with all those “crazy image galleries”? Well, here’s how to build a very simple one – Read on!
TABLE OF CONTENTS
DOWNLOAD & NOTES
Here is the download link to the example code, so you don’t have to copy-paste everything.
EXAMPLE CODE DOWNLOAD
Just click on “download zip” or do a git clone. I have released it under the MIT license, so feel free to build on top of it or use it in your own project.
SORRY FOR THE ADS...
But someone has to pay the bills, and sponsors are paying for it. I insist on not turning Code Boxx into a "paid scripts" business, and I don't "block people with Adblock". Every little bit of support helps.
Buy Me A Coffee Code Boxx eBooks
NODEJS EXPRESS IMAGE GALLERY
All right, let us now get into more details about building an image gallery with NodeJS and Express.
QUICK SETUP
- Run
npm i glob express ejsto install the required modules. - There are 3 folders in this project:
galleryPut all your images in this folder.publicCSS, Javascript, fonts.viewsHTML templates.
PART 1) EXPRESS HTTP SERVER
// (A) LOAD REQUIRED MODULES
const express = require("express"),
path = require("path"),
glob = require("glob");

// (B) INIT EXPRESS SERVER
const app = express();
app.set("view engine", "ejs");

// (C) GET IMAGES
var images = glob.sync("gallery/**/*.{jpg,jpeg,png,webp,gif}");
var names = [];
images.forEach(img => names.push(path.parse(img).name));

// (D) GALLERY IMAGES & PAGE
app.use("/public", express.static(path.join(__dirname, "public")))
app.use("/gallery", express.static(path.join(__dirname, "gallery")))
app.get("/", (req, res) => res.render("2a-gallery.ejs" , { images: images, names: names }));

// (E) START SERVER
app.listen(80, () => console.log(`Server running at port 80`));
Let us start with the Express HTTP server, this should be pretty self-explanatory.
- (A & B) Load the required modules and initialize Express. Take note that we are using EJS to handle the HTML templates.
- (C) Get all the images inside the
galleryfolder. - (D) HTTP “endpoints”.
- Serve static files from both
galleryandpublic. - Serve
views/2a-gallery.ejsathttp://your-site.com/, take note, we pass the list of images into the HTML template.
- Serve static files from both
- (E) Start the HTTP server.
PART 2) GALLERY PAGE
2A) THE HTML
<div class="gallery">
<% images.forEach((img, i) => { %>
<figure>
<img src="<%= img %>">
<figcaption><%= names[i] %></figcaption>
</figure>
<% }); %>
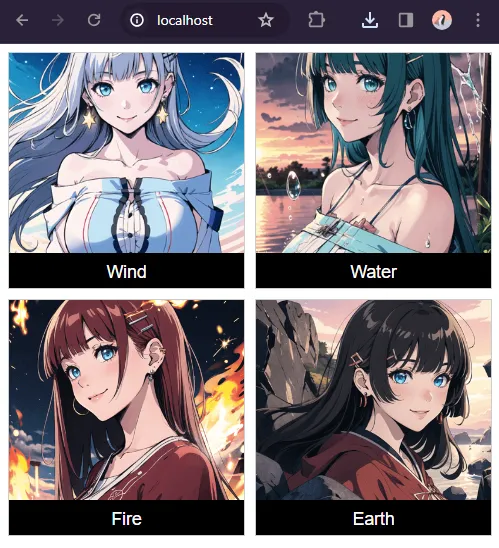
</div>Yep, the HTML is dreadfully simple. We loop through the list of images and generate the <img> tags.
2B) THE CSS
/* (A) GALLERY CONTAINER */
/* (A1) BIG SCREENS - 3 IMAGES PER ROW */
.gallery {
  display: grid;
  grid-template-columns: repeat(3, minmax(0, 1fr));
  grid-gap: 10px;
  max-width: 1200px;
  margin: 0 auto;
}

/* (A2) SMALL SCREENS - 2 IMAGES PER ROW */
@media screen and (max-width: 640px) {
  .gallery { grid-template-columns: repeat(2, minmax(0, 1fr)); }
}

/* (B) THUMBNAILS & CAPTION */
.gallery figure {
  margin: 0;
  border: 1px solid #cdcdcd;
  background: #000;
}
.gallery img {
  width: 100%;
  height: 200px;
  object-fit: cover; /* fill | contain | cover | scale-down */
  cursor: pointer;
}
.gallery figcaption {
  font-family: Arial, Helvetica, sans-serif;
  font-size: 1.1em;
  text-align: center;
  color: #fff;
  padding: 5px 10px;
}

/* (C) FULLSCREEN IMAGE */
.gallery img.full {
  position: fixed;
  top: 0; left: 0; z-index: 999;
  width: 100vw; height: 100vh;
  object-fit: contain; /* fill | contain | cover | scale-down */
  background: #fff;
}
Keep calm and look closely, the only few “rather important” parts are:
- We set the gallery to show 3 images per row on big screens, and 2 on the smaller screens.
- Styles for the thumbnail images,
object-fitis the resize behavior for the images. Change this to your own liking. - When the user clicks on an image, we will toggle a
.fullCSS class on the selected image; This section simply sets the selected image to fill up the entire window.
2C) JAVASCRIPT
window.addEventListener("DOMContentLoaded", () => {
  // (A) GET ALL IMAGES
  var all = document.querySelectorAll(".gallery img");

  // (B) CLICK ON IMAGE TO TOGGLE FULLSCREEN
  if (all.length>0) { for (let img of all) {
    img.onclick = () => img.classList.toggle("full");
  }}
});
Lastly, a small bit of Javascript to drive the “toggle fullscreen image”.
- On window load, we get all images.
- Click on an image to add/remove the
.fullCSS class (toggle fullscreen).
EXTRAS
That’s all for the tutorial, and here is a small section on some extras and links that may be useful to you.
SORTING THE IMAGES
As in 1-server.js, var images is an array containing the list of images. Just use the native array sort functions to sort the list of images.
images.sort()In ascending order.images.sort().reverse()In descending order.- If you want very specific sort order, you can pass a custom function into sort –
images.sort(MY-SORT-FUNCTION). Do a search for “Javascript custom array sort” on your own… Or this tutorial will never end.
LINKS & REFERENCES
THE END
Thank you for reading, and we have come to the end. I hope that it has helped you to better understand, and if you want to share anything with this guide, please feel free to comment below. Good luck and happy coding!