
I Was Here is an open-source PHP Student Attendance Management System. Featuring NFC and passwordless login, also allows students to take attendance by scanning a QR code.
TABLE OF CONTENTS
DOWNLOAD & INSTALLATION
First, here are the download links and a quick “setup guide” for the impatient folks who don’t want to read through everything.
LICENSE & DOWNLOAD
I Was here is released under the MIT License. You are free to use it for personal and commercial projects, and modify it as you see fit. On the condition that the software is provided “as-is”. There are no warranties provided and “no strings attached”. Code Boxx and the authors are not liable for any claims, damages, or liabilities.
SORRY FOR THE ADS...
But someone has to pay the bills, and sponsors are paying for it. I insist on not turning Code Boxx into a "paid scripts" business, and I don't "block people with Adblock". Every little bit of support helps.
Buy Me A Coffee Code Boxx eBooks
REQUIREMENTS
- LAMP/WAMP/MAMP/XAMPP
- Apache Mod Rewrite
- PHP MYSQL PDO Extension
- PHP OpenSSL Extension
- At least PHP 8.0
INSTALLATION
Just copy/unzip into your HTTP folder. Access http://your-site.com in the browser and walk through the installer.
FAQ
AJAX Error? Bad Server Response? Change the domain? Change the timezone? Check out the FAQ here.
HOW TO USE
 So far so good? Let us now go through a quick crash course on how to use I Was Here.
EQUIPMENT RECOMMENDATIONS
- NFC tags – 10 pieces of Ntag213 only cost 2-3 bucks. Buy them in bulk, and one piece will only cost a few cents.
- Label printer – Print QR codes or “student cards” if you want. There are Bluetooth ones that can pair with smartphones.
STEP 1) REGISTER USERS
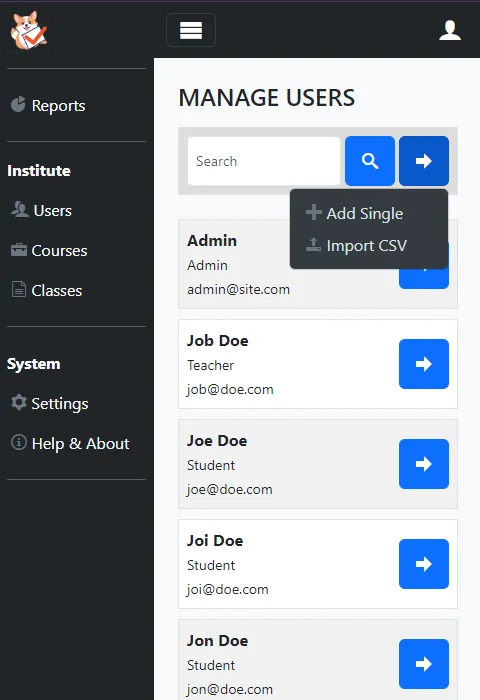
Start by registering the administrators, teachers, and students. You can do it one by one, but the smarter/faster way is to upload a CSV file.
STEP 2) REGISTER COURSES
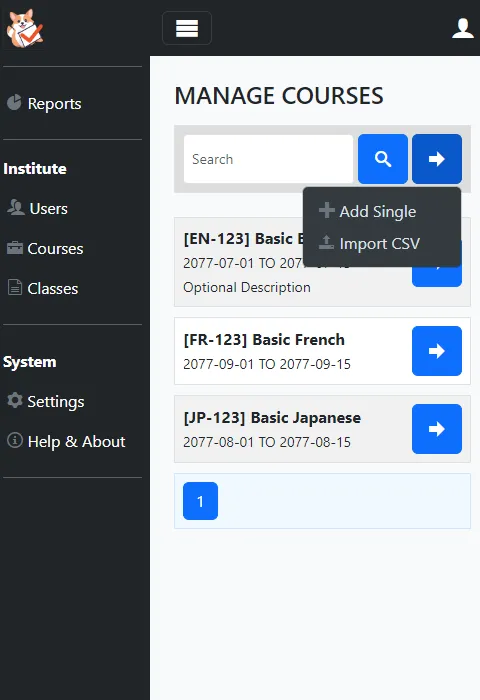
Next, register all your available courses – Again, you can do it one by one or upload a CSV file.
STEP 3) TIE USERS TO COURSES
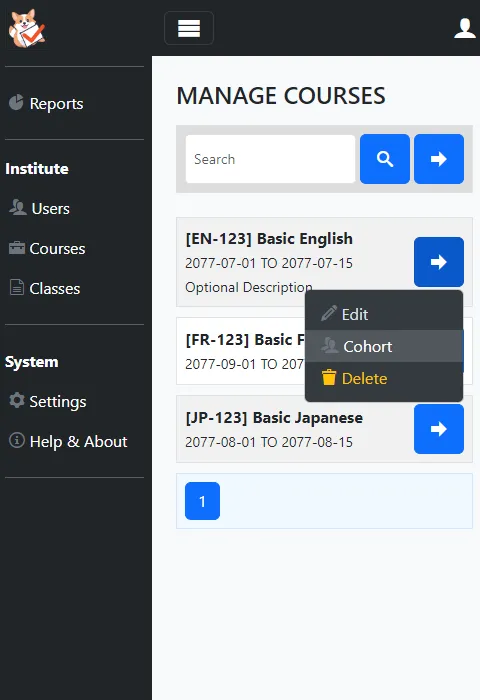
Now that the users and courses are registered, tie the users to the respective courses.
STEP 4) REGISTER CLASSES
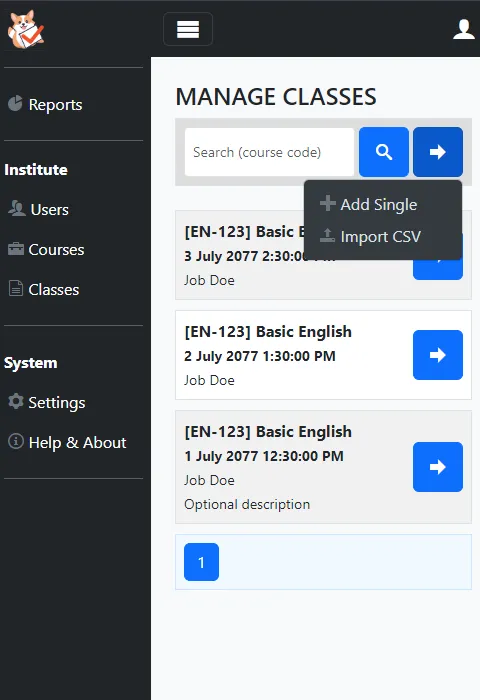
Finally, register the classes for the courses.
STEP 5) TAKE ATTENDANCE
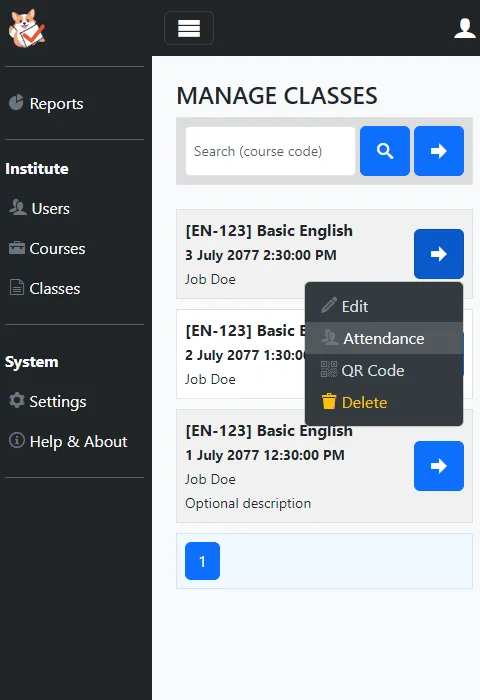
There are two ways to take attendance:
- The “old school” way, manually check/uncheck each student.
- Show a QR code during class – Students will log into the system and scan the QR code.
FOR THE DEVELOPERS
This section is for the developers, with a couple of development notes for customization.
BUILT ON CORE BOXX
- At least go through the very short tutorial.
- Thereafter, go into the deeper concepts:
- I Was Here has also adopted the following modules:
Hi how do I access the software locally
Setup your own local server, do your own research – https://www.apachefriends.org/
It works flawlessly.
But, I got a trouble while using ngrok. The URL is redirected to local URL. What should I do with HOST_BASE?
Thanks in advance.
See https://code-boxx.com/core-boxx-php-framework/#sec-faq – Changed domain and supporting multiple domains.
1. How do I leave the camera facing backwards by default when starting reading, and not the camera facing forward.
2. Where do I translate camera names, front and back? I couldn’t get the file
Ask the guy who made the QR scanner – https://github.com/mebjas/html5-qrcode
How to redirect the student area to a specific page after login?
Edit PAGE-home.php? Or change S-home.php entirely?
I need to be precise, when the student logs in, instead of being redirected to /s, redirected to /s/homepage which is a page that creates
Sorry, I cannot provide free consultation for your personal project beyond this. Good luck – https://code-boxx.com/faq/#help “Help on a deeper level”