
I Was Here is an open-source PHP Student Attendance Management System. Featuring NFC and passwordless login, also allows students to take attendance by scanning a QR code.
TABLE OF CONTENTS
DOWNLOAD & INSTALLATION
First, here are the download links and a quick “setup guide” for the impatient folks who don’t want to read through everything.
LICENSE & DOWNLOAD
I Was here is released under the MIT License. You are free to use it for personal and commercial projects, and modify it as you see fit. On the condition that the software is provided “as-is”. There are no warranties provided and “no strings attached”. Code Boxx and the authors are not liable for any claims, damages, or liabilities.
SORRY FOR THE ADS...
But someone has to pay the bills, and sponsors are paying for it. I insist on not turning Code Boxx into a "paid scripts" business, and I don't "block people with Adblock". Every little bit of support helps.
Buy Me A Coffee Code Boxx eBooks
REQUIREMENTS
- LAMP/WAMP/MAMP/XAMPP
- Apache Mod Rewrite
- PHP MYSQL PDO Extension
- PHP OpenSSL Extension
- At least PHP 8.0
INSTALLATION
Just copy/unzip into your HTTP folder. Access http://your-site.com in the browser and walk through the installer.
FAQ
AJAX Error? Bad Server Response? Change the domain? Change the timezone? Check out the FAQ here.
HOW TO USE
 So far so good? Let us now go through a quick crash course on how to use I Was Here.
EQUIPMENT RECOMMENDATIONS
- NFC tags – 10 pieces of Ntag213 only cost 2-3 bucks. Buy them in bulk, and one piece will only cost a few cents.
- Label printer – Print QR codes or “student cards” if you want. There are Bluetooth ones that can pair with smartphones.
STEP 1) REGISTER USERS
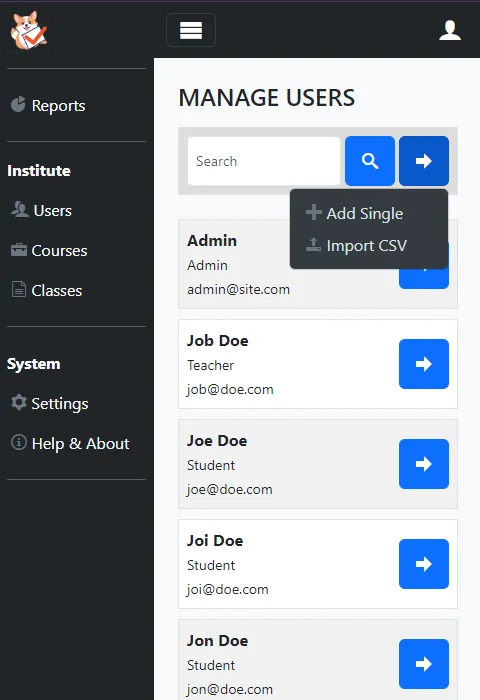
Start by registering the administrators, teachers, and students. You can do it one by one, but the smarter/faster way is to upload a CSV file.
STEP 2) REGISTER COURSES
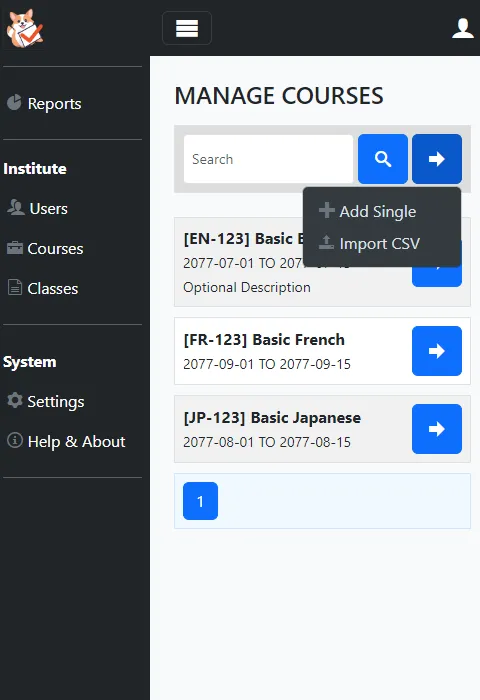
Next, register all your available courses – Again, you can do it one by one or upload a CSV file.
STEP 3) TIE USERS TO COURSES
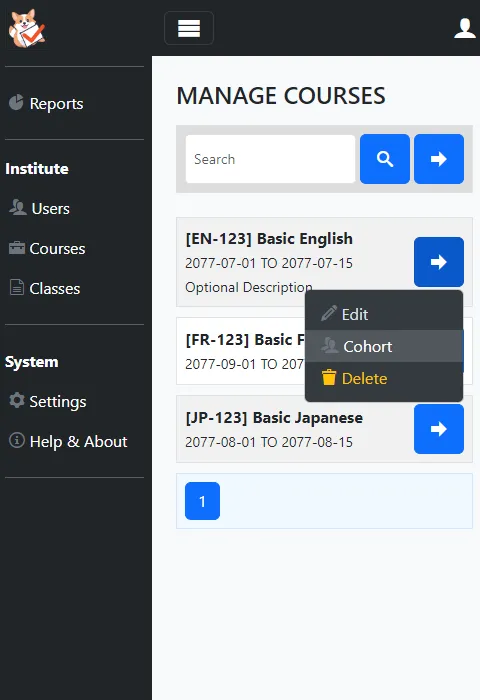
Now that the users and courses are registered, tie the users to the respective courses.
STEP 4) REGISTER CLASSES
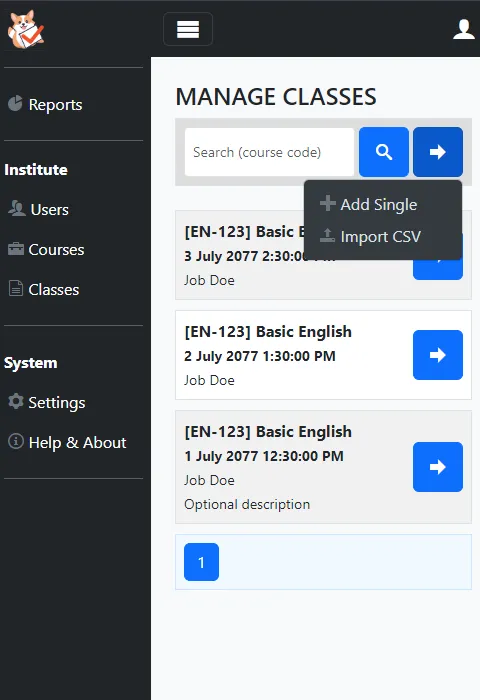
Finally, register the classes for the courses.
STEP 5) TAKE ATTENDANCE
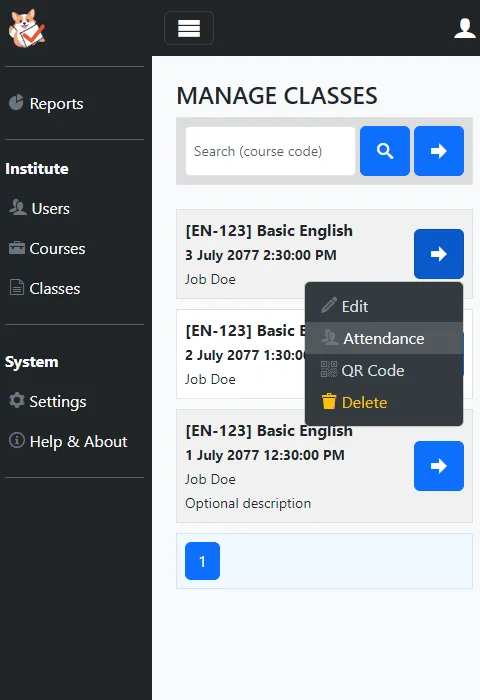
There are two ways to take attendance:
- The “old school” way, manually check/uncheck each student.
- Show a QR code during class – Students will log into the system and scan the QR code.
FOR THE DEVELOPERS
This section is for the developers, with a couple of development notes for customization.
BUILT ON CORE BOXX
- At least go through the very short tutorial.
- Thereafter, go into the deeper concepts:
- I Was Here has also adopted the following modules:
Can you list the number of students in a class and add a note field next to it when the student is away? Add these two functions in the next update
Good suggestions. Added to the “wish list”.
when will there be a next update and what new features will it have?
No idea. I have more than 500 tutorials/articles to update on this and other sites. A few features I have in mind – Email/push notifications for absentees, calendar/time table, staff/student card with NFC login, etc…
My site is on HTTPS, but the PWA installer still won’t load. I’m using CRHOME. I believe I have to enable something to work?
* EDIT- IGNORE THIS.
I didn’t understand. do you want the data to log into the system or server, or are you asking if I can log into the script normally?
I Was Here is already an installable PWA, just use HTTPS and login normally. The option to “add to home screen” will only be offered to users who are signed in.
Also, not all browsers support “add to home screen” – https://caniuse.com/web-app-manifest
How to format date for pt-br?
https://www.php.net/manual/en/datetime.format.php
I would just like to know in which file and in which line of your script I add the code to leave the date in Brazilian Portuguese format. Please help me
There are too many to list… Run through all
page/PAGE-*.P.S. I shall keep this as a feature request, and add a “simple way to update all date formats” in the future. Good luck.
Friend, I know it’s in some PHP script file and there are several, however, I need to know at least what code or command line I need to look for. please be more clear
As above. Too many to list, run through all
PAGE-*. Hire a proper web developer if you are not sure – Good luck.https://code-boxx.com/faq/#help “Help and requests on a deeper level – Explain everything”
I’m facing errors in the installation, I already fixed everything that asked for the steps
could you do the installation for me if i pass my server data?
Of course, it is perfectly safe to trust a random person on the Internet you have never met before. I need your login credentials and credit card details as well. 😆
https://code-boxx.com/faq/#notwork – “Share error details and messages”.
https://code-boxx.com/faq/#help – “Help and requests on a deeper level, I don’t work for free”.
Hi,
i’m trying to run this project on a Ubuntu Server 20.04 with Apache2, PHP 8.0 and MySQL.
The installer finishes without error, but after that, nothing works (404 Not Found for https://…/login)
The database is populated, so i don’t quite know where to look for the error.
Any help would be appreciated!
Thanks in advance!
Jonas
EDIT – Whoever encounters the same problem in the future, it’s either:
1)
MOD_REWRITEis enabled, butAllowOverrideis not properly set.2) SSL issues. Apache is not serving the pages and/or static assets properly.
Will try to add more checks, but fingers crossed. PHP has limited or no access to these Apache settings.