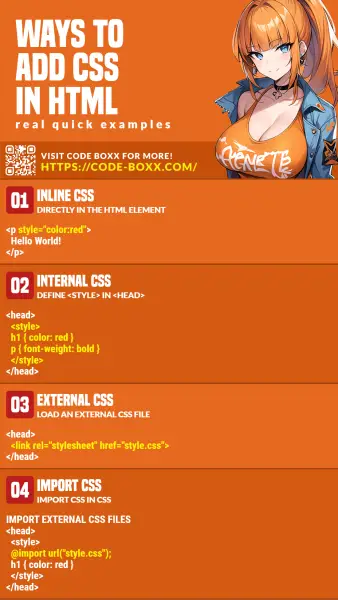
Welcome to a tutorial and examples on how to add CSS in HTML. Just started with web development and wondering how CSS styles are added into HTML? There are actually a couple of ways to do it:
- Inline CSS, by adding a style attribute to the HTML tag –
<p style="color:red">Demo</p> - Internal CSS, by inserting a style tag in the head section –
<head><style>p { color:red }</style></head> - External CSS, insert a link tag in the head section to load a CSS file –
<head><link rel="stylesheet" href="style.css"></head> - Finally, we can also use the import directive in the CSS itself to add an external CSS file –
@import "style.css"
That’s all for the basics, but read on for more examples!
ⓘ I have included a zip file with all the example source code at the start of this tutorial, so you don’t have to copy-paste everything… Or if you just want to dive straight in.
TLDR – QUICK SLIDES
[web_stories_embed url=”https://code-boxx.com/web-stories/how-to-add-css-in-html/” title=”How To Add CSS In HTML” poster=”https://code-boxx.com/wp-content/uploads/2022/03/STORY-HTML-20230505.webp” width=”360″ height=”600″ align=”center”]
Fullscreen Mode – Click Here
TABLE OF CONTENTS
DOWNLOAD & NOTES
Firstly, here is the download link to the example code as promised.
QUICK NOTES
If you spot a bug, feel free to comment below. I try to answer short questions too, but it is one person versus the entire world… If you need answers urgently, please check out my list of websites to get help with programming.
EXAMPLE CODE DOWNLOAD
Click here to download the source code, I have released it under the MIT license, so feel free to build on top of it or use it in your own project.
CSS IN HTML
All right, let us now get into the examples of how to add CSS in HTML.
1) INLINE CSS (DIRECTLY STYLE ELEMENT)
<p style="font-weight:bold; color:red">
  Hello World!
</p>
Yep, this is probably the easiest method. Just define the styles on an element using the style attribute. But I am personally not a fan of inline CSS – The styles only apply to that one element.
Things get messy when we have hundred of style scattered all over the place; The whole idea of CSS is to actually keep all the styles in one place for easy maintenance.
2) INTERNAL CSS (STYLE TAG)
<!DOCTYPE html>
<html>
  <head>
    <title>Add CSS In HTML</title>
    <style>
    h1 { color: red }
    p { font-weight: bold }
    </style>
  </head>
  <body>
    <h1>Hello World!</h1>
    <p>Lorem ipsum dolor sit amet, consectetur adipiscing elit.</p>
  </body>
</html>
This should be pretty self-explanatory – Define a <style> tag in the <head> section of the HTML document. Yes, the proper way is to put the <style> tag in the <head> section; While placing the <style> tag in the <body> section also works, it does not conform to the HTML standards.
3) EXTERNAL CSS (LOAD CSS FILE)
h1 { color: red }
p { font-weight: bold }<!DOCTYPE html>
<html>
<head>
<title>Add CSS In HTML</title>
<link rel="stylesheet" href="3a-style.css">
</head>
<body>
<h1>Hello World!</h1>
<p>Lorem ipsum dolor sit amet, consectetur adipiscing elit.</p>
</body>
</html>To load a CSS file, just add <link rel="stylesheet" href="FILE.CSS"> to the <head> section. Again, placing the <link> tag in the <body> section works, but it is not compliant to the HTML standards.
4) IMPORT CSS
p {
  color: green;
  font-size: 1.2em;
}<!DOCTYPE html>
<html>
<head>
<title>Add CSS In HTML</title>
<style>
@import url("4a-style.css");
h1 { color: red }
p { font-weight: bold }
</style>
</head>
<body>
<h1>Hello World!</h1>
<p>Lorem ipsum dolor sit amet, consectetur adipiscing elit.</p>
</body>
</html>Finally, this is an alternate for you guys who like a more “programmatic” approach – Use the @import directive, but take note that @import must be right on top of the stylesheet to work properly.
However, I rarely even use this. The <link> and <style> tags just make more sense – All the stylesheets are visible at one glance, we don’t have to open up the stylesheets to check if there are more “hidden imports” within.
5) MULTIPLE STYLE SHEETS & OVERRIDING
h1 { color: red }h1 { color: green }<link rel="stylesheet" href="5a-style.css">
<link rel="stylesheet" href="5b-style.css">Captain Obvious to the rescue! We can load multiple CSS files, but what happens when there are clashing styles?
h1 { color: red }in5a-styles.css.h2 { color: green }in5b-styles.css.
The answer is –
5a-style.csswill be loaded first,h1 { color: red }is applied.- Then
5b-style.cssis loaded,h1 { color: green }will override the previous.
So take note of this overriding mechanism.
EXTRA BITS & LINKS
That’s all for the tutorial, and here is a small section on some extras and links that may be useful to you.
RELATIVE VS ABSOLUTE URL
One last small tip and important example. Let’s say:
- We have a CSS file at
http://site.com/style.css - The current page is at
http://site.com/hello/index.html - The external stylesheet points to
<link rel="stylesheet" src="style.css">
Now, take note of src="style.css" – This is called a relative URL, it will resolve relative to the current URL. That is:
- Since the current page is at
http://site.com/hello/ - Therefore,
src="style.css"will resolve tohttp://site.com/hello/style.css
For those who are lost, the CSS file is kept in http://site.com/style.css and not http://site.com/hello/style.css. This is a common pitfall among beginners, so be careful with this. If unsure, just stick with absolute URL – src="http://site.com/style.css"
LINKS & REFERENCES
- HTML style attribute – MDN
- Style tag – MDN
- Link tag – MDN
- CSS import – MDN
INFOGRAPHIC CHEAT SHEET

THE END
Thank you for reading, and we have come to the end. I hope that it has helped you to better understand, and if you want to share anything with this guide, please feel free to comment below. Good luck and happy coding!

Дякую, дуже ДОСТУПНІ для розуміння пояснення.