Welcome to a quick tutorial on how to create a simple Javascript grocery list. Ah yes, this is a classic school assignment that has never changed for decades. There are probably a ton of these on the Internet already, so I figured to create one that is “updated” – A grocery list progressive web app that works offline. Read on!
TABLE OF CONTENTS
JAVASCRIPT GROCERY LIST

All right, let us now get into more details about how the Javascript grocery list works.
GROCERY LIST DEMO
PART 1) THE HTML
<div id="gro-wrap">
  <h1>GROCERY LIST</h1>

  <!-- (A) ADD ITEM -->
  <form id="gro-form">
    <input type="number" id="gro-qty" min="1" value="1" placeholder="Quantity" required disabled>
    <input type="text" id="gro-item" placeholder="Item Name" required disabled>
    <button id="gro-add" class="material-icons" disabled>add</button>
  </form>

  <!-- (B) ITEM LIST -->
  <div id="gro-list"></div>
</div>
The HTML is very straightforward, there are only 2 sections to the user interface.
- A simple “add item”
<form>with 2 fields – Quantity and item name. - An empty
<div>container to generate the grocery list into.
PART 2) GROCERY LIST INITIATE
var glist = {
  // (A) INITIALIZE GROCERY LIST
  items : [], // current grocery list
  hqty : null, // html add quantity field
  hitem : null, // html add item field
  hlist : null, // html <div> grocery list
  init : () => {
    // (A1) GET HTML ELEMENTS
    glist.hqty = document.getElementById("gro-qty");
    glist.hitem = document.getElementById("gro-item");
    glist.hlist = document.getElementById("gro-list");

    // (A2) ENABLE FORM
    glist.hqty.disabled = false;
    glist.hitem.disabled = false;
    document.getElementById("gro-add").disabled = false;
    document.getElementById("gro-form").onsubmit = glist.add;

    // (A3) RESTORE PREVIOUS GROCERY LIST
    if (localStorage.items == undefined) { localStorage.items = "[]"; }
    glist.items = JSON.parse(localStorage.items);

    // (A4) DRAW HTML GROCERY LIST
    glist.draw();
};
window.addEventListener("load", glist.init);
How does grocery list Javascript work? Let us start with glist.init(), this function will run on page load.
- (A1) Get all the related HTML elements.
- (A2) Enable the “add item” HTML form.
- (A3) Now, this is where the magic happens.
glist.itemsis an array that stores the actual grocery list.- But as you know, variables will disappear once the user navigates away. So we will use
localStorage.itemsto store the grocery list in a more permanent manner. - This section simply initializes an empty array if it is a first-time user, or restores the grocery list from a previous session.
- (A4) Draw the HTML grocery list when the init is done.
PART 3) ADD A NEW ITEM
// (B) SAVE GROCERY LIST INTO LOCAL STORAGE
save : () => {
  if (localStorage.items == undefined) { localStorage.items = "[]"; }
  localStorage.items = JSON.stringify(glist.items);
},

// (C) ADD NEW ITEM TO THE LIST
add : evt => {
  // (C1) ADD NEW ITEM TO LIST
  glist.items.push({
    qty : glist.hqty.value, // item quantity
    name : glist.hitem.value, // item name
    got : false // item accquired
  });
  glist.save();

  // (C2) RESET HTML ADD FORM
  glist.hqty.value = 1;
  glist.hitem.value = "";

  // (C3) REDRAW HTML GROCERY LIST
  glist.draw();
  return false;
},
This can be a little intimidating to beginners, but keep calm and look closely.
- (C)
glist.add()is fired when the user adds a new item. - (C1) We create a new object
{ qty: QUANTITY, name: ITEM NAME, got: STATUS }, and push it into theglist.itemsarray. - (B) Save the updated grocery list into
localStorage.items.
Yep, that’s about it.
PART 4) DELETE ITEM & TOGGLE STATUS
// (D) DELETE SELECTED ITEM
delete : id => { if (confirm("Remove this item?")) {
  glist.items.splice(id, 1);
  glist.save();
  glist.draw();
}},

// (E) TOGGLE ITEM BETWEEN "ACCQUIRED" & "NOT YET"
toggle : id => {
  glist.items[id].got = !glist.items[id].got;
  glist.save();
  glist.draw();
},- (D) To delete an item, we simply remove it from the
glist.itemsarray, then updatelocalstorage.items. - (E) To update the “got it/not yet” status, we simply update the respective
glist.items[id].gotflag, then updatelocalstorage.items.
PART 5) DRAW HTML GROCERY LIST
// (F) DRAW THE HTML GROCERY LIST
draw : () => {
  // (F1) RESET HTML LIST
  glist.hlist.innerHTML = "";

  // (F2) NO ITEMS
  if (glist.items.length == 0) {
    glist.hlist.innerHTML = "<div class='item-row item-name'>No items found.</div>";
  }

  // (F3) DRAW ITEMS
  else { for (let i in glist.items) {
    // (F3-1) ITEM ROW
    let row = document.createElement("div");
    row.className = glist.items[i].got ? "item-row yes" : "item-row no";
    glist.hlist.appendChild(row);

    // (F3-2) DELETE BUTTON
    let del = document.createElement("button");
    del.className = "item-del material-icons";
    del.innerHTML = "delete";
    del.onclick = () => glist.delete(i);
    row.appendChild(del);

    // (F3-3) ITEM QUANTITY & NAME
    let name = document.createElement("div");
    name.innerHTML = `${glist.items[i].qty} X ${glist.items[i].name}`;
    name.className = "item-name";
    row.appendChild(name);

    // (F3-4) ITEM ACCQUIRED
    let ok = document.createElement("button");
    ok.className = "item-ok material-icons";
    ok.innerHTML = glist.items[i].got ? "done" : "clear";
    ok.onclick = () => glist.toggle(i);
    row.appendChild(ok);
  }}
}
This function simply loops through the glist.items array to generate the HTML grocery list.
PART 6) PROGRESSIVE WEB APP
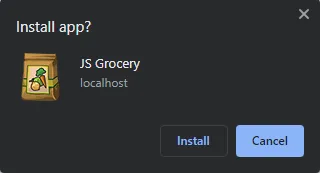
At this stage, we already have a fully functioning grocery list. But we can further enhance it into an offline-capable and installable progress web app. No need to panic, it actually only requires a couple more things – A web manifest and a service worker in particular.
6A) HTML META
<!-- ANDROID + CHROME + APPLE + WINDOWS APP -->
<meta name="viewport" content="width=device-width, initial-scale=1.0, maximum-scale=1.5">
<link rel="icon" href="favicon.png" type="image/png">
<meta name="mobile-web-app-capable" content="yes">
<meta name="theme-color" content="white">
<link rel="apple-touch-icon" href="icon-512.png">
<meta name="apple-mobile-web-app-capable" content="yes">
<meta name="apple-mobile-web-app-status-bar-style" content="black">
<meta name="apple-mobile-web-app-title" content="JS Grocery List">
<meta name="msapplication-TileImage" content="icon-512.png">
<meta name="msapplication-TileColor" content="#ffffff">

<!-- WEB APP MANIFEST -->
<!-- https://web.dev/add-manifest/ -->
<link rel="manifest" href="grocery-manifest.json">

<!-- SERVICE WORKER -->
<script>
if ("serviceWorker" in navigator) {
  navigator.serviceWorker.register("grocery-worker.js");
}
</script>
In the <head> section of the HTML, we will add metadata for:
- App icons. It is kind of painful here as everyone uses a different icon size. I just do it the lazy way, create a huge 512 X 512 icon and let whatever Apple/Android/Windows do their own resizing.
- Define the web app manifest.
- Register a service worker.
6B) WEB APP MANIFEST
{
  "short_name": "JS Grocery",
  "name": "JS Grocery",
  "icons": [{
     "src": "favicon.png",
     "sizes": "64x64",
     "type": "image/png"
  }, {
    "src": "icon-512.png",
    "sizes": "512x512",
    "type": "image/png"
  }],
  "start_url": "/grocery-list.html",
  "scope": "/",
  "background_color": "white",
  "theme_color": "white",
  "display": "standalone"
}
What the heck is a “web app manifest”? This should be self-explanatory. It contains information about your web app – The name, icon, description, theme color, etc…
6C) SERVICE WORKER
// (A) CREATE/INSTALL CACHE
self.addEventListener("install", evt => {
  self.skipWaiting();
  evt.waitUntil(
    caches.open("JSGrocery")
    .then(cache => cache.addAll([
      "favicon.png",
      "icon-512.png",
      "grocery-list.html",
      "grocery-list.css",
      "grocery-list.js",
      "grocery-manifest.json"
    ]))
    .catch(err => console.error(err))
  );
});

// (B) CLAIM CONTROL INSTANTLY
self.addEventListener("activate", evt => self.clients.claim());

// (C) LOAD FROM CACHE FIRST, FALLBACK TO NETWORK IF NOT FOUND
self.addEventListener("fetch", evt => evt.respondWith(
  caches.match(evt.request).then(res => res || fetch(evt.request))
});
Finally, a “service worker” is simply a piece of Javascript that runs in the background. In this one:
- (A) We will cache the HTML/CSS/JS/images into the browser.
- (C) “Hijack” the fetch requests, load from the cache if the requested file is saved in the cache.
In other words, offline support. Even if the user is not connected to the Internet, the web app will still load from the cache.
DOWNLOAD & NOTES

Here is the download link to the example code, so you don’t have to copy-paste everything.
SORRY FOR THE ADS...
But someone has to pay the bills, and sponsors are paying for it. I insist on not turning Code Boxx into a "paid scripts" business, and I don't "block people with Adblock". Every little bit of support helps.
Buy Me A Coffee Code Boxx eBooks
EXAMPLE CODE DOWNLOAD
Click here for the source code on GitHub gist, just click on “download zip” or do a git clone. I have released it under the MIT license, so feel free to build on top of it or use it in your own project.
EXTRA BITS & LINKS

That’s all for this guide, and here is a small section on some extras and links that may be useful to you.
COMPATIBILITY CHECKS
- Arrow Functions – CanIUse
- Service Worker – CanIUse
- Add To Home Screen – CanIUse
- Local Storage – CanIUse
This example will work on most browsers, but the PWA offline features will only work on the “Grade A” ones.
LINKS & REFERENCES
- Progressive Web App – Google Developers
- Example On CodePen – JS Grocery List
THE END

Thank you for reading, and we have come to the end of this guide. I hope that it has helped you with your project, and if you want to share anything with this guide, please feel free to comment below. Good luck and happy coding!