Welcome to a tutorial on how to create a simple comment system using PHP, MYSQL, and AJAX. Want to upgrade your website or eCommerce store? Allow users to enter comments on a post or product? Well, it really isn’t too difficult to create a comment (or feedback) system from scratch – Let us walk through a simple one in this guide, read on!
TABLE OF CONTENTS
DOWNLOAD & NOTES
Here is the download link to the example code, so you don’t have to copy-paste everything.
EXAMPLE CODE DOWNLOAD
Just click on “download zip” or do a git clone. I have released it under the MIT license, so feel free to build on top of it or use it in your own project.
SORRY FOR THE ADS...
But someone has to pay the bills, and sponsors are paying for it. I insist on not turning Code Boxx into a "paid scripts" business, and I don't "block people with Adblock". Every little bit of support helps.
Buy Me A Coffee Code Boxx eBooks
PHP MYSQL COMMENTS SYSTEM
All right, let us now get into the steps of creating an easy AJAX-driven comments system with PHP and MYSQL.
STEP 1) COMMENTS DATABASE TABLE
CREATE TABLE `comments` (
  `comment_id` bigint(20) NOT NULL,
  `post_id` bigint(20) NOT NULL,
  `timestamp` datetime NOT NULL DEFAULT current_timestamp(),
  `name` varchar(255) NOT NULL,
  `message` text NOT NULL
) ENGINE=InnoDB DEFAULT CHARSET=utf8mb4;

ALTER TABLE `comments`
  ADD PRIMARY KEY (`comment_id`);

ALTER TABLE `comments`
MODIFY `comment_id` bigint(20) NOT NULL AUTO_INCREMENT;| Field | Description |
comment_id |
Primary key and auto-increment. |
post_id |
Foreign key. Use this to identify which comments belong to which post (or product). |
timestamp |
Date and time when the comment is posted. |
name |
Name of the user. |
message |
Comment message. |
This should be easy enough, but you might want to change the structure a little to fit your own project. For example, it may make sense to add an email field, or use URL slugs instead of ID (change post_id to post_slug, use VARCHAR instead of BIGINT).
STEP 2) PHP COMMENT LIBRARY
<?php
class Comments {
  // (A) CONSTRUCTOR - CONNECT TO DATABASE
  private $pdo;
  private $stmt;
  public $error;
  function __construct () {
    $this->pdo = new PDO(
      "mysql:host=".DB_HOST.";dbname=".DB_NAME.";charset=".DB_CHARSET,
      DB_USER, DB_PASSWORD, [
      PDO::ATTR_ERRMODE => PDO::ERRMODE_EXCEPTION,
      PDO::ATTR_DEFAULT_FETCH_MODE => PDO::FETCH_NAMED
    ]);
  }

  // (B) DESTRUCTOR - CLOSE DATABASE CONNECTION
  function __destruct () {
    if ($this->stmt !== null) { $this->stmt = null; }
    if ($this->pdo !== null) { $this->pdo = null; }
  }

  // (C) HELPER - RUN SQL QUERY
  function query ($sql, $data=null) : void {
    $this->stmt = $this->pdo->prepare($sql);
    $this->stmt->execute($data);
  }

  // (D) GET COMMENTS
  function get ($id) {
    $this->query(
      "SELECT `name`, `timestamp`, `message`
       FROM `comments` WHERE `post_id`=?
       ORDER BY `timestamp` ASC", [$id]);
    return $this->stmt->fetchAll();
  }

  // (E) SAVE COMMENT
  function save ($id, $name, $msg) {
    $this->query(
      "INSERT INTO `comments` (`post_id`, `name`, `message`) VALUES (?,?,?)",
      [$id, $name, strip_tags($msg)]
    );
    return true;
  }
}

// (F) DATABASE SETTINGS - CHANGE TO YOUR OWN !
define("DB_HOST", "localhost");
define("DB_NAME", "test");
define("DB_CHARSET", "utf8mb4");
define("DB_USER", "root");
define("DB_PASSWORD", "");

// (G) COMMMENTS OBJECT
$_COM = new Comments();
This may look complicated at first, but keep calm and look carefully.
- (A, B, G) When
$_COM = new Comments()is created, the constructor connects to the database. The destructor closes the connection. - (C)
query()A helper function to run an SQL query. - (D & E) There are only 2 “actual comment functions” here.
get()Get all comments for the given post/product/content ID.save()Save a comment.
- (F) Remember to change the settings to your own.
STEP 3) COMMENT AJAX HANDLER
<?php
if (isset($_POST["req"])) {
  require "2-lib.php";
  switch ($_POST["req"]) {
    // (A) GET COMMENTS
    case "get";
      echo json_encode($_COM->get($_POST["id"]));
      break;

    // (B) ADD COMMENT
    case "add":
      $_COM->save($_POST["id"], $_POST["name"], $_POST["msg"]);
      echo "OK";
      break;
}}
How this AJAX handler works is very simple, just post the request followed by the required parameters. For example:
- To get the comments –
$_POST = ["req"=>"get", "pid"=>888] - To add a comment –
$_POST = ["req"=>"add", "pid"=>888, "name"=>"John", "msg"=>"Hello"]
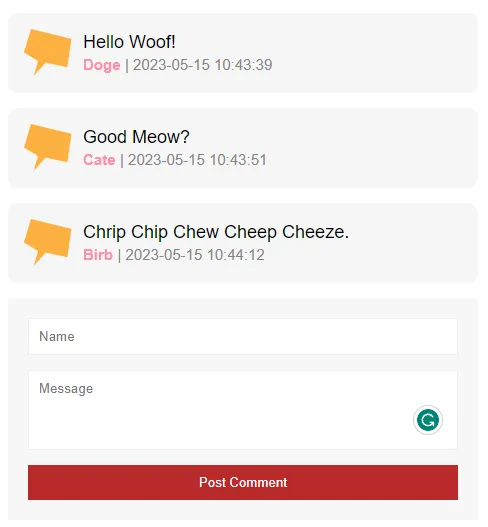
STEP 4) DUMMY COMMENTS PAGE
4A) THE HTML
<!-- (A) GIVE THIS PAGE A HIDDEN POST ID -->
<input type="hidden" id="pid" value="999">

<!-- (B) COMMENTS WILL LOAD HERE -->
<div id="cWrap"></div>

<!-- (C) ADD NEW COMMENT -->
<form id="cAdd" onsubmit="return comments.add(this)">
  <input type="text" id="cName" placeholder="Name" required>
  <textarea id="cNsg" placeholder="Message" required></textarea>
  <input type="submit" value="Post Comment">
</form>- Tag the page with a unique ID, place it into a hidden field –
<input type="hidden" id="pid" value="N">. - Create a container to load all the comments –
<div id="cWrap">. - Finally, the “Add A Comment” form itself –
<form id="cAdd">.
4B) COMMENTS JAVASCRIPT
var comments = {
  // (A) HELPER - AJAX CALL
  ajax : (data, after) => {
    // (A1) DATA TO SEND
    var form = new FormData();
    form.append("id", document.getElementById("pid").value);
    for (let [k,v] of Object.entries(data)) { form.append(k,v); }

    // (A2) AJAX FETCH
    fetch("3-ajax.php", { method: "POST", body: form })
    .then(res => res.text()).then(after)
    .catch(err => console.error(err));
  },

  // (B) LOAD COMMENTS INTO <DIV ID="CWRAP">
  load : () => comments.ajax({ req : "get" }, data => {
    let wrap = document.getElementById("cWrap"), row;
    data = JSON.parse(data);
    wrap.innerHTML = "";
    if (data.length > 0) { for (let c of data) {
      row = document.createElement("div");
      row.className = "row";
      row.innerHTML = `<img class="cImg" src="talk.png">
      <div class="cTxt">
        <div class="cMsg">${c.message}</div>
        <div>
          <span class="cName">${c.name}</span>
          <span class="cTime">| ${c.timestamp}</span>
        </div>
      </div>`;
      wrap.appendChild(row);
    }}
  }),

  // (C) ADD COMMENT
  add: () => {
    comments.ajax({
      req : "add",
      name : document.getElementById("cName").value,
      msg : document.getElementById("cMsg").value
    }, res => {
      if (res == "OK") {
        document.getElementById("cAdd").reset();
        comments.load();
      } else { alert(res); }
    });
    return false;
  }
};
window.onload = comments.load;
Some beginners may panic at the sight of Javascript, but it is actually simple and straightforward again.
- We are using AJAX to drive the comments, and thus the need for this
comments.ajax()helper function. Yep, all it does is nicely pack the data and send an AJAX request to2-ajax.php. - On window load,
comments.load()will fire up. As you can guess, this does an AJAX call to the server to load the comments for the current page. - The
comments.add()function is fired when the user adds a new comment. Again, this is AJAX-driven.
EXTRAS
We are finally done with the entire system, and here are some extras that may be useful to you.
IMPROVEMENT IDEAS & FAQ
Yes, this simple example works, but it is far from a “professional system”. There is plenty you can do to make it better:
- Need some spam protection? Check out Google reCAPTCHA.
- Sort comments – Change
ORDER BY `timestamp` ASC/DESCinfunction get() 2-lib.php. - Only registered users can post.
- In
4a-comments.php, show the “add comments” form to registered users only. E.G.if (isset($_SESSION["user"])) { DRAW <FORM ID="CADD"> }. - In
2-ajax.php, process “save comment” only if the user is signed in. E.G.if (isset($_SESSION["user"])) { $_COMMENT->save(...); }
- In
- Manual approval required.
- Add an
approvedflag to thecommentstable, set the default value to0. - In
2-lib.php, changeget()to only fetch approved comments –WHERE `post_id=? AND `approved`=1. - Add a new library function to approve/delete comments.
- Add an
- Add more of your own features and functions –
- Moderation (auto censor bad words)
- Allow users to edit their own comment?
- Allow users to delete their own comment?
- Introduce admin or moderators?
Yep, the possibilities are endless. It’s up to you to complete your own system now.
REPLY TO COMMENTS
Here is a possibility:
- Add
parent_idto thecommentstable – If it is a “base comment”,parent_idwill be0. If it is a reply,parent_idwill hold thecomment_idthat it replies to. - Change
function get(), find some way to properly arrange the data. E.G.$comments = [COMMENT ID => COMMENT]; $replies = [PARENT ID => [ARRAY OF COMMENT ID]]. - Redo the entire comments page. Draw nested comments with replies, and add a reply button to the comments.
- Find some way to control the number of levels – So you don’t get “a reply to a reply that replies to yet another reply”.
Good luck, and feel free to challenge yourself. There’s a good reason why “reply” is left out to keep this tutorial simple. 😆
P.S. This will probably require recursion to work properly. See my other tutorial on category/subcategory if you are interested to learn more.
LINKS & REFERENCES
- User Registration Form With Email Validation – Code Boxx
- User Login Page – Code Boxx
- Contact Form With Google reCaptcha – Code Boxx
THE END
Thank you for reading, and we have come to the end. I hope that it has helped you to better understand, and if you want to share anything with this guide, please feel free to comment below. Good luck and happy coding!
Great info ,thank you .
Thanks for this blog. very impressive content that would be understandable.
Thanks for this great post.
What if if you want to :
1. add the possibility to vote for a post or comment
2. share a post or a comment via facebook, twitter and so on.
3. want to go up to 5 levels of replies?
When only registered users can leave a comment, you should also provide the possibility to:
1. Sign in
2. Update user information, change or retrieve password
3. change avatar and more…
Anyway, This is a good starting point.
Good luck with your project, and check out the rest of the tutorials –
1) User Registration
2) User Login
3) Like/Dislike
4) Facebook Web API
good job thank you
Nice posting..
Hi there, thank you very much for the information on this webpage,
But I seem to noticed that the date time is not using his own timestamp on the moment its nested.
That depends on how the timezone region is configured on your server. MySQL may default to GMT+0, which explains a time difference on your results… This seems like a good topic to talk about in depth. I will see if I can create another tutorial for this in the future.