Welcome to a tutorial on how to create a simple PHP audio player. Want to create your own podcast or playlist? Once upon a time, we have to fight with digital dragons and use all sorts of plugins to do that. But today, it is nearly as simple as using an <audio> tag. Read on for the example!
TABLE OF CONTENTS
DOWNLOAD & NOTES
Here is the download link to the example code, so you don’t have to copy-paste everything.
EXAMPLE CODE DOWNLOAD
Just click on “download zip” or do a git clone. I have released it under the MIT license, so feel free to build on top of it or use it in your own project.
SORRY FOR THE ADS...
But someone has to pay the bills, and sponsors are paying for it. I insist on not turning Code Boxx into a "paid scripts" business, and I don't "block people with Adblock". Every little bit of support helps.
Buy Me A Coffee Code Boxx eBooks
PHP AUDIO PLAYER
All right, let us now get into how to create a PHP audio player with a playlist.
STEP 1) THE PHP & HTML
<div id="demo">
<!-- (A) AUDIO TAG -->
<audio id="demoAudio" controls></audio>
<!-- (B) PLAYLIST -->
<div id="demoList"><?php
// (B1) GET ALL SONGS
$songs = glob("audio/*.{mp3,webm,ogg,wav}", GLOB_BRACE);
// (B2) OUTPUT SONGS IN <DIV>
if (is_array($songs)) { foreach ($songs as $k=>$s) {
$name = basename($s);
printf("<div data-src='%s' class='song'>%s</div>", rawurlencode($name), $name);
}} else { echo "No songs found!"; }
?></div>
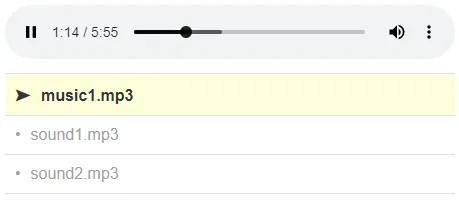
</div>Yep, there are only 2 components for this simple example.
- The audio player, good old
<audio>tag. - The playlist.
- We will use
$songs = glob("audio/*.{mp3,webm,ogg,wav}", GLOB_BRACE)to get the list of songs from theaudiofolder. Take note,globwill not recursively read into sub-folders. - Then, loop through
$songsand generate the playlist. Take note of the customdata-srchere.
- We will use
STEP 2) JAVASCRIPT PLAYLIST INIT
var aud = {
  // (A) INITIALIZE PLAYER
  player : null,   // html <audio> element
  playlist : null, // html playlist
  now : 0,         // current song
  init : () => {
    // (A1) GET HTML ELEMENTS
    aud.player = document.getElementById("demoAudio");
    aud.playlist = document.querySelectorAll("#demoList .song");

    // (A2) LOOP THROUGH ALL THE SONGS, CLICK TO PLAY
    for (let i=0; i<aud.playlist.length; i++) {
      aud.playlist[i].onclick = () => aud.play(i);
    }

    // (A3) AUTO PLAY WHEN SUFFICIENTLY LOADED
    aud.player.oncanplay = aud.player.play;

    // (A4) AUTOPLAY NEXT SONG IN PLAYLIST WHEN CURRENT SONG ENDS
    aud.player.onended = () => {
      aud.now++;
      if (aud.now>=aud.playlist.length) { aud.now = 0; }
      aud.play(aud.now);
    };
  }
};
window.addEventListener("DOMContentLoaded", aud.init);
Unfortunately, <audio> does not support playlists at the time of writing. So we will need to build our own, var aud contains the mechanics of our custom playlist player.
- (A1) Get the HTML elements.
aud.playerrefers to<audio id="demoAudio">.aud.playlistis anHTMLCollectionof songs contained in<div id="demoList">.- The idea is to use
aud.nowto track the current song playing inaud.playlist. For example,aud.now = 0will indicate the first song,aud.now = 1indicates the second, and so on.
- (A2) Loop through all the songs, attach “click to play”
onclick = aud.play. - (A3) Just a bit of precaution here, we wait until the song is sufficiently buffered before playing.
- (A4) When the current song ends, we do a
aud.now++and play the next song automatically.
STEP 3) PLAY SONG
// (B) START PLAYING
aud.play : id => {
  // (B1) UPDATE CURRENT & PLAY
  aud.now = id;
  aud.player.src = "audio/" + aud.playlist[id].dataset.src;

  // (B2) A LITTLE BIT OF COSMETIC
  for (let i=0; i<aud.playlist.length; i++) {
    if (i==id) { aud.playlist[i].classList.add("now"); }
    else { aud.playlist[i].classList.remove("now"); }
  }
};
Lastly, we have a function that plays the song itself. Very simply, we set aud.play.src to the selected data-src. The end. aud.player.oncanplay will automatically start playing once sufficiently buffered.
EXTRAS
That’s all for the tutorial, and here is a small section on some extras and links that may be useful to you.
CUSTOMIZING THE AUDIO PLAYER?
Take extra note that <audio> cannot be styled or customized (at the time of writing). But we can build one ourselves, check out the custom audio player link below.
COMPATIBILITY CHECKS
- HTML Audio Element – CanIUse
- Arrow Functions – CanIUse
Works on all modern “Grade A” browsers.
LINKS & REFERENCES
- <audio>: The Embed Audio element – MDN
- Custom Audio Player With Playlist – Code Boxx
- Need to read sub-folders? Check out List Files & Folders In PHP – Code Boxx
THE END
Thank you for reading, and we have come to the end. I hope that it has helped you to better understand, and if you want to share anything with this guide, please feel free to comment below. Good luck and happy coding!
How can I make the playlist stop at each track’s end?
I Tried to modify the .js file without success.
Thanks
Don’t play the next song when the current track ends?
// aud.play(aud.now);Good! And how to restart the same track at each track’s end? In a sort of loop mode? Just a novice here to js
Ok delete the if option and set an aud now just below. I Got the point looking to the custom javascript one, cause it’s very easy to restrict downloads. And that works also on my old Android!!! Hello from Illy
How would you add a short intro and outro to each title. For use with a podcast.
I want the ability to change the intro and outro each week (mp3 format)
https://www.audacityteam.org/
Thank you! Ill use this for audiobooks for the senior center and for personal boredom.
How is it possible to add pause between one audio and another? I tried with the code: after the (A3) and before (A4) but it didn’t serve. Grateful for the attention. Grato pela atenção.
audio.player.currentTime = 50;
Thank you very much W.S. TOh. I’m using your code to create an playlist for english learning. For my doctoral proficiency exam. Your code is perfect. Novamente, muito obrigado.