Welcome to a tutorial on how to upload large files in PHP. Once upon a time in the Stone Age of the Internet, uploads were manageable without large files. But these days, we have to deal with all kinds of oversized files, and the “traditional” upload mechanism just can’t handle it.
To deal with large uploads in PHP, there are a few possible alternatives:
- Change the
upload_max_filesizelimit in php.ini. - Split and upload the file in smaller chunks, and assemble them when the upload is complete.
- Implement resumable uploads.
But just how does each of these methods work? Read on for the examples!
TABLE OF CONTENTS
DOWNLOAD & NOTES
Here is the download link to the example code, so you don’t have to copy-paste everything.
EXAMPLE CODE DOWNLOAD
Just click on “download zip” or do a git clone. I have released it under the MIT license, so feel free to build on top of it or use it in your own project.
SORRY FOR THE ADS...
But someone has to pay the bills, and sponsors are paying for it. I insist on not turning Code Boxx into a "paid scripts" business, and I don't "block people with Adblock". Every little bit of support helps.
Buy Me A Coffee Code Boxx eBooks
LARGE UPLOADS IN PHP
All right, let us now get into the examples and possible ways of handling large uploads in PHP.
TUTORIAL VIDEO
METHOD 1) TWEAK PHP SETTINGS
1A) UPDATE PHP.INI
upload_max_filesize = 150M
post_max_size = 150M
max_input_time = 300
max_execution_time = 300
This is the easiest method for you guys who are dealing with somewhat manageable uploads – Just change the maximum allowed file size in PHP. There are 4 settings to look out for:
upload_max_filesize– The maximum allowed upload file size.post_max_size– The maximum allowed POST data size.max_input_time– Maximum allowed input time.max_execution_time– Maximum allowed time the scripts are allowed to run.
But of course, I will not recommend changing the php.ini file directly. This will affect the entire server and all your other websites as well.
1B) UPDATING THE HTACCESS FILE
php_value upload_max_filesize 150M
php_value post_max_size 150M
php_value max_input_time 300
php_value max_execution_time 300
If you don’t have access to php.ini, or just want to apply the settings for a single site – It is also possible to change the settings by creating a .htaccess file. IIS and NGINX users, you will need to do some of your own research.
1C) UPLOAD!
<!-- (A) HTML UPLOAD FORM -->
<form method="post" enctype="multipart/form-data">
  <input type="file" name="up" required>
  <input type="submit" value="Go">
</form>

<?php
// (B) HANDLE FILE UPLOAD
if (isset($_FILES["up"])) {
  $source = $_FILES["fileup"]["tmp_name"];
  $destination = $_FILES["fileup"]["name"];
  move_uploaded_file($source, $destination);
  echo "OK";
}
?>
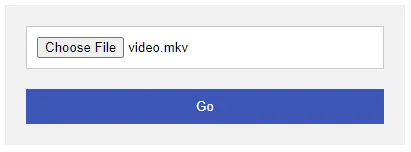
Well, this is just a regular upload form. For those who may have missed out on basic file upload.
1D) INI SET?
For you guys who are thinking of using ini_set() to change the upload size – Take note that according to the official core php.ini directives, upload_max_filesize is only changeable in PHP_INI_PERDIR. Meaning, it can only be tweaked in the php.ini or .htaccess file; ini_set("upload_max_filesize", "150M") will not work.
METHOD 2) CHUNK UPLOAD
2A) HTML & JAVASCRIPT
<!-- (A) UPLOAD BUTTON & FILE LIST -->
<form>
  <div id="list"></div>
  <input type="button" id="pick" value="Upload">
</form>

<!-- (B) LOAD PLUPLOAD FROM CDN -->
<script src="https://cdnjs.cloudflare.com/ajax/libs/plupload/3.1.5/plupload.full.min.js"></script>
<script>
// (C) INITIALIZE UPLOADER
window.onload = () => {
  // (C1) GET HTML FILE LIST
  var list = document.getElementById("list");

  // (C2) INIT PLUPLOAD
  var uploader = new plupload.Uploader({
    runtimes: "html5",
    browse_button: "pick",
    url: "2b-chunk.php",
    chunk_size: "10mb",
    init: {
      PostInit: () => list.innerHTML = "<div>Ready</div>",
      FilesAdded: (up, files) => {
        plupload.each(files, file => {
          let row = document.createElement("div");
          row.id = file.id;
          row.innerHTML = `${file.name} (${plupload.formatSize(file.size)}) <strong></strong>`;
          list.appendChild(row);
        });
        uploader.start();
      },
      UploadProgress: (up, file) => {
        document.querySelector(`#${file.id} strong`).innerHTML = `${file.percent}%`;
      },
      Error: (up, err) => console.error(err)
    }
  });
  uploader.init();
};
</script>
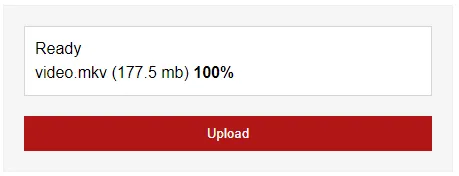
This second method is called “chunking” – Splitting a large file and uploading them in smaller chunks. While it may sound difficult, there is thankfully an open-source library called Plupload that we can use. This is pretty much a modified version of the “default Plupload” demo script.
- There are only 2 HTML elements here.
<div id="list">Upload file list and progress.<input id="pick">Click to pick files for upload.
- Captain Obvious. Load Plupload from the CDN.
- Initiate Plupload on page load. Not going to explain line by line, but this basically starts the upload immediately after choosing a file.
That is the gist of it, read the official documentation (links in the extra section below) if you need more customizations.
2B) SERVER-SIDE UPLOAD HANDLER
<?php
// (A) HELPER FUNCTION - SERVER RESPONSE
function verbose ($ok=1, $info="") {
  if ($ok==0) { http_response_code(400); }
  exit(json_encode(["ok"=>$ok, "info"=>$info]));
}

// (B) INVALID UPLOAD
if (empty($_FILES) || $_FILES["file"]["error"]) {
  verbose(0, "Failed to move uploaded file.");
}

// (C) UPLOAD DESTINATION - CHANGE FOLDER IF REQUIRED!
$filePath = __DIR__ . DIRECTORY_SEPARATOR . "uploads";
if (!file_exists($filePath)) { if (!mkdir($filePath, 0777, true)) {
  verbose(0, "Failed to create $filePath");
}}
$fileName = isset($_REQUEST["name"]) ? $_REQUEST["name"] : $_FILES["file"]["name"];
$filePath = $filePath . DIRECTORY_SEPARATOR . $fileName;

// (D) DEAL WITH CHUNKS
$chunk = isset($_REQUEST["chunk"]) ? intval($_REQUEST["chunk"]) : 0;
$chunks = isset($_REQUEST["chunks"]) ? intval($_REQUEST["chunks"]) : 0;
$out = @fopen("{$filePath}.part", $chunk == 0 ? "wb" : "ab");
if ($out) {
  $in = @fopen($_FILES["file"]["tmp_name"], "rb");
  if ($in) { while ($buff = fread($in, 4096)) { fwrite($out, $buff); } }
  else { verbose(0, "Failed to open input stream"); }
  @fclose($in);
  @fclose($out);
  @unlink($_FILES["file"]["tmp_name"]);
} else { verbose(0, "Failed to open output stream"); }

// (E) CHECK IF FILE HAS BEEN UPLOADED
if (!$chunks || $chunk == $chunks - 1) { rename("{$filePath}.part", $filePath); }
verbose(1, "Upload OK");
Once again, this is pretty much a modified version of the demo upload handler. Not going to explain line-by-line, but how this works essentially:
- Create an empty
.partfile on the first chunk. - Append chunks into the
.partfile as they are being uploaded. - When all the chunks are assembled, rename the
.partfile back to what it’s supposed to be.
Done! You now have a system that is capable of handling large file uploads.
METHOD 3) RESUMABLE UPLOAD
3A) HTML & JAVASCRIPT
<!-- (A) UPLOAD BUTTON & LIST -->
<form>
  <div id="list"></div>
  <input type="button" id="upBrowse" value="Browse">
  <input type="button" id="upToggle" value="Pause OR Continue">
</form>

<!-- (B) LOAD FLOWJS -->
<script src="https://cdnjs.cloudflare.com/ajax/libs/flow.js/2.14.1/flow.min.js"></script>
<script>
// (C) INIT FLOWJS
window.onload = () => {
  // (C1) NEW FLOW OBJECT
  var flow = new Flow({
    target: "3c-resumable.php",
    chunkSize: 1024*1024, // 1MB
    singleFile: true
  });

  if (flow.support) {
    // (C2) ASSIGN BROWSE BUTTON
    flow.assignBrowse(document.getElementById("upBrowse"));
    // OR DEFINE DROP ZONE
    // flow.assignDrop(document.getElementById("upDrop"));

    // (C3) ON FILE ADDED
    flow.on("fileAdded", (file, evt) => {
      let fileslot = document.createElement("div");
      fileslot.id = file.uniqueIdentifier;
      fileslot.innerHTML = `${file.name} (${file.size}) - <strong>0%</strong>`;
      document.getElementById("list").appendChild(fileslot);
    });

    // (C4) ON FILE SUBMITTED (ADDED TO UPLOAD QUEUE)
    flow.on("filesSubmitted", (arr, evt) => flow.upload());

    // (C5) ON UPLOAD PROGRESS
    flow.on("fileProgress", (file, chunk) => {
      let progress = (chunk.offset + 1) / file.chunks.length * 100;
      progress = progress.toFixed(2) + "%";
      let fileslot = document.getElementById(file.uniqueIdentifier);
      fileslot = fileslot.getElementsByTagName("strong")[0];
      fileslot.innerHTML = progress;
    });

    // (C6) ON UPLOAD SUCCESS
    flow.on("fileSuccess", (file, message, chunk) => {
      let fileslot = document.getElementById(file.uniqueIdentifier);
      fileslot = fileslot.getElementsByTagName("strong")[0];
      fileslot.innerHTML = "DONE";
    });

    // (C7) ON UPLOAD ERROR
    flow.on("fileError", (file, message) => {
      let fileslot = document.getElementById(file.uniqueIdentifier);
      fileslot = fileslot.getElementsByTagName("strong")[0];
      fileslot.innerHTML = "ERROR";
    });

    // (C8) PAUSE/CONTINUE UPLOAD
    document.getElementById("upToggle").onclick = () => {
      if (flow.isUploading()) { flow.pause(); }
      else { flow.resume(); }
    };
  }
};
</script>
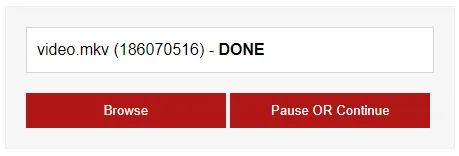
You should be familiar with this last method – Resumable uploads. Yep, not going to reinvent the wheel. Using FlowJS here to drive the resumable upload.
- The HTML only has 3 elements.
<div id="list">Upload file list.<input id="upBrowse">Upload button.<input id="upToggle">Pause/resume button.
- Load the FlowJS library.
- Initiate FlowJS, not going to run through line-by-line again. But just like Plupload, this starts uploading once a file is selected. Read their documentation if you want the full list of settings and events. Links below.
3B) DOWNLOAD FLOW PHP SERVER
Next, we will build the server side. Don’t need to fret, FlowJS has a PHP library as well.
- Download and install Composer if you have not done so.
- Open the command line, navigate to your project folder.
- Run
composer require flowjs/flow-php-server.
That’s all. Composer will fetch the latest version into the vendor/ folder.
3C) FLOW PHP UPLOAD HANDLER
<?php
// (A) INIT PHP FLOW
require __DIR__ . DIRECTORY_SEPARATOR . "vendor" . DIRECTORY_SEPARATOR . "autoload.php";
$config = new \Flow\Config();
$config->setTempDir(__DIR__ . DIRECTORY_SEPARATOR . "temp");
$request = new \Flow\Request();

// (B) HANDLE UPLOAD
$uploadFolder = __DIR__ . DIRECTORY_SEPARATOR . "uploads" . DIRECTORY_SEPARATOR;
$uploadFileName = uniqid() . "_" . $request->getFileName();
$uploadPath = $uploadFolder . $uploadFileName;
if (\Flow\Basic::save($uploadPath, $config, $request)) {
  // File saved successfully
} else {
  // Not final chunk or invalid request. Continue to upload.
}
Just a small modified version of the official demo once again. Probably shouldn’t use this as-it-is, but a good start nonetheless.
EXTRAS
That’s it for all the upload methods, and here is a section of small extras and links that may be useful to you.
FILE TYPE RESTRICTIONS
All the above examples now accept all kinds of files and extensions. If you want to restrict the file types, I will highly recommend doing a simple server-side check instead.
<?php
$ext = strtoupper(pathinfo($FILE, PATHINFO_EXTENSION));

// LET'S SAY, WE ALLOW ONLY XLS, XLSX
if ($ext!="XLS" || $ext!="XLSX") { exit("INVALID FILE TYPE"); }
LINKS & REFERENCES
- File upload directives in php.ini
- Official documentation for Plupload
- Flow JS
- FlowJS – GitHub
- Flow PHP Server – GitHub
- CDNJS
- Plupload
THE END
Thank you for reading, and we have come to the end of this short tutorial. I hope that it has helped to solve your big upload woes. If you have stuff you like to add to this guide, please feel free to comment below. Good luck and happy coding!

This Tutorial is very helpfull for me thanks a lot.