Welcome to a tutorial on how to create a simple online booking system with Python Flask. This is for you guys who are looking to create a simple reservation system, without involving any crazy database stuff – Read on!
TABLE OF CONTENTS
DOWNLOAD & NOTES
Here is the download link to the example code, so you don’t have to copy-paste everything.
EXAMPLE CODE DOWNLOAD
Just click on “download zip” or do a git clone. I have released it under the MIT license, so feel free to build on top of it or use it in your own project.
SORRY FOR THE ADS...
But someone has to pay the bills, and sponsors are paying for it. I insist on not turning Code Boxx into a "paid scripts" business, and I don't "block people with Adblock". Every little bit of support helps.
Buy Me A Coffee Code Boxx eBooks
PYTHON FLASK ONLINE BOOKING
All right, let us now get into the details of building a booking system with Python Flask. Not going to explain line-by-line, but here’s a quick walkthrough.
QUICK SETUP
- Create a virtual environment
virtualenv venvand activate it –venv\Scripts\activate(Windows)venv/bin/activate(Linux/Mac) - Install required libraries –
pip install flask - For those who are new, the default Flask folders are –
staticPublic files (JS/CSS/images/videos/audio)templatesHTML pages
STEP 1) BOOKING PAGE
1A) THE HTML
<form id="bookForm" onsubmit="return book();">
<label>Name</label>
<input type="text" name="Name" required>
<label>Email</label>
<input type="email" name="Email" required>
<label>Date</label>
<input type="date" name="Date" required>
<input type="submit" value="Go!" disabled id="bookGo">
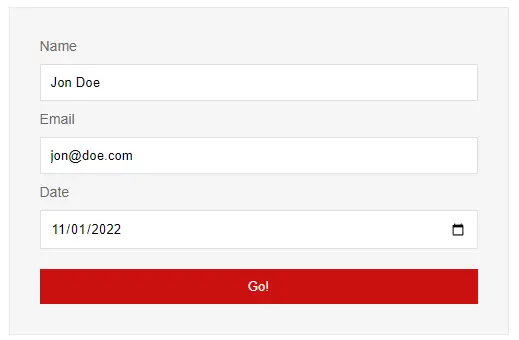
</form>This page should be self-explanatory. Just a simple booking form with the name, email, and date fields. Feel free to add more fields as required.
1B) THE JAVASCRIPT
// (A) SEND BOOKING REQUEST
function book () {
  // (A1) PREVENT MULTIPLE SUBMIT
  document.getElementById("bookGo").disabled = true;

  // (A2) COLLECT FORM DATA
  let data = new FormData(document.getElementById("bookForm"));

  // (A3) SEND!
  fetch("/book", { method:"POST", body:data })
  .then(res => {
    if (res.status==200) { location.href = "/thank"; }
    else {
      console.error(res);
      alert("Opps an error has occured.");
    }
  })
  .catch(err => {
    console.error(err);
    alert("Opps an error has occured.");
  });
  return false;
}

// (B) ON PAGE LOAD
window.onload = () => {
  // (B1) MIN SELECTABLE DATE IS TODAY
  let datepick = document.getElementsByName("Date")[0];
  datepick.min = new Date().toISOString().split("T")[0];

  // (B2) ENABLE FORM
  document.getElementById("bookGo").disabled = false;
};
Just a small bit of Javascript for the booking page.
- Collect the booking form, and send it to the server side with fetch post.
- On window load, we set the minimum reservation date to today. Feel free to tweak this, even set a
maxdate on it.
STEP 2) THANK YOU PAGE
<h1>Thank You</h1>
<p>We have received your reservation request</p>
A dummy “thank you page”.
STEP 3) SERVER-SIDE BOOKING
3A) INITIALIZE
# (A) INIT
# (A1) LOAD REQUIRED PACKAGES
from flask import Flask, render_template, request, make_response
from werkzeug.datastructures import ImmutableMultiDict
import smtplib
from email.mime.multipart import MIMEMultipart
from email.mime.text import MIMEText

# (A2) FLASK INIT
app = Flask(__name__)
# app.debug = True

# (B) SETTINGS
HOST_NAME = "localhost"
HOST_PORT = 80
MAIL_FROM = "sys@site.com"
MAIL_TO = "admin@site.com"
MAIL_SUBJECT = "Booking Request"
The first few sections of the server side should be self-explanatory. We are just loading the required packages, and defining some of the settings stuff. Yes, a gentle reminder here to change the settings to your own.
3B) ROUTES – HTML PAGES
# (C) ROUTES
# (C1) BOOKING PAGE
@app.route("/")
def index():
  return render_template("S1_booking.html")

# (C2) THANK YOU PAGE
@app.route("/thank")
def thank():
  return render_template("S2_thank.html")
Captain Obvious to the rescue:
http://localhost/to serve the booking pageS1_booking.html.http://localhost/thankto serve the “thank you” pageS2_thank.html.
3C) BOOKING PROCESS
# (C3) BOOKING ENDPOINT
@app.route("/book", methods=["POST"])
def foo():
  # (C3-1) EMAIL HEADERS
  mail = MIMEMultipart("alternative")
  mail["Subject"] = MAIL_SUBJECT
  mail["From"] = MAIL_FROM
  mail["To"] = MAIL_TO

  # (C3-2) EMAIL BODY (BOOKING DATA)
  data = dict(request.form)
  msg = "<html><head></head><body>"
  for key, value in data.items():
  msg += key + " : " + value + "<br>"
  msg += "</body></html>"
  mail.attach(MIMEText(msg, "html"))

  # (C3-3) SEND MAIL
  mailer = smtplib.SMTP("localhost")
  mailer.sendmail(MAIL_FROM, MAIL_TO, mail.as_string())
  mailer.quit()

  # (C3-4) HTTP RESPONSE
  res = make_response("OK", 200)
  return res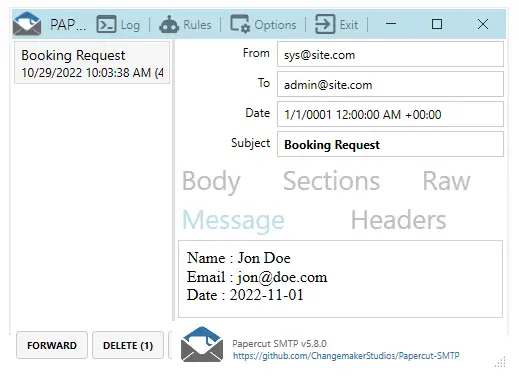
Remember the “send booking form via fetch post”? This part handles the submission – Simply collect the form data, and send it to the email address that you have specified.
3D) START!
# (D) START!
if __name__ == "__main__":
  app.run(HOST_NAME, HOST_PORT)
No explanation is required…
EXTRAS
That’s all for the tutorial, and here is a small section on some extras and links that may be useful to you.
EXTRA) MAIL SEND
Take note that we are using mailer = smtplib.SMTP("localhost") to send the email out. You guys who are on Mac/Linux should not have a problem so long as sendmail is in place. But for Windows users, I will recommend using Papercut SMTP for easy testing.
P.S. smtplib is also capable of using a remote SMTP server, just follow up with their documentation.
THE END
Thank you for reading, and we have come to the end. I hope that it has helped you to better understand, and if you want to share anything with this guide, please feel free to comment below. Good luck and happy coding!