So you are trying to implement “login with Google” in your project, only to find confusing documentation all over the Internet? Well, let’s simplify the steps here.
- Create a new project at the Google API dashboard, set up OAuth consent, and get the API credentials.
- Using the Google API client library, create a “login with Google” link.
- After the user clicks on the link, we verify the status. Get an access token and set it in the user session as a valid login.
- Optionally, we can also get the user’s profile from Google using the token.
Yep, that’s about it, we don’t really need a complex user database. Read on for the details!
TABLE OF CONTENTS
DOWNLOAD & NOTES
Here is the download link to the example code, so you don’t have to copy-paste everything.
EXAMPLE CODE DOWNLOAD
Just click on “download zip” or do a git clone. I have released it under the MIT license, so feel free to build on top of it or use it in your own project.
SORRY FOR THE ADS...
But someone has to pay the bills, and sponsors are paying for it. I insist on not turning Code Boxx into a "paid scripts" business, and I don't "block people with Adblock". Every little bit of support helps.
Buy Me A Coffee Code Boxx eBooks
PHP LOGIN WITH GOOGLE
All right, let us now into the details of using PHP to “login with Google”.
TUTORIAL VIDEO
STEP 1) REGISTRATION & SETUP
1A) CREATE NEW PROJECT
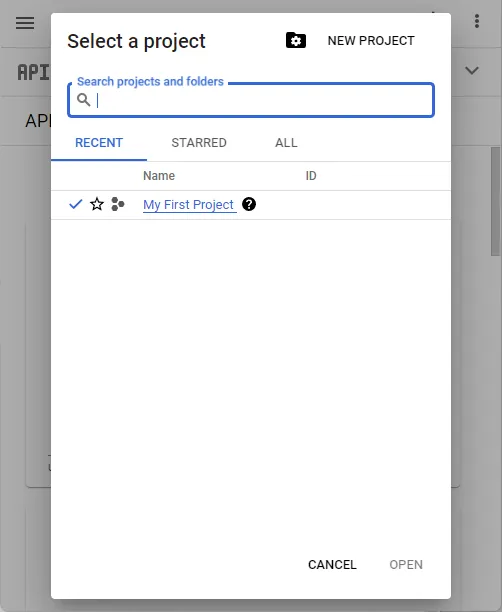
- First, head over to Google API Console.
- Create a new project, or select an existing one.
1B) OAUTH CONSENT
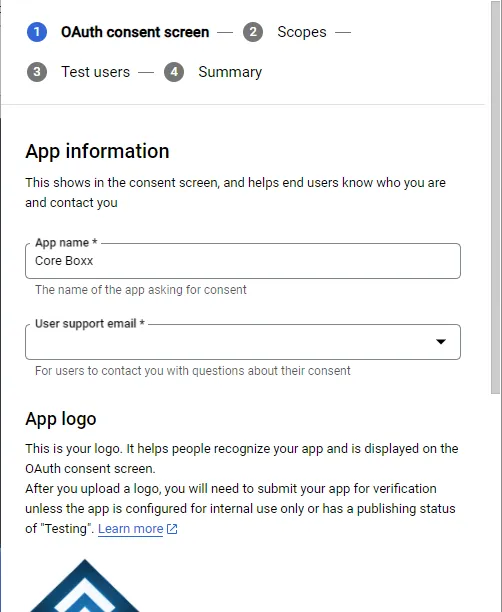
- Next, go under “OAuth consent screen”.
- Fill in your app info.
- Scopes can be left blank.
- Under “Test Users”, add your own Gmail account.
- Friendly reminder – DO NOT PUBLISH YOUR APP UNTIL IT IS READY.
1C) API CREDENTIALS
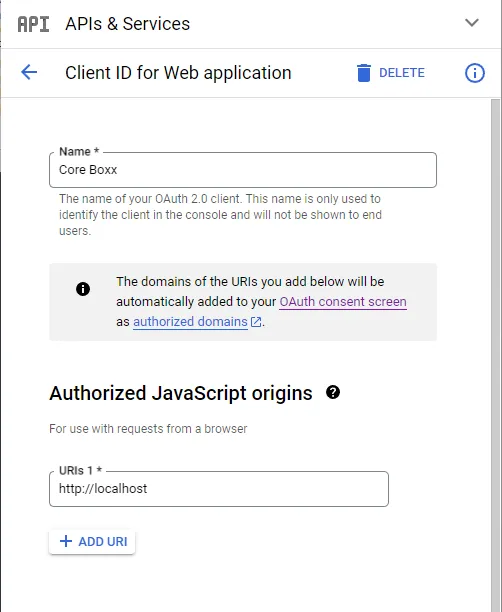
- Finally, go under “Credentials”.
- Create credentials > OAuth client ID.
- Set the name of your app, set the origin as
http://localhostfor testing. - Set redirect URL as
http://localhost/3-login.php. - After saving, Google will give you the client ID and secret. No need to write on a piece of paper, we can check back at any time. 😆
1D) DOWNLOAD API CLIENT LIBRARY
Create your project folder, and install Composer if you have not already done so.
- Open the command line (or terminal).
- Navigate to your project folder –
cd PATH/MY/PROJECT/ - Run
composer require google/apiclient
That’s all. Composer will automatically download the latest version of the API client into the vendor/ folder.
STEP 2) GOOGLE API CLIENT LIBRARY
<?php
// (A) LOAD GOOGLE CLIENT LIBRARY
require("vendor/autoload.php");

// (B) NEW GOOGLE CLIENT
$goo = new Google\Client();
$goo->setClientId("YOUR-ID");
$goo->setClientSecret("YOUR-SECRET");
$goo->addScope("email");
$goo->addScope("profile");
$goo->setRedirectUri("http://localhost/3-login.php");
Now that you have completed the “trial by registration”, paste your client ID and secret into this script. Yep, this snippet pretty much just loads the library and creates a $goo = new Google\Client()… So we don’t have to repeat this all over the place.
STEP 3) LOGIN PAGE
<?php
// (A) ALREADY SIGNED IN
session_start();
if (isset($_SESSION["token"])) {
  header("Location: 4-home.php"); exit;
}

// (B) ON LOGIN - PUT TOKEN INTO SESSION
require "2-google.php";
if (isset($_GET["code"])) {
  $token = $goo->fetchAccessTokenWithAuthCode($_GET["code"]);
  if (!isset($token["error"])) {
    $_SESSION["token"] = $token;
    header("Location: 4-home.php"); exit;
  }
}

// (C) SHOW LOGIN PAGE ?>
<!DOCTYPE html>
<html>
  <head>
    <title>Login With Google</title>
  </head>
  <body>
    <?php if (isset($token["error"])) { ?>
    <div><?= print_r($token); ?></div>
    <?php } ?>

    <a href="<?= $goo->createAuthUrl() ?>">Login with Google</a>
  </body>
</html>
The order of the login page is a little messy, but it is easier to study in this order:
- (A) Self-explanatory. If the user is already signed in, redirect to the home page.
- (B & C) Load the API library, use
$goo->createAuthUrl()to create the “login with Google” link. - (B) After the user clicks on the link.
- Google will return
$_GET["code"]. - We use
$token = $goo->fetchAccessTokenWithAuthCode()to verify the login status, a valid login will not have error messages –!isset($token["error"]). - If it is valid, we put the token into the session and take it as a valid login –
$_SESSION["token"] = $token.
- Google will return
STEP 4) GET USER PROFILE
<?php
// (A) NOT LOGGED IN
session_start();
if (!isset($_SESSION["token"])) {
  header("Location: 3-login.php"); exit;
}

// (B) TOKEN EXPIRED - TO LOGIN PAGE
require "2-google.php";
$goo->setAccessToken($_SESSION["token"]);
if ($goo->isAccessTokenExpired()) {
  unset($_SESSION["token"]);
  header("Location: 3-login.php"); exit;
}

// (C) GET USER PROFILE
$user = (new Google_Service_Oauth2($goo))->userinfo->get();
print_r($user);
Actually, that’s about it for the login. A couple of things to take note of:
- Use
$goo->setAccessToken($_SESSION["token"])and$goo->isAccessTokenExpired()to check if the access token has expired. If it has,unset($_SESSION["token"])and sign the user out. - We can get the user’s profile (name, email, profile picture, etc…) from Google using
(new Google_Service_Oauth2($goo))->userinfo->get().
STEP 5) LOGOUT
// (A) NOT LOGGED IN
session_start();
if (!isset($_SESSION["token"])) {
  header("Location: 3-login.php"); exit;
}

// (B) REMOVE & REVOKE TOKEN
require "2-google.php";
$goo->setAccessToken($_SESSION["token"]);
$goo->revokeToken();
unset($_SESSION["token"]);
// REMOVE YOUR OWN USER SESSION VARIABLES AS WELL
header("Location: 3-login.php"); exit;
Finally, how do we sign the user out?
- Use
$goo->revokeToken()to remove the login token. - Simply
unset($_SESSION["token"]), orsession_destroy()to clean everything out.
EXTRAS
That’s all for the tutorial, and here is a small section on some extras and links that may be useful to you.
TIE-IN WITH USER SYSTEM
Before the not-so-intelligent trolls go “so stupid”, everyone has a different user system and different ways to process login/logout/authentication – It is impossible to give a “one size fits all solution”. I can only provide some general advice, you will need to figure the rest out yourself. If you don’t have a user system, check out the links below.
- I will recommend adding a “Google ID” field to the existing user table.
- Modify
3-login.php. After the user signs in, get the user info –userinfo->get().- Check the Google ID against the database. Sign in if a user has already tied the account to Google ID.
- If there are no matches for the Google ID and email – Automatically create a new account, activate it, and log in.
- If there are no matches for the Google ID, but has a matching email – Tie the Google ID to the email/user account.
- At this stage, we can actually
revokeToken(). - Sign in the user, using your existing mechanics –
$_SESSIONor JWT or whatever.
ACTIVATE YOUR PROJECT!
- Head back to the Google API console.
- Credentials > Change the origin and redirect URLs to your live server.
- Publish.
LINKS & REFERENCES
- Simple User Login In PHP MySQL – Code Boxx
- JWT Login – Code Boxx
- Google API Console
- Google API Client Library
THE END
Thank you for reading, and we have come to the end. I hope that it has helped you to better understand, and if you want to share anything with this guide, please feel free to comment below. Good luck and happy coding!