Welcome to a tutorial on how to create a simple live chat application with PHP and WebSockets. Looking to add live chat features to your website or portal? Let us walk through an example in this guide – Read on!
TABLE OF CONTENTS
DOWNLOAD & NOTES
Here is the download link to the example code, so you don’t have to copy-paste everything.
EXAMPLE CODE DOWNLOAD
Just click on “download zip” or do a git clone. I have released it under the MIT license, so feel free to build on top of it or use it in your own project.
SORRY FOR THE ADS...
But someone has to pay the bills, and sponsors are paying for it. I insist on not turning Code Boxx into a "paid scripts" business, and I don't "block people with Adblock". Every little bit of support helps.
Buy Me A Coffee Code Boxx eBooks
PHP LIVE CHAT
All right, let us now get into more details on the PHP live chat.
VIDEO TUTORIAL
DOWNLOAD RATCHET WEBSOCKET LIBRARY
- As above, a copy of Ratchet is required.
- An easy way is to use Composer to fetch the latest version.
- Open the command line, navigate to your HTTP folder –
cd YOUR-HTTP-FOLDER. - Run
composer require cboden/ratchet. This will automatically download the latest version into thevendor/folder.
PART 1) PHP WEBSOCKET LIVE CHAT
<?php
// (A) COMMAND LINE ONLY
// CREDITS : https://stackoverflow.com/questions/933367/php-how-to-best-determine-if-the-current-invocation-is-from-cli-or-web-server
function is_cli () {
  if (php_sapi_name()==="cli") { return true; }
  if (defined("STDIN")) { return true; }
  if (array_key_exists("SHELL", $_ENV)) { return true; }
  if (!array_key_exists("REQUEST_METHOD", $_SERVER)) { return true; }
  if (empty($_SERVER["REMOTE_ADDR"]) && !isset($_SERVER["HTTP_USER_AGENT"]) && count($_SERVER["argv"])>0) { return true; }
  return false;
}
if (!is_cli()) { exit("Please run this in the command line."); }

// (B) LOAD RATCHET
// https://github.com/ratchetphp/Ratchet
// composer require cboden/ratchet
require "vendor/autoload.php";
use Ratchet\MessageComponentInterface;
use Ratchet\ConnectionInterface;
use Ratchet\Server\IoServer;
use Ratchet\Http\HttpServer;
use Ratchet\WebSocket\WsServer;

// (C) CHAT CLASS
class Chat implements MessageComponentInterface {
  // (C1) PROPERTIES
  private $debug = true; // debug mode
  protected $clients; // connected clients

  // (C2) CONSTRUCTOR - INIT CLIENTS LIST
  public function __construct () {
    $this->clients = new \SplObjectStorage;
    if ($this->debug) { echo "Chat server started.\r\n"; }
  }

  // (C3) ON CLIENT CONNECT - STORE INTO $THIS->CLIENTS
  public function onOpen (ConnectionInterface $conn) {
    $this->clients->attach($conn);
    if ($this->debug) { echo "Client connected: {$conn->resourceId}\r\n";  }
  }

  // (C4) ON CLIENT DISCONNECT - REMOVE FROM $THIS->CLIENTS
  public function onClose (ConnectionInterface $conn) {
    $this->clients->detach($conn);
    if ($this->debug) { echo "Client disconnected: {$conn->resourceId}\r\n";  }
  }

  // (C5) ON ERROR
  public function onError (ConnectionInterface $conn, \Exception $e) {
    $conn->close();
    if ($this->debug) { echo "Client error: {$conn->resourceId} | {$e->getMessage()}\r\n";  }
  }

  // (C6) ON RECEIVING MESSAGE - SEND TO EVERYONE
  public function onMessage (ConnectionInterface $from, $msg) {
    $msg = strip_tags($msg);
    if ($this->debug) { echo "Received message from {$from->resourceId}: {$msg}\r\n"; }
    foreach ($this->clients as $client) { $client->send($msg); }
  }
}

// (D) START!
$server = IoServer::factory(new HttpServer(new WsServer(new Chat())), 8080); // @CHANGE if not port 8080
$server->run();
Not going to explain this line-by-line, but in summary:
- A “safety check” to make sure the script is run from the command line.
- Load and use the Ratchet library.
- The mechanics of the chat application:
- (C3) We store all clients into
$this->clientswhen they connect to the WebSocket server. - (C4) Remove the clients from
$this->clientswhen they disconnect. - (C6) On receiving a message from any client, we loop through
$this->clientsand forward the message to everyone.
- (C3) We store all clients into
- Start the live chat server.
Yep. That’s all for the “complicated chat server”.
PART 2) LIVE CHAT PAGE
2A) THE HTML
<div id="chat-wrap">
  <!-- (A) CHAT MESSAGES -->
  <div id="chat-messages"></div>

  <!-- (B) SET NAME -->
  <form id="chat-name" onsubmit="return chat.start()">
    <input type="text" id="chat-name-set" placeholder="What is your name?" value="Jon Doe" required>
    <input type="submit" id="chat-name-go" value="Start" disabled>
  </form>

  <!-- (C) SEND MESSAGE -->
  <form id="chat-send" onsubmit="return chat.send()">
    <input type="text" id="chat-send-text" placeholder="Enter message" required>
    <input type="submit" id="chat-send-go" value="Send">
  </form>
</div>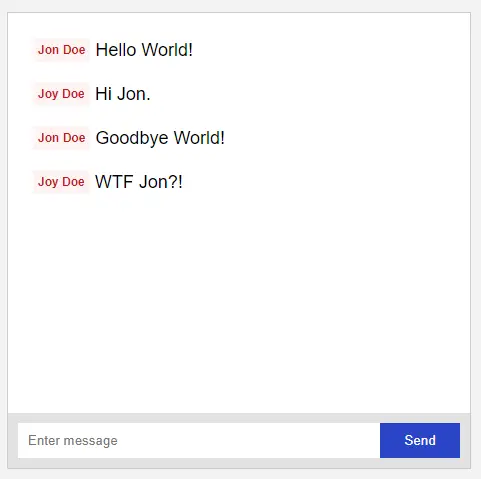
There are 3 parts to the HTML chat interface:
<div id="chat-messages">is where we show all the chat messages.<form id="chat-name">is where we ask the user for a name before launching the chat.<form id="chat-send">is the “send message” box. This is hidden at first, will only show after the user enters a name and successfully connects to the WebSocket server.
2B) LIVE CHAT JAVASCRIPT
var chat = {
  // (A) INIT - GET HTML ELEMENTS
  host : "ws://localhost:8080/", // @CHANGE to your own!
  name : "", // current user name
  socket : null, // websocket object
  hMsg : null, // html chat messages
  hName : null, // html set name form
  hNameSet : null, // html set name field
  hNameGo : null, // html set name submit
  hSend : null, // html send message form
  hSendTxt : null, // html send message field
  hSendGo : null, // html send message submit
  init : () => {
    chat.hMsg = document.getElementById("chat-messages");
    chat.hName = document.getElementById("chat-name");
    chat.hNameSet = document.getElementById("chat-name-set");
    chat.hNameGo = document.getElementById("chat-name-go");
    chat.hSend = document.getElementById("chat-send");
    chat.hSendTxt = document.getElementById("chat-send-text");
    chat.hSendGo = document.getElementById("chat-send-go");
    chat.hNameGo.disabled = false;
  },

  // (B) SWAP BETWEEN SET NAME/SEND MESSAGE FORM
  swap : direction => {
    if (direction) {
      chat.hName.classList.add("hide");
      chat.hSend.classList.remove("hide");
    } else {
      chat.hSend.classList.add("hide");
      chat.hName.classList.remove("hide");
    }
  },

  // (C) START CHAT
  start : () => {
    // (C1) SET NAME + SWAP HTML FORM
    chat.name = chat.hNameSet.value;
    chat.swap(1);
    chat.hSendGo.disabled = true;

    // (C2) CREATE WEB SOCKET
    chat.socket = new WebSocket(chat.host);

    // (C3) ON OPEN - ENABLE CHAT
    chat.socket.onopen = e => chat.hSendGo.disabled = false;

    // (C4) ON CLOSE - SWAP BACK TO "SET NAME"
    chat.socket.onclose = e => chat.swap(0);

    // (C5) ON RECEIVING DATA - UPDATE HTML CHAT
    chat.socket.onmessage = e => {
      let msg = JSON.parse(e.data),
      row = document.createElement("div");
      row.className = "chat-row";
      row.innerHTML = `<div class="chat-name">${msg.n}</div><div class="chat-msg">${msg.m}</div>`;
      chat.hMsg.appendChild(row);
    };

    // (C6) ON ERROR
    chat.socket.onerror = e => {
      chat.swap(0);
      console.error(e);
      alert(`Failed to connect to ${chat.host}`);
    };

    return false;
  },

  // (D) SEND MESSAGE
  send : () => {
    chat.socket.send(JSON.stringify({
      n: chat.name,
      m: chat.hSendTxt.value
    }));
    chat.hSendTxt.value = "";
    return false;
  }
};
window.onload = chat.init;
This is yet another “massive script”, but keep calm and look carefully – The var chat object literally contains all the mechanics to run the live chat.
init()Runs on window load. All it does is literally get all the HTML elements.swap()Swap the HTML interface between “set name” and “send message”.start()When the user enters the name and clicks on “start”. Long story short, create a WebSocket object, connect to the server, and update the HTML chat on receiving messages.send()Self-explanatory. Send a chat message to the server.
EXTRAS
That’s all for this guide, and here is a small section on some extras that may be useful to you.
IMPROVEMENT IDEAS
This is ultimately a simple example, a lot of changes can be done to make it better.
- Do a “unique name check” after connecting to the server to make sure that there are no clashes.
- Announce when users connect/disconnect from the chat.
- Save the messages to the database, or store them in the browser.
- If you want to create “chat rooms”, a possibility is to:
- Turn
$clientsinto a nested array in1-chat-server.php. For example,$clients["PUBLIC"] = [],$clients["TECH"] = [],$clients["LIFE"] = []. - On connect, the client needs to provide the group name, or we will put them into
PUBLICby default. - When the client sends a message, forward it to everyone in the group only.
- Turn
Yep, the possibilities are endless – It is up to you to complete your own system now.
DYNAMIC PROPERTIES
- At the time of writing, PHP 8.2+ throw a lot of “creation of dynamic property is deprecated” for the PHP Ratchet library. If you do not know what that means, follow up with this.
- The script has set
error_reporting(E_ALL & ~E_DEPRECATED)to mute the deprecation notices. - Not sure if PHP Ratchet will be updated, will keep a look out and change to another sockets library if required.
- Other possible “fixes”:
- Edit the Ratchet library files, add
#[\AllowDynamicProperties]before theclassdefinitions. - Or set
class XYZ extends stdClass
- Edit the Ratchet library files, add
COMPATIBILITY CHECKS
- Arrow Functions – CanIUse
- Template Literals – CanIUse
- WebSocket API – CanIUse
Works across all modern browsers.
LINKS & REFERENCES
- Sockets – PHP
- WebSocket API – MDN
- Ratchet Documentation
THE END
Thank you for reading, and we have come to the end of this guide. That took quite a lot of research, work, and I can easily see why some people are charging money for it… But I hope that this has helped you in your project, and if you want to share anything, please feel free to comment below. Good luck and happy coding!
How to add SSL/TLS and user authentication?
I cannot explain that in one line… Or even in one tutorial. Do a search for “how to setup wss”, “WSS SSL certificate”, “websocket user authentication” on your own. Good luck.
https://code-boxx.com/faq/#help “Answers all over the Internet”
How to send message to specific user?
Not impossible, but substantial changes are required:
1) PHP – On connect and disconnect, propagate resource ID.
2) JS – Keep the list of people in an array.
3) HTML – Update the interface. Show the list of people, click on a person to send a “private message”.
4) JS – Change the send function to also send the resource ID if it is a “private message”.
5) PHP – Modify onmessage to either send a “private message” or “public message”.
Good luck.
Server is running
path is localhost/php-chat/chat-server.php but getting this error :: Please run this in the command line
can you help me pleas :
“Fools despise wisdom and instruction” – Proverbs 1:7
Here, we have another specimen of humanity’s finest “big brain genius”. Who, decided the best course of action is to skip a 5 minutes tutorial and wonder why things don’t work for days. Perhaps, it is to demonstrate their unrivaled talent of bringing suffering upon themselves.
Sadly, this less talented human cannot supersede such a superior level of intelligence. Please help yourself. The step-by-step instructions and an entire setup video guide are right above. 🙄
As humorous as the post is and likelyhood that they didnt read anything, after having read YOUR code, it’s VERY possible that it would give this error even if they did run it from the command line. So, I would probably hold off on any “less than talented human” claims considering you seem to suffer from the same issue when you search for “user-agent” when calling from the command line. In quite a few hosting environments, those will actually be set with “curl/X.x”. You should not be checking for a user agent when calling from command line. That is absurd. However, the check for argv is appropriate and it’s actually the ONLY var you need to be checking for in a command line context. The other 2 you have are complete garbage.
Thanks for reporting the possible hiccup to the less talented humans. Will look for better ways to detect the command line in the next update.
P.S. None of the 500++ tutorials on this site is perfect, it is always a pleasure to see geniuses react. Bless the ones who shed light graciously. While the few who love to flash their “big dong of stellar self-righteousness” are unmannerly, they are entertaining and never get old nonetheless. Cheers! 😆
https://code-boxx.com/faq/#badatti
hi,
i am trying using this chat on live server but i am not able to connection is getting failed this is my url can you please help with this =URL REMOVED=
https://code-boxx.com/faq/#help
https://code-boxx.com/faq/#notwork