Welcome to a tutorial and example on how to create a NodeJS live chat application with WebSockets. Yes, it is possible to build an entire live chat driven by pure Javascript.
The general mechanics of a live chat are:
- Create a WebSocket server to accept and manage the connections.
- Create a live chat page that will connect to the server, send and receive messages.
- When a message is sent to the server, simply forward the message to all connected clients.
It’s really that simple – Read on for the full example!
TABLE OF CONTENTS
DOWNLOAD & NOTES
Here is the download link to the example code, so you don’t have to copy-paste everything.
EXAMPLE CODE DOWNLOAD
Just click on “download zip” or do a git clone. I have released it under the MIT license, so feel free to build on top of it or use it in your own project.
SORRY FOR THE ADS...
But someone has to pay the bills, and sponsors are paying for it. I insist on not turning Code Boxx into a "paid scripts" business, and I don't "block people with Adblock". Every little bit of support helps.
Buy Me A Coffee Code Boxx eBooks
NODEJS LIVE CHAT
All right, let us now get into the live chat example.
PART 1) NODE LIVE CHAT SERVER
// (A) INIT + CREATE WEBSOCKET SERVER AT PORT 8080
var ws = require("ws"),
    wss = new ws.Server({ port: 8080 }),
    users = {};

// (B) ON CLIENT CONNECT
wss.on("connection", (socket, req) => {
  // (B1) REGISTER CLIENT
  let id = 0;
  while (true) {
    if (!users.hasOwnProperty(id)) { users[id] = socket; break; }
    id++;
  }

  // (B2) DEREGISTER CLIENT ON DISCONNECT
  socket.on("close", () => delete users[id]);

  // (B3) FORWARD MESSAGE TO ALL ON RECEIVING MESSAGE
  socket.on("message", msg => {
    let message = msg.toString().replace(/(<([^>]+)>)/gi, "");
    for (let u in users) { users[u].send(message); }
  });
});
First, we need the WebSocket module to make this work, run npm install ws in your project folder. Then how this works is very simple:
- Load the
wsmodule, create a WebSocket server. Take note of the emptyusersobject here. - Handle the live chat.
- When a user connects to the WebSocket server, “save” the connection into
users. - When the user disconnects, we remove the connection from
users. - Finally, when the user sends a message to the server, we simply forward it to all connected clients.
- When a user connects to the WebSocket server, “save” the connection into
PART 2A) LIVE CHAT HTML CLIENT PAGE
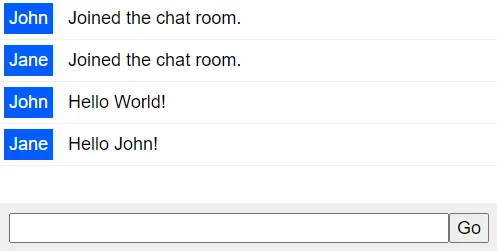
<!-- (A) CHAT HISTORY -->
<div id="chatShow"></div>

<!-- (B) CHAT FORM -->
<form id="chatForm" onsubmit="return chat.send();">
  <input id="chatMsg" type="text" required disabled>
  <input id="chatGo" type="submit" value="Go" disabled>
</form>
This should be self-explanatory, just a simple HTML chat page.
<div id="chatShow">is where we show the chat messages.<form id="chatForm">is the HTML form where we enter and send a message.
PART 2B) LIVE CHAT CLIENT JAVASCRIPT
var chat = {
  // (A) INIT CHAT
  name : null, // user's name
  socket : null, // chat websocket
  ewrap : null, // html chat history
  emsg : null, // html chat message
  ego : null, // html chat go button
  init : () => {
    // (A1) GET HTML ELEMENTS
    chat.ewrap = document.getElementById("chatShow");
    chat.emsg = document.getElementById("chatMsg");
    chat.ego = document.getElementById("chatGo");

    // (A2) USER'S NAME
    chat.name = prompt("What is your name?", "John");
    if (chat.name == null || chat.name=="") { chat.name = "Mysterious"; }

    // (A3) CONNECT TO CHAT SERVER
    chat.socket = new WebSocket("ws://localhost:8080");

    // (A4) ON CONNECT - ANNOUNCE "I AM HERE" TO THE WORLD
    chat.socket.addEventListener("open", () => {
      chat.controls(1);
      chat.send("Joined the chat room.");
    });

    // (A5) ON RECEIVE MESSAGE - DRAW IN HTML
    chat.socket.addEventListener("message", evt => chat.draw(evt.data));

    // (A6) ON ERROR & CONNECTION LOST
    chat.socket.addEventListener("close", () => {
      chat.controls();
      alert("Websocket connection lost!");
    });
    chat.socket.addEventListener("error", err => {
      chat.controls();
      console.log(err);
      alert("Websocket connection error!");
    });
  },

  // (B) TOGGLE HTML CONTROLS
  controls : enable => {
    if (enable) {
      chat.emsg.disabled = false;
      chat.ego.disabled = false;
    } else {
      chat.emsg.disabled = true;
      chat.ego.disabled = true;
    }
  },

  // (C) SEND MESSAGE TO CHAT SERVER
  send : msg => {
    if (msg == undefined) {
      msg = chat.emsg.value;
      chat.emsg.value = "";
    }
    chat.socket.send(JSON.stringify({
      name: chat.name,
      msg: msg
    }));
    return false;
  },

  // (D) DRAW MESSAGE IN HTML
  draw : msg => {
    // (D1) PARSE JSON
    msg = JSON.parse(msg);
    console.log(msg);

    // (D2) CREATE NEW ROW
    let row = document.createElement("div");
    row.className = "chatRow";
    row.innerHTML = `<div class="chatName">${msg["name"]}</div> <div class="chatMsg">${msg["msg"]}</div>`;
    chat.ewrap.appendChild(row);

    // (D3) AUTO SCROLL TO BOTTOM - MAY NOT BE THE BEST...
    window.scrollTo(0, document.body.scrollHeight);
  }
};
window.addEventListener("DOMContentLoaded", chat.init);
This seems a little crazy at first, but keep calm and look carefully.
- (A) On page load,
chat.init()will run. We ask for the user’s name, connect to the chat server, and enable the HTML chat form. - (C) When the user enters a message, we simply send it to the chat server.
- (A5 & D) Remember that the chat server will forward messages to all connected clients? All we do here is display the received message in HTML.
EXTRAS
That’s all for the tutorial, and here is a small section on some extras and links that may be useful to you.
NOT PERFECT. DUH.
Of course, this simple chat is but a barebones example. Plenty can be done to make this better:
- Better security – Restrict the number of users or who can connect to the chat server.
- More security – Remove all HTML and scripts in the messages.
- Name check – Don’t allow duplicate names?
- Restricted words – Automatically censor bad words.
- Announce users who left the chat.
- Better HTML interface – Keep only N messages? Prevent too many messages and browsers from crashing.
COMPATIBILITY CHECKS
- Arrow Functions – CanIUse
- Web Socket – CanIUse
Surprise. Web Socket goes all the back, supported even on the old Internet Exploders.
LINKS & REFERENCES
- WebSocket API – MDN
- WS Module Manual – GitHub
THE END
Thank you for reading, and we have come to the end. I hope that it has helped you to better understand, and if you want to share anything with this guide, please feel free to comment below. Good luck and happy coding!
Hi
How to add an authority to the web socket for security reason from client access?
Good question, there is literally no straight answer – WSS is an entirely different protocol from HTTPS. Cookies and even basic HTTP AUTH are kind of out of the equation, and you will have to “invent” your own means of an “authenticated handshake”.
P.S. Do a search for “websocket cookie”. Although funky, that is one possible solution.
Please can you advise:
I’ve tried a few demo projects but can never get them to work on a server. I think the localhost set up is for when you are just testing nodejs on your own computer?
So I followed the instructions here, and via terminal typed node 1-server.js and got this long error.. (see below)
What do I change the 8080 to so it will run on a server?
Thanks
node:events:491
throw er; // Unhandled ‘error’ event^
Error: listen EADDRINUSE: address already in use :::8080
You already know there is a port clash and know what has to be done to fix it… What is stopping you from doing a “CTRL-F (or CMD-F)” > 8080? That is an interesting brain fart that I have not experienced before. 😆
https://code-boxx.com/faq/#help “Answer is already straight in your face”