Welcome to a tutorial on how to create a QR code login system with PHP MYSQL. So, you are looking for an alternative login method, but don’t want to deal with NFC and all the crazy stuff? Here’s a quick example I have cooked – Read on!
TABLE OF CONTENTS
DOWNLOAD & NOTES
Here is the download link to the example code, so you don’t have to copy-paste everything.
EXAMPLE CODE DOWNLOAD
The example code is released under the MIT license, so feel free to build on top of it or use it in your own project.
SORRY FOR THE ADS...
But someone has to pay the bills, and sponsors are paying for it. I insist on not turning Code Boxx into a "paid scripts" business, and I don't "block people with Adblock". Every little bit of support helps.
Buy Me A Coffee Code Boxx eBooks
PHP QR CODE LOGIN
All right, let us now get into the example of a QR code login system.
TUTORIAL VIDEO
SETUP
This project requires 3 packages:
- Firebase PHP JWT –
composer require firebase/php-jwt - Javascript QR Code Generator (included in the zip file above)
- QR Code Scanner (included in the zip file above)
PART 1) THE DATABASE
1A) USERS TABLE
-- (A) USERS TABLE
CREATE TABLE `users` (
  `id` bigint(20) NOT NULL,
  `email` varchar(255) NOT NULL,
  `password` varchar(255) NOT NULL
) ENGINE=InnoDB DEFAULT CHARSET=utf8mb4;

ALTER TABLE `users`
  ADD PRIMARY KEY (`id`),
  ADD UNIQUE KEY `email` (`email`);

ALTER TABLE `users`
  MODIFY `id` bigint(20) NOT NULL AUTO_INCREMENT;

-- (B) DUMMY USER
INSERT INTO `users` (`id`, `email`, `password`) VALUES (NULL, 'jon@doe.com', 'DOES-NOT-MATTER');
For this example, we will be working with this simple table.
idUser ID. Primary key and auto-increment.emailEmail. Unique to prevent duplicates.passwordDoes not matter actually… This will be used in the “regular login”.
P.S. This tutorial will only touch on the parts of QR code login. If you do not have a “basic login system” yet, check out the links below first.
1B) USERS HASH TABLE
-- (C) USERS HASH TABLE
CREATE TABLE `users_hash` (
  `id` bigint(20) NOT NULL,
  `time` datetime NOT NULL DEFAULT current_timestamp(),
  `hash` varchar(255) NOT NULL
) ENGINE=InnoDB DEFAULT CHARSET=utf8mb4;

ALTER TABLE `users_hash`
  ADD PRIMARY KEY (`id`);
This table is used to store the “passwords for QR code login”.
idUser ID. Primary and foreign key.timeTimestamp when the “password” is created. This is actually optional, but you can use this to impose an expiry for QR codes.hashA random “password” for QR login.
PART 2) USERS LIBRARY
class Users {
  // (A) CONSTRUCTOR - CONNECT DATABASE
  private $pdo = null;
  private $stmt = null;
  public $error = null;
  function __construct () {
    $this->pdo = new PDO(
      "mysql:host=".DB_HOST.";dbname=".DB_NAME.";charset=".DB_CHARSET,
      DB_USER, DB_PASSWORD, [
      PDO::ATTR_ERRMODE => PDO::ERRMODE_EXCEPTION,
      PDO::ATTR_DEFAULT_FETCH_MODE => PDO::FETCH_ASSOC
    ]);
  }

  // (B) DESTRUCTOR - CLOSE CONNECTION
  function __destruct () {
    if ($this->stmt !== null) { $this->stmt = null; }
    if ($this->pdo !== null) { $this->pdo = null; }
  }

  // (C) HELPER - RUN SQL QUERY
  function query ($sql, $data=null) : void {
    $this->stmt = $this->pdo->prepare($sql);
    $this->stmt->execute($data);
  }

  // (D) HELPER - GET USER BY ID OR EMAIL
  function get ($id) {
    $this->query(sprintf(
      "SELECT * FROM `users`
      LEFT JOIN `users_hash` USING (`id`)
      WHERE users.`%s`=?",
      is_numeric($id) ? "id" : "email"
    ), [$id]);
    return $this->stmt->fetch();
  }

  // (E) CREATE LOGIN QR CODE
  function createQR ($id, $length=12) {
    // (E1) CHECK IF USER REGISTERED
    $user = $this->get($id);
    if (!is_array($user)) {
      $this->error = "Invalid user.";
      return false;
    }

    // (E2) GENERATE RANDOM HASH
    $token = substr(preg_replace("/[^A-Za-z0-9]/", "", base64_encode(random_bytes($length * 2))), 0, $length);
    $this->query(
      "REPLACE INTO `users_hash` (`id`, `hash`) VALUES (?,?)",
      [$id, password_hash($token, PASSWORD_DEFAULT)]
    );

    // (E3) RETURN ENCODED TOKEN
    require __DIR__ . "/vendor/autoload.php";
    return Firebase\JWT\JWT::encode([$id, $token], JWT_SECRET, JWT_ALGO);
  }

  // (F) QR CODE LOGIN
  function loginQR ($token) {
    // (F1) DECODE TOKEN
    $valid = true;
    try {
      require __DIR__ . "/vendor/autoload.php";
      $token = Firebase\JWT\JWT::decode(
        $token, new Firebase\JWT\Key(JWT_SECRET, JWT_ALGO)
      );
      $valid = is_object($token);
      if ($valid) {
        $token = (array) $token;
        $valid = count($token)==2;
      }
    } catch (Exception $e) { $valid = false; }

    // (F2) VERIFY TOKEN
    if ($valid) {
      $user = $this->get($token[0]);
      $valid = (is_array($user) && password_verify($token[1], $user["hash"]));
    }

    // (F3) SESSION START
    if ($valid) {
      $_SESSION["user"] = $user;
      unset($_SESSION["user"]["password"]);
      unset($_SESSION["user"]["hash"]);
      unset($_SESSION["user"]["time"]);
      return true;
    }

    // (F4) NADA
    $this->error = "Invalid token";
    return false;
  }
}

// (G) DATABASE SETTINGS - CHANGE TO YOUR OWN!
define("DB_HOST", "localhost");
define("DB_NAME", "test");
define("DB_CHARSET", "utf8mb4");
define("DB_USER", "root");
define("DB_PASSWORD", "");

// (H) JWT SETTINGS
define("JWT_SECRET", "YOUR-SECRET-KEY"); // CHANGE TO YOUR OWN!
define("JWT_ALGO", "HS256");

// (I) NEW USER OBJECT
$USR = new Users();
Don’t let this “intimidating library” scare you. Keep calm and study slowly:
- (A, B, I) When
$USR = new Users()is created, the constructor will automatically connect to the database. The destructor closes the connection. - (G) Database settings – Change to your own.
- (C & D) Two helper functions.
query()Run an SQL query.get()Get a user by ID or email.
- (E)
createQR()Part 1 of the process. Generate a random hash (random string), and store it in theusers_hashtable. - (F)
loginQR()Part 2 of the process. Use this to validate QR code scans, and login accordingly. - (H) Change the secret key to your own.
PART 3) CREATE LOGIN QR CODE
// (A) GENERATE LOGIN QR TOKEN
require "2-lib.php";
$qrtoken = $USR->createQR(1);
?>

<!-- (B) DRAW QR CODE -->
<div id="qrcode"></div>
<script src="qrcode.min.js"></script>
<script>
var qrcode = new QRCode(document.getElementById("qrcode"), {
  text: "<?=$qrtoken?>",
  width: 300, height: 300,
  colorDark : "#000000",
  colorLight : "#ffffff",
  correctLevel : QRCode.CorrectLevel.H
});
</script>
This should be straightforward.
- We use the library to create the “QR login code” (pretty much just an encoded random string).
- Generate the QR code itself.
P.S. If you want to “modify” the token to contain more information, take note that QR codes have a limit of 300 characters.
PART 4) LOGIN WITH QR CODE
4A) QR SCANNER
<!-- (A) HIDDEN LOGIN FORM -->
<form id="loginForm" method="post" action="4b-login.php">
  <input type="hidden" id="loginToken" name="token">
</form>

<!-- (B) QR SCANNER -->
<div id="qrscanner"></div>
<script src="html5-qrcode.min.js"></script>
<script>
var scanner = new Html5QrcodeScanner("qrscanner", { fps: 10, qrbox: 250 });
scanner.render((txt, res) => {
  document.getElementById("loginToken").value = txt;
  document.getElementById("loginForm").submit();
});
</script>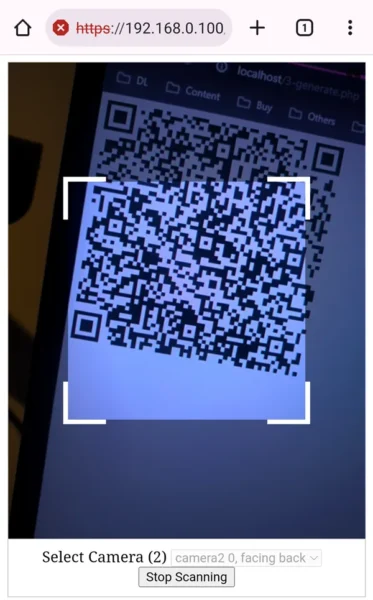
Just a simple scanner page.
- A hidden HTML form that will submit the token for “actual login”.
- Initialize the QR code scanner. On successful scan, place the scanned token into the hidden form and submit it.
4B) QR LOGIN PROCESS
// (A) FOR THIS DEMO - WE USE SIMPLE SESSION BASED LOGIN
session_start();

// (B) CHECKS
if (isset($_SESSION["user"])) {
  // IN YOUR PROJECT - REDIRECT TO HOME PAGE
  // header("location: home.php"); exit();

  // BUT FOR THIS DEMO - WE UNSET THE USER SESSION
  unset($_SESSION["user"]);
}
if (!isset($_POST["token"])) { exit("Invalid Request"); }

// (C) PROCESS LOGIN
require "2-lib.php";
if ($USR->loginQR($_POST["token"])) {
  print_r($_SESSION);
  echo "OK";
} else {
  echo $USR->error;
}- We will use the “traditional session” for this demo. Feel free to adopt JWT or whatever mechanics of your own.
- Check if the user is already signed in, and if a token is present.
- Use the library to validate the token and sign in.
EXTRAS
That’s all for the tutorial, and here is a small section on some extras and links that may be useful to you.
SECURITY RECOMMENDATIONS
Before the “security experts” start to sing their looney tunes – This is only a simple example. There are a lot of things you need to do to ensure a secure system.
- Use HTTPS. A system is only as strong as its weakest link.
- As above, setting an expiry time on the token is a good idea.
- Feel free to add another “nullQR” function – Simply delete the user’s login token when the QR code is lost or stolen, or issue a new one.
- If you want more, impose “one token to one device only”. Tie the token to a specific user agent/device. If the device is suddenly different, it is a stolen token.
LINKS & REFERENCES
- Simple User Login In PHP MYSQL – Code Boxx
- JWT Login Authentication In PHP MYSQL – Code Boxx
THE END
Thank you for reading, and we have come to the end. I hope that it has helped you to better understand, and if you want to share anything with this guide, please feel free to comment below. Good luck and happy coding!