Welcome to a tutorial on how to create a simple expense list with pure Javascript. Yep, there are a ton of such “expense list” examples on the Internet. So here’s one that is slightly different – An offline-capable expense list web app. Read on!
TABLE OF CONTENTS
JAVASCRIPT EXPENSE LIST

All right, let us now get into more details on how the Javascript expense list works.
EXPENSE LIST DEMO
PART 1) THE HTML
<!-- (A) ADD NEW RECORD -->
<form id="add_form" onsubmit="return track.add()">
  <input id="add_date" type="date" required>
  <input id="add_name" type="text" placeholder="Item Name" required>
  <input id="add_amt" type="number" min="1" step="0.01" placeholder="Amount" value="1.00" required>
  <input type="submit" value="Add">
</form>

<!-- (B) RECORDS -->
<div id="rec_wrap"></div>
The HTML layout is very straightforward:
- A
<form>to “add a new expense entry” – Date, item name, and amount. - An empty
<div>to show the expense entries.
PART 2) THE JAVASCRIPT
2A) PROPERTIES
var track = {
  // (A) PROPERTIES
  data : {},    // expenses data
  hDate : null, // html add item date
  hName : null, // html add item name
  hAmt : null,  // html add item amount
  hWrap : null, // html records wrapper
};
The var track object will contain all the mechanics that drive the app. At the very top of the script, we begin by defining the properties.
track.dataAn object to hold the expense entries. Will go through more below in 2E.track.hSOMETHINGReference to the HTML elements.
2B) SAVE EXPENSE ENTRIES
// (B) SUPPORT FUNCTION - SAVE TO LOCAL STORAGE
save : () => localStorage.setItem("expenses", JSON.stringify(track.data)),
Next, we have track.save() that saves track.data into the localStorage. For those who are new, track.data will disappear once the user navigates away from the page. This is why we have to save it into the persistent localStorage whenever changes are made.
2C) INITIALIZE
// (C) INIT
init : () => {
  // (C1) GET HTML ELEMENTS
  track.hDate = document.getElementById("add_date");
  track.hName = document.getElementById("add_name");
  track.hAmt = document.getElementById("add_amt");
  track.hWrap = document.getElementById("rec_wrap");

  // (C2) DEFAULT TODAY'S DATE
  track.hDate.valueAsDate = new Date();

  // (C3) LOAD RECORDS FROM LOCAL STORAGE
  let data = localStorage.getItem("expenses");
  if (data != null) { track.data = JSON.parse(data); }

  // (C4) DRAW RECORDS
  track.draw();
},
window.addEventListener("DOMContentLoaded", track.init);
track.init() will run on page load, and it does what its name implies – Initiate the app.
- (C1) Get the related HTML elements.
- (C2) Set the default date in the “add entry” HTML form to today.
- (C3) Restore the entries from
localStorage. - (C4) Draw the expense records.
2D) DRAW EXPENSE ENTRIES
// (D) DRAW RECORDS
draw : () => {
  // (D1) EMPTY WRAPPER
  track.hWrap.innerHTML = "";

  // (D2) LOOP & DRAW RECORDS
  let row, total = 0;
  for (let date in track.data) { for (let i in track.data[date]) {
    let entry = track.data[date][i];
    total += parseFloat(entry[1]);

    row = document.createElement("div");
    row.className = "row";
    row.innerHTML = `
    <input type="button" value="X" onclick="track.del('${date}', ${i})">
    <div class="name">[${date}] ${entry[0]}</div>
    <div class="amt">$${entry[1]}</div>`;
    track.hWrap.appendChild(row);
  }}

  // (D3) TOTAL
  row = document.createElement("div");
  row.className = "row total";
  row.innerHTML = `<div class="name">Total Expenses</div><div class="amt">$${total.toFixed(2)}</div>`
  track.hWrap.appendChild(row);
},
Right, this seems confusing at first, but keep calm and look closely. We are just looping through track.data, creating the HTML, and inserting them into <div id="rec_wrap">.
2E) ADD EXPENSE ENTRY
// (E) ADD ENTRY
add : () => {
  // (E1) PUSH NEW ENTRY
  if (track.data[track.hDate.value]==undefined) { track.data[track.hDate.value] = []; }
  track.data[track.hDate.value].push([track.hName.value, track.hAmt.value]);

  // (E2) SORT & SAVE TO LOCALSTORAGE
  // CREDITS : https://www.w3docs.com/snippets/javascript/how-to-sort-javascript-object-by-key.html
  track.data = Object.keys(track.data).sort().reduce((r,k) => (r[k] = track.data[k], r), {});
  track.save();

  // (E3) RESET FORM
  track.hName.value = "";
  track.hAmt.value = "1.00";

  // (E4) DRAW RECORDS
  track.draw();
  return false;
},
As you already know track.data holds the expense entries. Here’s the data structure:
track.data = {
  "YYYY-MM-DD" : [["NAME", "AMOUNT"], ["NAME", "AMOUNT"], ...],
  "YYYY-MM-DD" : [["NAME", "AMOUNT"], ["NAME", "AMOUNT"], ...],
  ...
};
That’s right, track.data is an object organized by DATE : ARRAY OF ITEMS. In track.add(), we are simply pushing more entries into this object, sorting it, then updating it into localStorage.
2F) REMOVE EXPENSE ENTRY
// (F) REMOVE ENTRY
del : (date, i) => { if (confirm("Delete Entry?")) {
  track.data[date].splice(i, 1);
  if (track.data[date].length==0) { delete track.data[date]; }
  track.save();
  track.draw();
}}
How do we remove an entry from track.data? We simply splice the selected entry out, and update localStorage.
PART 3) PROGRESSIVE WEB APP
3A) HTML META
<head>
  <!-- ANDROID + CHROME + APPLE + WINDOWS APP -->
  <link rel="icon" href="favicon.png" type="image/png">
  <meta name="mobile-web-app-capable" content="yes">
  <meta name="theme-color" content="white">
  <link rel="apple-touch-icon" href="icon-512.png">
  <meta name="apple-mobile-web-app-capable" content="yes">
  <meta name="apple-mobile-web-app-status-bar-style" content="black">
  <meta name="apple-mobile-web-app-title" content="JS Expense">
  <meta name="msapplication-TileImage" content="icon-512.png">
  <meta name="msapplication-TileColor" content="#ffffff">

  <!-- WEB APP MANIFEST -->
  <!-- https://web.dev/add-manifest/ -->
  <link rel="manifest" href="3a-manifest.json">

  <!-- SERVICE WORKER -->
  <script>
  if ("serviceWorker" in navigator) { navigator.serviceWorker.register("3b-worker.js"); }
  </script>
</head>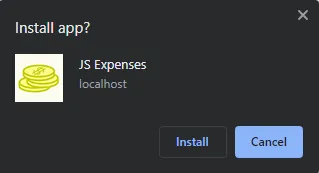
At this stage, we already have a fully functioning expense tracker; This step is completely optional. But to bring it one level up to an “installable progressive web app”, we only need a few more things.
- Specifying the icons is kind of optional. It’s a pain in the “S” as different platforms/browsers use different icon sizes. I usually just define a huge 512X512 icon, and let the platforms resize it.
- Define a web app manifest.
- Install a service worker.
3B) WEB MANIFEST
{
  "short_name": "Expenses",
  "name": "JS Expenses",
  "icons": [{
    "src": "favicon.png",
    "sizes": "64x64",
    "type": "image/png"
  }, {
    "src": "icon-512.png",
    "sizes": "512x512",
    "type": "image/png"
  }],
  "start_url": "1-track-expense.html",
  "scope": "/",
  "background_color": "white",
  "theme_color": "white",
  "display": "standalone"
}
The manifest file should be pretty self-explanatory – It contains data on your app name, icons, and general settings.
3C) SERVICE WORKER
// (A) CREATE/INSTALL CACHE
self.addEventListener("install", evt => {
  self.skipWaiting();
  evt.waitUntil(
    caches.open("JSExpenses")
    .then(cache => cache.addAll([
      "favicon.png",
      "icon-512.png",
      "1-track-expense.html",
      "2-track-expense.css",
      "2-track-expense.js",
      "3a-manifest.json"
    ]))
    .catch(err => console.error(err))
  );
});

// (B) CLAIM CONTROL INSTANTLY
self.addEventListener("activate", evt => self.clients.claim());

// (C) LOAD FROM CACHE FIRST, FALLBACK TO NETWORK IF NOT FOUND
self.addEventListener("fetch", evt => evt.respondWith(
  caches.match(evt.request).then(res => res || fetch(evt.request))
));
For those who are new once again, a “service-worker” is simply Javascript that runs in the background.
- (A & B) In this one, we save the entire project into the browser cache.
- (C) “Hijack” the fetch requests. Load from the cache if the requested file is found, fallback to load from the network if not.
In other words, this worker will help to support “offline mode” – Run from the browser cache.
DOWNLOAD & NOTES

Here is the download link to the example code, so you don’t have to copy-paste everything.
SORRY FOR THE ADS...
But someone has to pay the bills, and sponsors are paying for it. I insist on not turning Code Boxx into a "paid scripts" business, and I don't "block people with Adblock". Every little bit of support helps.
Buy Me A Coffee Code Boxx eBooks
EXAMPLE CODE DOWNLOAD
Click here for the source code on GitHub gist, just click on “download zip” or do a git clone. I have released it under the MIT license, so feel free to build on top of it or use it in your own project.
EXTRA BITS & LINKS

That’s all for the tutorial, and here is a small section on some extras and links that may be useful to you.
NOTES ON PERFORMANCE
A quick note here that localStorage is not a database, it can only save flat strings. In this example, we are saving data by converting an object into a string with JSON.stringify(). To restore the data, we convert a string back to an object with JSON.parse().
This is by all means, not great for performance. If you want a “real Javascript database”, check out indexed databases. Links below.
COMPATIBILITY CHECKS
- Arrow Functions – CanIUse
- Local Storage – CanIUse
- Service Worker – CanIUse
- Add To Home Screen – CanIUse
This example will work on most browsers. But offline support and “install to home screen” will only work on modern “Grade A” browsers.
LINKS & REFERENCES
- Indexed DB API – MDN
- Example on Codepen – Simple Javascript Expense Tracker
THE END

Thank you for reading, and we have come to the end. I hope that it has helped you to better understand, and if you want to share anything with this guide, please feel free to comment below. Good luck and happy coding!
hello, I’m a fan of your work, I already bought one of your books and I’m about to buy another two, but what I would like to know is the theme of your site, because I would like to create a similar one for natives of my language, I am php programmer and I will focus on this to help south america beginners, if you can answer me I appreciate it.
Thanks for the support, Code Boxx is running on WP Astra. A modified “lite version” with jQuery and Block library stripped.