Welcome to a tutorial on how to create an HTML list from a Javascript array or object. Need to display an array of data nicely?
To create an HTML list from an array in Javascript:
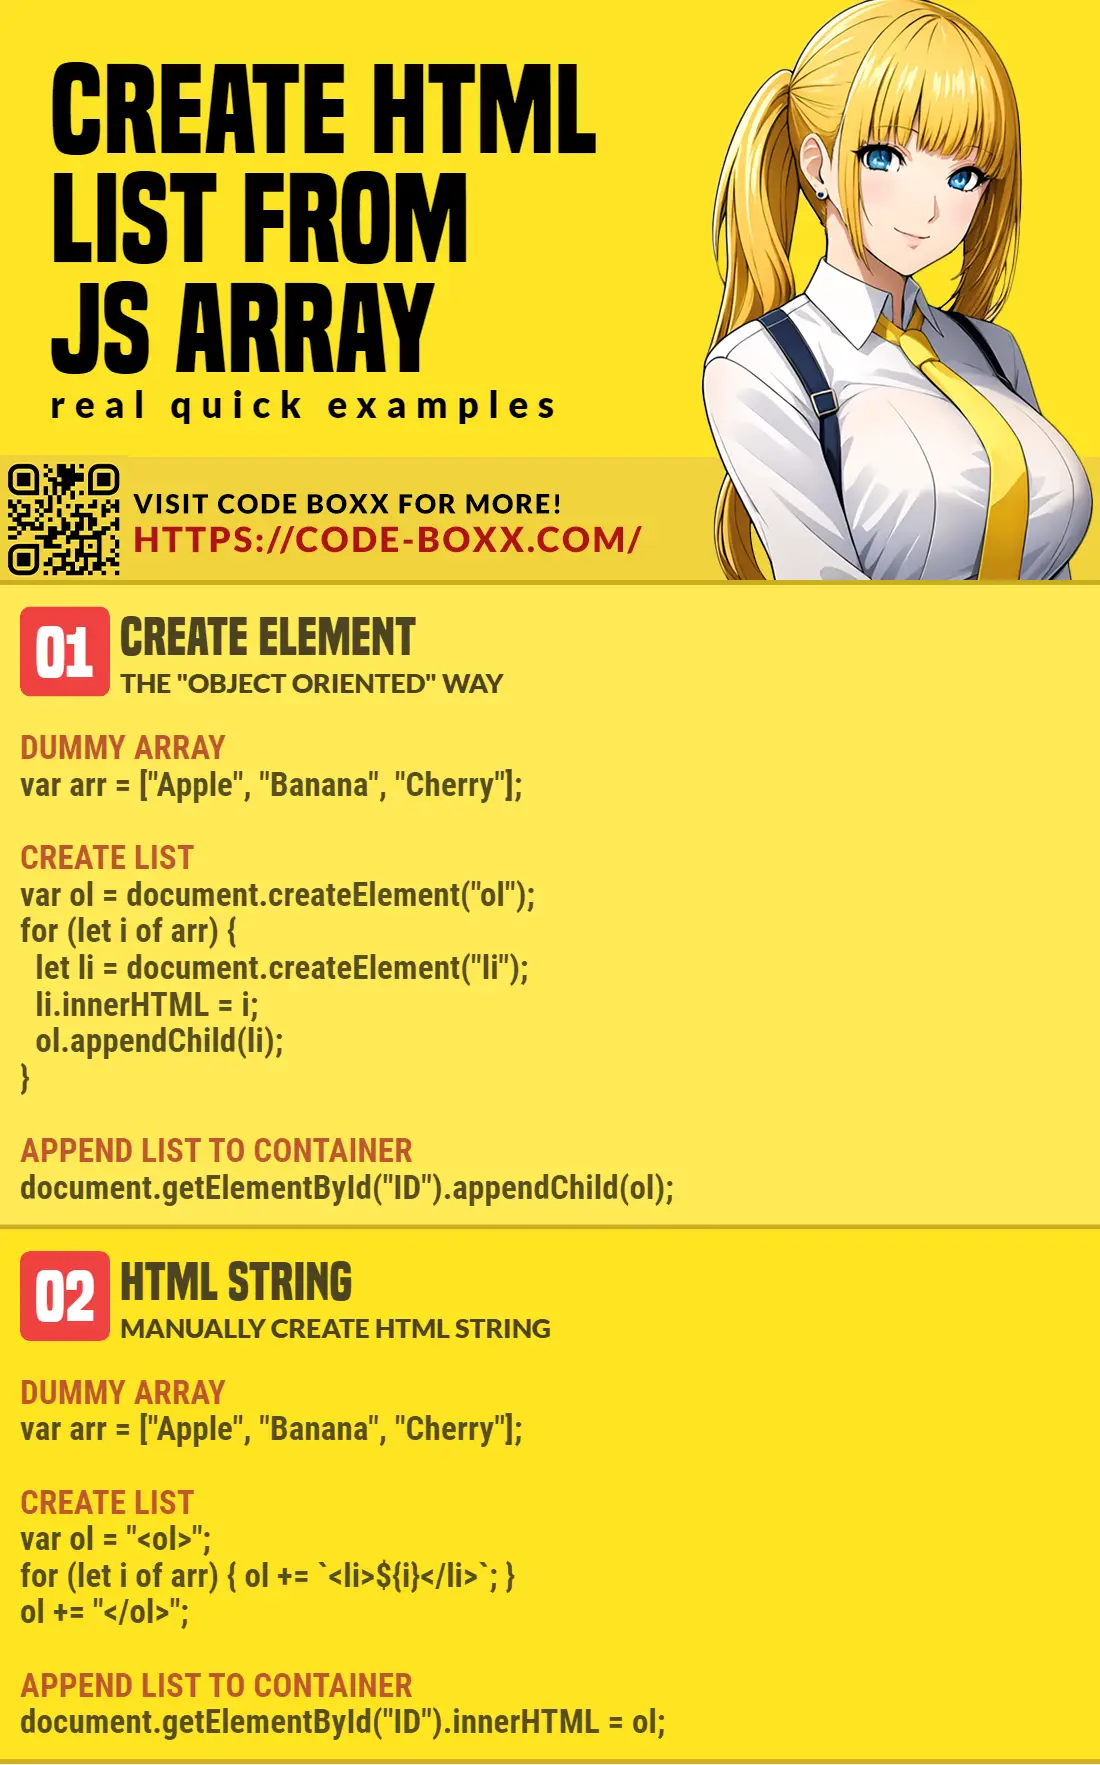
- Create the HTML list
var ol = document.createElement("ol"); - Loop through the array and append list items
for (let i of ARRAY) { let li = document.createElement("li"); li.innerHTML = i; ol.appendChild(li); } - Append the list to where you want
document.getElementById("TARGET").appendChild(ol);
That covers the basics, read on for more examples!
TLDR – QUICK SLIDES
[web_stories_embed url=”https://code-boxx.com/web-stories/create-html-list-from-javascript-array/” title=”Create HTML List From Javascript Array” poster=”https://code-boxx.com/wp-content/uploads/2021/11/STORY-JS-20230518.webp” width=”360″ height=”600″ align=”center”]
Fullscreen Mode – Click Here
TABLE OF CONTENTS
ARRAY/OBJECT TO LIST

All right, let us now get into the examples of generating an HTML list from an array or object.
1) CREATE & APPEND HTML ELEMENTS
<!-- (A) DIV CONTAINER -->
<div id="demoA"></div>

<!-- (B) JAVASCRIPT -->
<script>
// (B1) DUMMY ARRAY
var arr = ["Apple", "Banana", "Cherry"];

// (B2) CREATE LIST
var list = document.createElement("ol");
for (let i of arr) {
  let item = document.createElement("li");
  item.innerHTML = i;
  list.appendChild(item);
}

// (B3) APPEND LIST TO CONTAINER
document.getElementById("demoA").appendChild(list);
</script>
This is the “full version” of the snippet in the introduction – It should be pretty straightforward and self-explanatory.
- Create the list.
- Loop and append the list of items.
- Then attach the entire list to wherever you want.
2) MANUAL HTML STRING
<!-- (A) DIV CONTAINER -->
<div id="demoB"></div>

<!-- (B) JAVASCRIPT -->
<script>
// (B1) DUMMY ARRAY
var arr = ["Apple", "Banana", "Cherry"];

// (B2) CREATE LIST
var list = "<ol>";
for (let i of arr) {
  list += `<li>${i}</li>`;
}
list += "</ol>";

// (B3) APPEND LIST TO CONTAINER
document.getElementById("demoB").innerHTML = list;
</script>
If the above “object-oriented way” of creating HTML elements is not your cup of tea, here is the alternative – We manually generate a string of HTML list, then attach it to the container.
3) NESTED OBJECT
<!-- (A) DIV CONTAINER -->
<div id="demoC"></div>

<!-- (B) JAVASCRIPT -->
<script>
// (B1) DUMMY OBJECT
var obj = {
  "Fruits" : ["Apple", "Banana", "Cherry"],
  "Vegetables" : ["Celery", "Cabbage", "Carrot"]
};

// (B2) CREATE LIST
var list = document.createElement("ul");
for (let i in obj) {
  // (B2-1) SUB-LIST HEADING
  let item = document.createElement("li");
  let subitem = document.createElement("strong");
  subitem.innerHTML = i;
  list.appendChild(item);
  item.appendChild(subitem);

  // (B2-2) SUB-LIST ITEMS
  let sublist = document.createElement("ul");
  item.appendChild(sublist);
  for (let j of obj[i]) {
    subitem = document.createElement("li");
    subitem.innerHTML = j;
    sublist.appendChild(subitem);
  }
}

// (B3) APPEND LIST TO CONTAINER
document.getElementById("demoC").appendChild(list);
</script>
Finally, how do we deal with nested objects? This example is seemingly intimidating at first, but keep calm and look through slowly – We are pretty much doing the same thing, looping through the nested object and creating the necessary HTML elements.
DOWNLOAD & NOTES

Here is the download link to the example code, so you don’t have to copy-paste everything.
SORRY FOR THE ADS...
But someone has to pay the bills, and sponsors are paying for it. I insist on not turning Code Boxx into a "paid scripts" business, and I don't "block people with Adblock". Every little bit of support helps.
Buy Me A Coffee Code Boxx eBooks
EXAMPLE CODE DOWNLOAD
Click here for the source code on GitHub gist, just click on “download zip” or do a git clone. I have released it under the MIT license, so feel free to build on top of it or use it in your own project.
EXTRA BITS & LINKS

That’s all for the tutorial, and here is a small section on some extras and links that may be useful to you.
LINKS & REFERENCES
- How To Create and Style HTML List – Code Boxx
- Responsive Horizontal List In HTML CSS – Code Boxx
- Sortable List – Code Boxx
INFOGRAPHIC CHEAT SHEET
THE END

Thank you for reading, and we have come to the end. I hope that it has helped you to better understand, and if you want to share anything with this guide, please feel free to comment below. Good luck and happy coding!