Welcome to a quick tutorial and example on converting the image file format in Javascript – JPG, PNG, WEBP, and GIF. Yes, you have also read correctly. We can convert an image directly in the web browser without uploading it to the server. Read on for the example!
TABLE OF CONTENTS
DOWNLOAD & DEMO
Here is the download link to the example code, so you don’t have to copy-paste everything.
EXAMPLE CODE DOWNLOAD
Click here to download | Example on CodePen
The example code is released under the MIT license, so feel free to build on top of it or use it in your own project.
SORRY FOR THE ADS...
But someone has to pay the bills, and sponsors are paying for it. I insist on not turning Code Boxx into a "paid scripts" business, and I don't "block people with Adblock". Every little bit of support helps.
Buy Me A Coffee Code Boxx eBooks
CONVERT IMAGE DEMO
JAVASCRIPT CONVERT IMAGE FORMAT
All right, let us now get into more details about how the HTML Javascript image converter works.
TUTORIAL VIDEO
THE HTML
<form id="cForm" onsubmit="return convert.read()">
  <label>SELECT FORMAT</label>
  <select id="cFormat">
    <option value="webp">WEBP</option>
    <option value="jpeg">JPG</option>
    <option value="png">PNG</option>
    <option value="gif">GIF</option>
  </select>

  <label>CHOOSE FILE</label>
  <input type="file" id="cFile" accept="image/*" required>

  <input type="submit" value="Go">
</form>
Well, I don’t think this needs much explanation. Just a simple form with 2 fields –
<select id="cFormat">Image format selector.<input type="file" id="cFile">File picker.
THE JAVASCRIPT
var convert = {
  // (A) PROPERTIES
  reader : null, // file reader
  img : null, // selected image

  // (B) READ SELECTED IMAGE
  read : () => {
    convert.reader = new FileReader();
    convert.reader.onload = convert.obj;
    convert.reader.readAsDataURL(
      document.getElementById("cFile").files[0]
    );
    return false;
  },

  // (C) SELECTED IMAGE TO OBJECT
  obj : () => {
   convert.img = new Image();
    convert.img.onload = convert.go;
    convert.img.src = convert.reader.result;
  },

  // (D) CONVERT & DOWNLOAD
  go : () => {
    // (D1) CREATE EMPTY CANVAS
    let canvas = document.createElement("canvas"),
        ctx = canvas.getContext("2d");

    // (D2) DRAW IMAGE ONTO CANVAS
    canvas.width = convert.img.width;
    canvas.height = convert.img.height;
    ctx.drawImage(convert.img, 0, 0);

    // (D3) GET SELECTED IMAGE FORMAT
    let format = document.getElementById("cFormat").value,
        ext = format=="jpeg" ? "jpg" : format ;

    // (D4) CONVERT & "FORCE DOWNLOAD"
    let a = document.createElement("a");
    a.href = canvas.toDataURL(`image/${format}`);
    a.download = `converted.${ext}`;
    a.click();
    a.remove();
  }
};
This looks like a handful, but keep calm and look carefully. It’s just long-winded.
- (B) First, we read the selected image from the file picker.
- (C) Then, convert the selected file into an image object.
- (D1) To do the conversion, we need the help of yet another canvas object…
- (D2) Draw the image object onto the canvas.
- (D3 & D4) To convert and force a download.
- We create an anchor link.
- Attach the canvas data to the anchor link, in the required image format. E.g.
data:image/png;base64,WHATEVER-RAW-IMAGE-DATA - Click on the anchor link to download the converted image.
TLDR – File picker > File Reader > Image Object > Canvas > Anchor Tag
EXTRAS
That’s all for the tutorial, and here is a small section on some extras and links that may be useful to you.
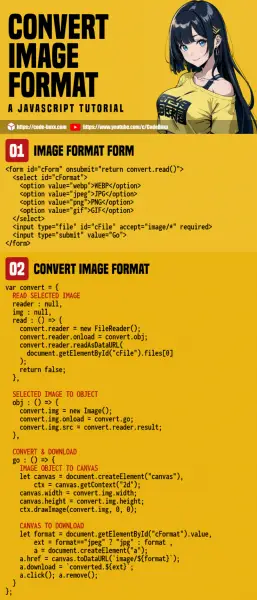
INFOGRAPHIC CHEATSHEET

COMPATIBILITY CHECKS
- Arrow Functions – CanIUse
- File Reader – CanIUse
- Canvas – CanIUse
This example works on all modern “Grade A” browsers.
LINKS & REFERENCES
- Download HTML Canvas As Image – Code Boxx
- How To Read Files In Javascript – Code Boxx
THE END
Thank you for reading, and we have come to the end. I hope that it has helped you to better understand, and if you want to share anything with this guide, please feel free to comment below. Good luck and happy coding!
