Welcome to a tutorial on how to create responsive AJAX tabs with pure HTML, CSS, and JS. Need to create a simple tab that loads the content via AJAX? Well, here is one that uses only pure HTML CSS JS, no third-party frameworks – Read on!
ⓘ I have included a zip file with all the source code at the start of this tutorial, so you don’t have to copy-paste everything… Or if you just want to dive straight in.
TABLE OF CONTENTS
DOWNLOAD & NOTES

Firstly, here is the download link to the example code as promised.
QUICK NOTES
If you spot a bug, feel free to comment below. I try to answer short questions too, but it is one person versus the entire world… If you need answers urgently, please check out my list of websites to get help with programming.
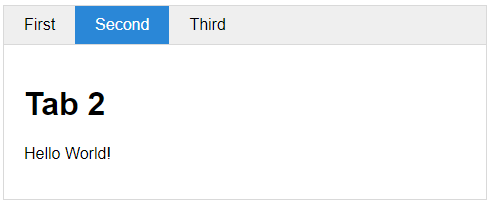
SCREENSHOT
EXAMPLE CODE DOWNLOAD
Click here to download the source code, I have released it under the MIT license, so feel free to build on top of it or use it in your own project.
HOW TO USE
<!-- (A) LOAD CSS + JS -->
<link href="ajax-tabs.css" rel="stylesheet">
<script src="ajax-tabs.js"></script>

<!-- (B) TABS WRAPPER -->
<div class="tabs">
  <ul class="tabHead">
    <li data-url="1-dummy.html">First</li>
    <li data-url="2-dummy.html">Second</li>
    <li data-url="3-dummy.html">Third</li>
  </ul>
</div>

<!-- (C) INIT TABS -->
<script>
atab();
</script>
For you guys who just want to use this as “a plugin”:
- Load the CSS and Javascript. Captain Obvious at your service.
- Create a
<div class="tabs"><ul class="tabHead">wrapper, sandwich the items inside –<li data-url="PAGE-TO-LOAD">TITLE</li>. - Just call
atab()to do the rest of the magic.
SIMPLE AJAX TABS

All right, let us now walk through how the AJAX tab works in more detail.
PART 1) THE JAVASCRIPT
function atab () { for (let tab of document.querySelectorAll(".tabs")) {
  // (A) CREATE TAB BODY SECTION
  let tbody = document.createElement("ul");
  tbody.className = "tabBody";
  tab.appendChild(tbody);

  // (B) TAB HEADER & BODY SECTIONS
  let htabs = tab.querySelectorAll("ul.tabHead > li"),
      btabs = [];

  // (C) TAB SWITCHER FUNCTION
  let switcher = i => {
    // (C1) ALREADY LOADED - SHOW
    if (htabs[i].loaded) {
      for (let j=0; j<htabs.length; j++) {
        if (i==j) {
          htabs[j].classList.add("open");
          btabs[j].classList.add("open");
        } else {
          htabs[j].classList.remove("open");
          btabs[j].classList.remove("open");
        }
      }
    }

    // (C2) AJAX LOAD
    else {
      fetch(htabs[i].dataset.url)
      .then(res=>res.text())
      .then(txt => {
        btabs[i].innerHTML = txt;
        htabs[i].loaded = true;
        switcher(i);
      })
      .catch(err => console.error(err));
    }
  };

  // (D) CLICK TO LOAD TAB
  for (let i=0; i<htabs.length; i++) {
    // (D1) LOADED FLAG + CLICK TO SHOW/LOAD
    htabs[i].loaded = false;
    htabs[i].onclick = () => switcher(i);

    // (D2) CREATE CORRESPONDING BODY TAB
    btabs.push(document.createElement("li"));
    tbody.appendChild(btabs[i]);
  }

  // (E) LOAD FIRST TAB BY DEFAULT, OR USER DEFINED OPEN TAB
  let load = 0;
  for (let i=0; i<htabs.length; i++) {
    if (htabs[i].classList.contains("open")) { load = i; break; }
  }
  switcher(load);
}}
This may appear to be quite a handful at first, but there is only one atab() function here driving the entire AJAX tab. Not going to explain line-by-line, but essentially:
for (let tab of document.querySelectorAll(".tabs"))will get all the<div class="tabs">on the page and loop through them.- (A) We insert the “tab body” section into the wrapper. That is,
<div class="tabs"><ul class="tabHead"></ul><ul class="tabBody"></ul></div>. - (B & D) If there are 3
<li>inside<ul class="tabHead">, we generate 3 corresponding<li>inside<ul class="tabBody">. - (C & D) On clicking a tab header, we use
fetchto load the specified URL into the corresponding tab body; If it is already loaded, we simply show it. - (E) Load the default tab.
PART 2) CSS COSMETICS
/* (A) WRAPPER & SHARED */
.tabs {
  max-width: 600px; /* optional */
  border: 1px solid #d9d9d9;
}
ul.tabHead, ul.tabBody {
  list-style: none;
  padding: 0; margin: 0;
}

/* (B) HEADER TABS */
.tabHead {
  display: flex;x
  border-bottom: 1px solid #d9d9d9;
  background: #efefef;
}
.tabHead li {
  padding: 10px 20px;
  cursor: pointer;
}
.tabHead li.open {
  color: #fff;
  background: #2a87d7;
}

/* (C) CONTENT TABS */
.tabBody li {
  display: none;
  padding: 20px;
  max-height: 300px; overflow: auto; /* optional */
}
.tabBody li.open { display: block; }
The CSS is mostly cosmetic, and the only functional part is pretty much:
- (C) Hide the contents by default
.tabBody li { display: none } - (C) Show the content as the user clicks on a tab
.tabBody li.open { display: block }
EXTRA BITS & LINKS

That’s all for the code, and here are a few small extras that may be useful to you.
SETTING DEFAULT OPEN TAB
<div class="tabs">
  <ul class="tabHead">
    <li data-url="1-dummy.html">First</li>
    <li class="open" data-url="2-dummy.html">Second</li>
    <li data-url="3-dummy.html">Third</li>
  </ul>
</div>
As above, the first tab will open by default. If that is not the case, manually set a class="open" on both the respective header tab.
LINKS & REFERENCES
Looking for more ways to organize your content? Check out my other guides:
- Pure CSS Accordion – Code Boxx
- Text Sliders – Code Boxx
- Simple Responsive Tabs – Code Boxx
THE END

Thank you for reading, and we have come to the end of this guide. I hope that it has helped you to better organize the information in your project, and if you want to share anything with this guide, please feel free to comment below. Good luck and happy coding!