Welcome to a quick tutorial on how to add voice commands to a website using Javascript speech recognition. Ever wonder if it is possible to drive a website using voice commands? Yes, we can use speech recognition and run commands with it… It is also surprisingly pretty easy to do. Read on for an example!
TLDR – QUICK SLIDES
[web_stories_embed url=”https://code-boxx.com/web-stories/voice-command-javascript/” title=”Javascript Voice Command” poster=”https://code-boxx.com/wp-content/uploads/2021/11/STORY-JS-20230518.webp” width=”360″ height=”600″ align=”center”]
Fullscreen Mode – Click Here
TABLE OF CONTENTS
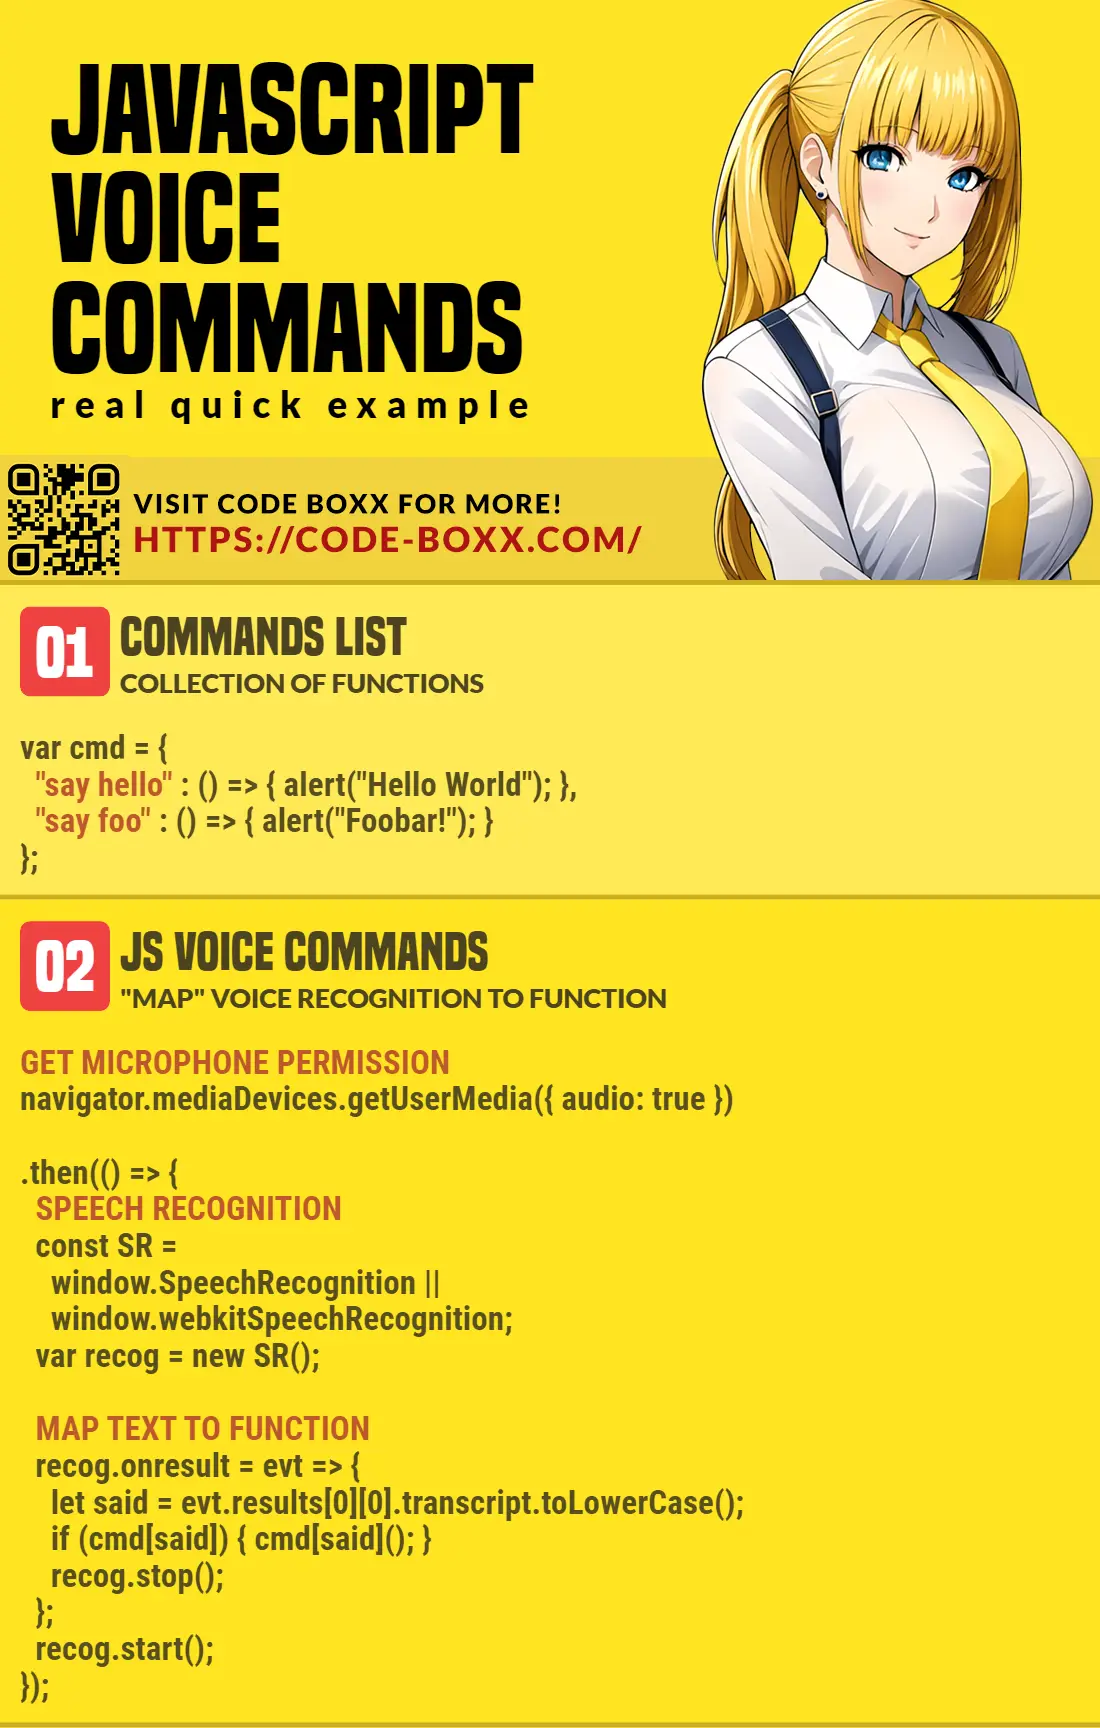
JAVASCRIPT VOICE COMMAND

All right, let us now get into the example of a simple voice command script in Javascript.
THE DEMO
Try “power on”, “power off”, or “say hello”.
PART 1) THE HTML
<!-- (A) DEMO WRAPPER -->
<div id="vwrap"></div>

<!-- (B) DEMO BUTTON -->
<input type="button" id="vbtn" value="Loading" disabled>
<div>Try "power on", "power off", or "say hello".</div>
For this demo, we only have a simple <div id="vwrap"> and <input type="button">.
PART 2) JAVASCRIPT VOICE COMMANDS
var voice = {
  // (A) INIT VOICE COMMAND
  wrap : null, // html demo <div> wrapper
  btn : null, // html demo button
  recog : null, // speech recognition object
  init : () => {
    // (A1) GET HTML ELEMENTS
    voice.wrap = document.getElementById("vwrap");
    voice.btn = document.getElementById("vbtn");

    // (A2) GET MIC ACCESS PERMISSION
    navigator.mediaDevices.getUserMedia({ audio: true })
    .then(stream => {
      // (A3) SPEECH RECOGNITION OBJECT & SETTINGS
      const SpeechRecognition = window.SpeechRecognition || window.webkitSpeechRecognition;
      voice.recog = new SpeechRecognition();
      voice.recog.lang = "en-US";
      voice.recog.continuous = false;
      voice.recog.interimResults = false;

      // (A4) ON SPEECH RECOGNITION - RUN CORRESPONDING COMMAND
      voice.recog.onresult = evt => {
        let said = evt.results[0][0].transcript.toLowerCase();
        if (cmd[said]) { cmd[said](); }
        else { said += " (command not found)"; }
        voice.wrap.innerHTML = said;
        voice.stop();
      };

      // (A5) ON SPEECH RECOGNITION ERROR
      voice.recog.onerror = err => console.error(evt);

      // (A6) READY!
      voice.btn.disabled = false;
      voice.stop();
    })
    .catch(err => {
      console.error(err);
      voice.wrap.innerHTML = "Please enable access and attach a microphone.";
    });
  },

  // (B) START SPEECH RECOGNITION
  start : () => {
    voice.recog.start();
    voice.btn.onclick = voice.stop;
    voice.btn.value = "Speak Now Or Click Again To Cancel";
  },

  // (C) STOP/CANCEL SPEECH RECOGNITION
  stop : () => {
    voice.recog.stop();
    voice.btn.onclick = voice.start;
    voice.btn.value = "Press To Speak";
  }
};
window.addEventListener("DOMContentLoaded", voice.init);
Right, this is probably intimidating to beginners. So I am not going to explain line-by-line, here are the essential parts:
- We run
voice.init()on window load, section A2 is pretty much the “core engine”. - First, we need to ask for permission to access the microphone –
navigator.mediaDevices.getUserMedia({ audio: true }) - Only then, can we properly set up the speech recognition –
voice.recog = new SpeechRecognition(). Changevoice.recog.langif you want to use other languages. - The magic happens in
voice.recog.onresult.let said = evt.results[0][0].transcript.toLowerCase()is a string of what the user spoke. For example, “power on”.- Next, we create an object of functions. I.E.
var cmd = { "power on" : () => {...} }. - Lastly, we only need to map the user’s spoken command to the object –
cmd[said]().
PART 3) JAVASCRIPT COMMAND FUNCTIONS
// (D) COMMANDS LIST
var cmd = {
  "power on" : () => {
    voice.wrap.style.backgroundColor = "yellow";
    voice.wrap.style.color = "black";
  },

  "power off" : () => {
    voice.wrap.style.backgroundColor = "black";
    voice.wrap.style.color = "white";
  },

  "say hello" : () => {
    alert("Hello World!");
  }
};
Well, this is just a list of dummy commands for this example. Feel free to change and do actually useful stuff in your own project… For example, "save photo" : () => { UPLOAD IMAGE TO SERVER }.
DOWNLOAD & NOTES

Here is the download link to the example code, so you don’t have to copy-paste everything.
SORRY FOR THE ADS...
But someone has to pay the bills, and sponsors are paying for it. I insist on not turning Code Boxx into a "paid scripts" business, and I don't "block people with Adblock". Every little bit of support helps.
Buy Me A Coffee Code Boxx eBooks
EXAMPLE CODE DOWNLOAD
Click here for the source code on GitHub gist, just click on “download zip” or do a git clone. I have released it under the MIT license, so feel free to build on top of it or use it in your own project.
EXTRA BITS & LINKS

That’s all for the tutorial, and here is a small section on some extras and links that may be useful to you.
COMPATIBILITY CHECKS
- Speech Recognition – CanIUse
- Arrow Functions – CanIUse
Speech recognition is only available on Chrome, Edge, and Safari at the time of writing. You may want to do your own feature checks, I recommend using Modernizr.
LINKS & REFERENCES
- Using the Web Speech API – MDN
- Permission Query – MDN
- Example on CodePen – JS Voice Commands
INFOGRAPHIC CHEAT SHEET
THE END

Thank you for reading, and we have come to the end. I hope that it has helped you to better understand, and if you want to share anything with this guide, please feel free to comment below. Good luck and happy coding!