Welcome to a tutorial on how to create a simple JWT user login system in Python Flask, without a database. Yes, for you guys who just want a “rather quick and easy” login system without having to deal with a database (nor the default Flask login), here is how it can be done – Read on!
TABLE OF CONTENTS
DOWNLOAD & NOTES
Here is the download link to the example code, so you don’t have to copy-paste everything.
EXAMPLE CODE DOWNLOAD
Just click on “download zip” or do a git clone. I have released it under the MIT license, so feel free to build on top of it or use it in your own project.
SORRY FOR THE ADS...
But someone has to pay the bills, and sponsors are paying for it. I insist on not turning Code Boxx into a "paid scripts" business, and I don't "block people with Adblock". Every little bit of support helps.
Buy Me A Coffee Code Boxx eBooks
PYTHON FLASK LOGIN SYSTEM
All right, let us now into the user login system. Not going to explain line-by-line, but here’s a quick walkthrough.
QUICK SETUP
- Create a virtual environment
virtualenv venvand activate it –venv\Scripts\activate(Windows)venv/bin/activate(Linux/Mac) - Install required libraries –
pip install install flask pyjwt bcrypt - For those who are new, the default Flask folders are –
staticPublic files (JS/CSS/images/videos/audio)templatesHTML pages
STEP 1) LOGIN PAGE
1A) THE HTML
<form id="login" onsubmit="return login()">
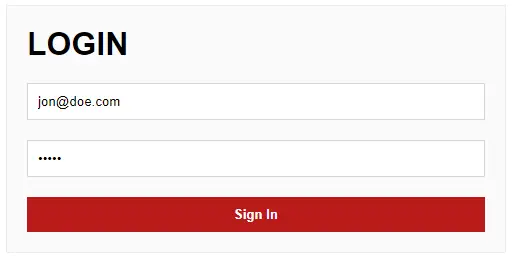
<h1>LOGIN</h1>
<input type="email" placeholder="Email" name="email" required value="jon@doe.com">
<input type="password" placeholder="Password" name="password" required value="12345">
<input type="submit" value="Sign In">
</form>The login page will be deployed at http://localhost/login. This should not be much of a mystery, just the regular login form with email and password fields.
1B) THE JAVASCRIPT
function login () {
  // (A) GET EMAIL + PASSWORD
  var data = new FormData(document.getElementById("login"));

  // (B) AJAX REQUEST
  fetch("/in", { method:"POST", body:data })
  .then(res => res.text())
  .then(txt => {
    if (txt=="OK") { location.href = "../"; }
    else { alert(txt); }
  })
  .catch(err => {
    console.error(err);
    alert("Error - " + err.message);
  });
  return false;
}
To process the login, this small piece of Javascript will send the email and password to /in via AJAX POST.
STEP 2) DUMMY ADMIN PAGE
2A) THE HTML
<h1>It Works!</h1>
<p>This page can only be accessed by admin.</p>
<input type="button" value="Logout" onclick="logout()">
Next, we have a “protected admin page” at http://localhost/. This can only be accessed by users who are signed in.
2B) THE JAVASCRIPT
function logout () {
  fetch("/out", { method:"POST" })
  .then(res => res.text())
  .then(txt => {
    if (txt=="OK") { location.href = "../login"; }
    else { alert(txt); }
  })
  .catch(err => {
    console.error(err);
    alert("Error - " + err.message);
  });
  return false;
}
Similarly for logging out, we do an AJAX POST to /out.
STEP 3) PYTHON FLASK SERVER
3A) INITIALIZE
# (A) INIT
# (A1) LOAD REQUIRED PACKAGES
from flask import Flask, render_template, make_response, request, redirect, url_for
from werkzeug.datastructures import ImmutableMultiDict
import bcrypt, jwt, time, random

# (A2) FLASK INIT
app = Flask(__name__)
# app.debug = True

# (A3) SETTINGS
HOST_NAME = "localhost"
HOST_PORT = 80
JWT_KEY = "YOUR-SECRET-KEY"
JWT_ISS = "YOUR-NAME"
JWT_ALGO = "HS512"
The first few parts of the server-side script should be self-explanatory. We are just loading the required packages and doing some settings. Yes, a gentle reminder to change those settings to your own.
HOST_NAMEandHOST_PORTwhere you want to deploy this project.JWT_KEYGenerate your own random secret key for the JSON Web Token, and NEVER expose it.JWT_ISSThe issuer is usually set to your company or domain name.
3B) THE USERS
# (B) USERS - AT LEAST HASH THE PASSWORD!
# password = "12345"
# print(bcrypt.hashpw(password.encode("utf-8"), bcrypt.gensalt()))
USERS = {
  "jon@doe.com" : b'$2b$12$3kcEc8qxnrHGCBHM8Bh0V.gWEFpsxpsxbkCfmk4BDcjBkGsVLut8i'
}
Yes, we don’t have a database. So, the only way is to keep the users is a dictionary… At least have the decency to hash/encrypt the passwords.
3C) JSON WEB TOKEN
# (C) JSON WEB TOKEN
# (C1) GENERATE JWT
def jwtSign(email):
  # https://stackoverflow.com/questions/2511222/efficiently-generate-a-16-character-alphanumeric-string
  rnd = "".join(random.choice("0123456789ABCDEFGHIJKLMNOPQRSTUVWXYZabcdefghijklmnopqrstuvwxyz~!@#$%^_-") for i in range(24))
  now = int(time.time())
  return jwt.encode({
    "iat" : now, # ISSUED AT - TIME WHEN TOKEN IS GENERATED
    "nbf" : now, # NOT BEFORE - WHEN THIS TOKEN IS CONSIDERED VALID
    "exp" : now + 3600, # EXPIRY - 1 HR (3600 SECS) FROM NOW IN THIS EXAMPLE
    "jti" : rnd, # RANDOM JSON TOKEN ID
    "iss" : JWT_ISS, # ISSUER
    # WHATEVER ELSE YOU WANT TO PUT
    "data" : { "email" : email }
  }, JWT_KEY, algorithm=JWT_ALGO)

# (C2) VERIFY JWT
def jwtVerify(cookies):
  try:
    token = cookies.get("JWT")
    decoded = jwt.decode(token, JWT_KEY, algorithms=[JWT_ALGO])
    # DO WHATEVER YOU WANT WITH THE DECODED TOKEN
    # print(decoded)
    return True
  except:
    return False
To keep the long story short for those who are not familiar with JSON Web Token (JWT):
- (C1) On valid user login,
jwtSign()will generate an encryptedJWTcookie. - (C2) On the protected pages, we use
jwtVerify()to decode theJWTcookie. Allow access only if it is a valid token.
3D) ROUTES – HTML PAGES
# (D) ROUTES
# (D1) ADMIN PAGE
@app.route("/")
def index():
  if jwtVerify(request.cookies):
    return render_template("S2_admin.html")
  else:
    return redirect(url_for("login"))

# (D2) LOGIN PAGE
@app.route("/login")
def login():
  if jwtVerify(request.cookies):
    return redirect(url_for("index"))
  else:
    return render_template("S1_login.html")
As previously mentioned, we will deploy:
- (D1) The admin page,
S2_admin.htmlto/. Only verified users with a validJWTtoken can access this page, unverified users will be redirected to the login page. - (D2) The login page,
S1_login.htmlto/login. Verified users will be redirected to the admin page.
3E) ROUTES – LOGIN & LOGOUT
# (D3) LOGIN ENDPOINT
@app.route("/in", methods=["POST"])
def lin():
  data = dict(request.form)
  valid = data["email"] in USERS
  if valid:
    valid = bcrypt.checkpw(data["password"].encode("utf-8"), USERS[data["email"]])
  msg = "OK" if valid else "Invalid email/password"
  res = make_response(msg, 200)
  if valid:
    res.set_cookie("JWT", jwtSign(data["email"]))
  return res

# (D4) LOGOUT ENDPOINT
@app.route("/out", methods=["POST"])
def lout():
  res = make_response("OK", 200)
  res.delete_cookie("JWT")
return res- (D3) Remember the login Javascript from earlier? This is the endpoint that will process the login. Very simply, verify the email/password against
USERSand generate aJWTcookie token. - (D4) To log out, we unset the
JWTcookie. I know, the “expert code ninjas” are going to say “this is stupid, just unset it on the client side”. Sure thing. But I will recommend setting thehttpOnlyflag on the cookie too. So this endpoint is still useful.
3F) GO!
# (E) START!
if __name__ == "__main__":
  app.run(HOST_NAME, HOST_PORT)
No explanation is required.
EXTRAS
That’s all for the tutorial, and here is a small section on some extras and links that may be useful to you.
WHAT’S NEXT?
This is pretty much a working example out of the box. Just add your own routes and create your own HTML templates – Do a quick if jwtVerify(request.cookies) check on all the protected pages. The end.
LINKS & REFERENCES
THE END
Thank you for reading, and we have come to the end. I hope that it has helped you to better understand, and if you want to share anything with this guide, please feel free to comment below. Good luck and happy coding!