Welcome to a tutorial on how to store and retrieve images in an MYSQL database with PHP. So for some reason, you have to store some images in a database. Yes, it is possible to do so, and actually relatively easy. Let us walk through a simple example – Read on!
TABLE OF CONTENTS
DOWNLOAD & NOTES
Here is the download link to the example code, so you don’t have to copy-paste everything.
EXAMPLE CODE DOWNLOAD
Just click on “download zip” or do a git clone. I have released it under the MIT license, so feel free to build on top of it or use it in your own project.
SORRY FOR THE ADS...
But someone has to pay the bills, and sponsors are paying for it. I insist on not turning Code Boxx into a "paid scripts" business, and I don't "block people with Adblock". Every little bit of support helps.
Buy Me A Coffee Code Boxx eBooks
STORE & RETRIEVE IMAGES IN THE DATABASE
All right, let us now get into the example of storing and retrieving an image in the database.
TUTORIAL VIDEO
PART 1) IMAGE DATABASE
CREATE TABLE `images` (
  `img_name` varchar(255) NOT NULL,
  `img_data` longblob NOT NULL
) ENGINE=InnoDB DEFAULT CHARSET=utf8mb4;

ALTER TABLE `images` ADD UNIQUE KEY `img_name` (`img_name`);
Yep, that’s all we need. The img_name field is for the file name and img_data holds the image data itself. But just what is longblob? It is definitely not some kind of sticky stuff even though it sounds like one. BLOB stands for “binary large object”, perfect for storing our uploaded image files. Take note of the file size restriction though:
BLOBwill only hold up to 64 KB of data.MEDIUMBLOBholds up to 16 MB of data.LONGBLOBup to 4 GB of data.
PART 2) DATABASE IMAGE LIBRARY
<?php
class DBImg {
  // (A) CONSTRUCTOR - CONNECT TO DATABASE
  protected $pdo = null;
  protected $stmt = null;
  public $error = "";
  function __construct() {
    $this->pdo = new PDO(
      "mysql:host=".DB_HOST.";dbname=".DB_NAME.";charset=".DB_CHARSET,
      DB_USER, DB_PASSWORD, [
      PDO::ATTR_ERRMODE => PDO::ERRMODE_EXCEPTION,
      PDO::ATTR_DEFAULT_FETCH_MODE => PDO::FETCH_ASSOC
    ]);
  }

  // (B) DESTRUCTOR - CLOSE CONNECTION
  function __destruct() {
    if ($this->stmt !== null) { $this->stmt = null; }
    if ($this->pdo !== null) { $this->pdo = null; }
  }

  // (C) HELPER - RUN SQL QUERY
  function query ($sql, $data=null) : void {
    $this->stmt = $this->pdo->prepare($sql);
    $this->stmt->execute($data);
  }

  // (D) SAVE IMAGE TO DATABASE
  function save ($name, $data) {
    $this->query("REPLACE INTO `images` (`img_name`, `img_data`) VALUES (?,?)", [$name, $data]);
    return true;
  }

  // (E) LOAD IMAGE FROM DATABASE
  // mode 1 = direct output
  // mode 2 = force download
  // mode 3 = base64 encode
  function load ($name, $mode=1) {
    // (E1) GET IMAGE
    $this->query("SELECT `img_data` FROM `images` WHERE `img_name`=?", [$name]);
    $img = $this->stmt->fetchColumn();
    if ($img==false) { return false; }

    // (E2) OUTPUT IMAGE
    $mime = mime_content_type($name);
    if ($mode==3) {
      echo "data:$mime;base64," . base64_encode($img);
    } else if ($mode==2) {
      header("Content-Type: application/octet-stream");
      header("Content-Transfer-Encoding: Binary");
      header("Content-disposition: attachment; filename=\"$name\"");
      echo $img;
    } else {
      header("Content-type: $mime");
      echo $img;
    }
  }
}

// (F) DATABASE SETTINGS - CHANGE TO YOUR OWN!
define("DB_HOST", "localhost");
define("DB_NAME", "test");
define("DB_CHARSET", "utf8mb4");
define("DB_USER", "root");
define("DB_PASSWORD", "");

// (G) NEW DBIMG OBJECT
$_DBIMG = new DBImg();
This library may be intimidating to some beginners, but keep calm and look carefully.
- (A, B, G) When
$_DBIMG = new DBImg()is created, the constructor automatically connects to the database. The destructor closes the connection. - (C)
query()is a helper function to run an SQL query. - (D & E) Pretty self-explanatory –
save()Save an image file into the database.load()Retrieve an image file from the database.
- (F) Remember to change the database settings to your own.
PART 3) SAVE & LOAD IMAGE IN DATABASE
3A) UPLOAD INTO THE DATABASE
<!-- (A) FILE UPLOAD FORM -->
<form method="post" enctype="multipart/form-data">
  <input type="file" name="upload" accept="image/*" required>
  <input type="submit" name="submit" value="Upload">
</form>

<?php
// (B) SAVE IMAGE INTO DATABASE
if (isset($_FILES["upload"])) {
  require "2-lib.php";
  $_DBIMG->save($_FILES["upload"]["name"], file_get_contents($_FILES["upload"]["tmp_name"]));
  echo "<div class='note'>Upload OK</div>";
}
?>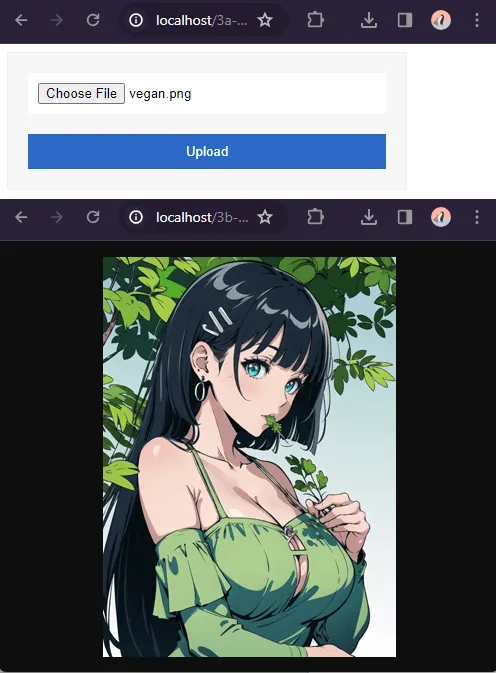
This should be pretty straightforward.
- Just a regular HTML file upload form.
- On submit, we simply use
save()to save the uploaded image into the database. Yes, take note, we directly read the uploaded image file and insert the raw data –file_get_contents($_FILES["upload"]["tmp_name"])
3B) DIRECT IMAGE OUTPUT & FORCE DOWNLOAD
<?php
// (A) LOAD LIBRARY
require "2-lib.php";

// (B) GET & OUTPUT
$_DBIMG->load("vegan.png", 1);
// $_DBIMG->load("vegan.png", 2);

To retrieve the image, we use the load() function – Specify which image file and mode.
- Mode
1will directly output the image. - Mode
2will force download the image.
3C) OUTPUT TO HTML IMAGE TAG
<?php require "2-lib.php"; ?>
<img class="myImg" src="<?=$_DBIMG->load("vegan.png", 3)?>">
If you prefer to directly embed the image into an HTML <img> tag, use load(IMAGE, 3). This will output the image as a base 64 encoded string.
EXTRAS
That’s all for this project, and here is a small section on some extra bits that may be useful to you.
ALTERNATIVE – UPLOAD TO PRIVATE FOLDER
<?php
$private = "PATH/TO/FOLDER/";
move_uploaded_file (
  $_FILES["upload"]["tmp_name"], $private . $_FILES["upload"]["name"]
);<?php
$file = "PATH/FOLDER/IMAGE.png";
$mime = mime_content_type(basename($file));
$img = base64_encode(file_get_contents($file));
echo "<img src='data:$mime;base64,$img'>";If security is a concern, consider saving the uploaded images to a private folder instead. For example, if the public HTTP folder is located at D:/http/, we save the uploaded image into D:/uploaded/. This way, the uploaded images are not publically accessible, but PHP can still read those image files.
LINKS & REFERENCES
- Looking for a more elegant way to upload the images? Here are a few plugins you can check out:
- Plupload
- Uploadify
- Dropzone
- Drag-and-drop upload – Code Boxx
- Restrict Upload File Type – Code Boxx
- Restrict Upload File Size – Code Boxx
THE END
Thank you for reading, and we have come to the end of this quick guide. I hope you have found it to be useful, but please do take note that a lot of error checking and security still need to be added to the above skeleton scripts. If you want to share anything with the guide, please feel free to comment below. Good luck and happy coding!
Well done. based on the domain-name I have expected usual badly written I* stuff and skipped it at first, but its rare for first tutorial on google to actually be a good one. Maybe it would be handy to add size-checking, but Thanks for quality tutorial. Well done
EDIT BY WS: Let’s keep racial bias out. I have also written plenty of crappy stuff before getting to this stage… Will keep size checking as a possible future update.