Welcome to a tutorial and example on how to create a simple order form with PHP and MySQL. Need to add an order form to your website? Contrary to what some beginners think, it is actually a pretty straightforward process.
An order form in the simplest design actually only requires a few components:
- A database table to store the necessary order details.
- Create the HTML order form itself.
- Lastly, a PHP script to save the order form into the database upon submission – Optionally, send it out via email.
Let us walk through a simple order form in this guide – Read on!
TABLE OF CONTENTS
DOWNLOAD & NOTES
Here is the download link to the example code, so you don’t have to copy-paste everything.
EXAMPLE CODE DOWNLOAD
Just click on “download zip” or do a git clone. I have released it under the MIT license, so feel free to build on top of it or use it in your own project.
SORRY FOR THE ADS...
But someone has to pay the bills, and sponsors are paying for it. I insist on not turning Code Boxx into a "paid scripts" business, and I don't "block people with Adblock". Every little bit of support helps.
Buy Me A Coffee Code Boxx eBooks
SIMPLE ORDER FORM
All right, let us now get into the details of the order form now.
TUTORIAL VIDEO
STEP 1) ORDERS DATABASE TABLE
CREATE TABLE `orders` (
  `order_id` bigint(20) NOT NULL,
  `dop` datetime NOT NULL DEFAULT current_timestamp(),
  `name` varchar(255) NOT NULL,
  `email` varchar(255) NOT NULL,
  `qty` int(5) NOT NULL
) ENGINE=InnoDB DEFAULT CHARSET=utf8mb4;

ALTER TABLE `orders`
  ADD PRIMARY KEY (`order_id`),
  ADD KEY `dop` (`dop`);

ALTER TABLE `orders`
  MODIFY `order_id` bigint(20) NOT NULL AUTO_INCREMENT, AUTO_INCREMENT=1;
The first step is to create a database table to store all the required order details. In this example, we will be capturing:
| Field | Description |
order_id |
Primary key, just a unique running number in the system to keep track of which order is which. |
dop |
Date of purchase. |
name |
Name of customer. |
email |
Customer’s email. |
qty |
Quantity. |
But this is only an example ultimately – Feel free to add/remove fields in your own project as necessary.
P.S. For the total beginners, you can easily manage your database with a free manager such as phpMyAdmin or MySQL Workbench.
STEP 2) ORDER HTML PAGE
<?php
// (A) PROCESS ORDER FORM
if (isset($_POST["name"])) {
  require "3-process.php";
  echo $result == ""
    ? "<div class='notify'>Thank You! We have received your order</div>"
    : "<div class='notify'>$result</div>" ;
}
?>

<!-- (B) ORDER FORM -->
<form method="post" target="_self">
  <label>Name</label>
  <input type="text" name="name" required value="Jon Doe">

  <label>Email</label>
  <input type="email" name="email" required value="jon@doe.com">

  <label>Quantity</label>
  <input type="number" name="qty" required min="1" max="99" value="1">

  <input type="submit" value="Place Order">
</form>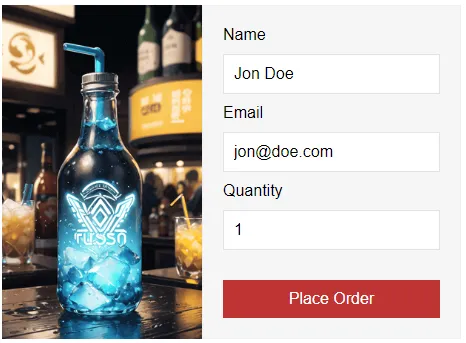
Wait, there is PHP code mixed inside! Keep calm and look carefully:
- (B) A simple HTML order form with the 3 fields. Name, email, quantity.
- (A) When the HTML form is submitted, we use PHP to handle things accordingly.
STEP 3) PHP PROCESSING
<?php
// (A) PROCESS RESULT
$result = "";

// (B) CONNECT TO DATABASE - CHANGE SETTINGS TO YOUR OWN!
$dbhost = "localhost";
$dbname = "test";
$dbchar = "utf8mb4";
$dbuser = "root";
$dbpass = "";
$pdo = new PDO(
  "mysql:host=$dbhost;dbname=$dbname;charset=$dbchar",
  $dbuser, $dbpass, [
  PDO::ATTR_ERRMODE => PDO::ERRMODE_EXCEPTION,
  PDO::ATTR_DEFAULT_FETCH_MODE => PDO::FETCH_ASSOC
]);

// (C) SAVE ORDER TO DATABASE
if ($result=="") { try {
  $stmt = $pdo->prepare("INSERT INTO `orders` (`name`, `email`, `qty`) VALUES (?,?,?)");
  $stmt->execute([$_POST["name"], $_POST["email"], $_POST["qty"]]);
} catch (Exception $ex) { $result = $ex->getMessage(); }}

// (D) SEND ORDER VIA EMAIL
if ($result=="") {
  $to = "admin@site.com"; // CHANGE TO YOUR OWN!
  $subject = "ORDER RECEIVED";
  $message = "";
  foreach ($_POST as $k=>$v) { $message .= "$k - $v\r\n"; }
  if (!@mail($to, $subject, $message)) { $result = "Error sending mail!"; }
}
This may look like a “confusing bunch”, what it does is straightforward – Connect to the database, save the order, and send it out via email. That’s all to the “complicated system”.
EXTRAS
That’s all for the main tutorial, and here is a small section on some extras and links that may be useful to you.
RECOMMENDATIONS
As you may have noticed, this order form may work, but it is raw barebones. A couple of recommended “homework” and “add-ons”:
- An open order form is just waiting for spammers to open fire upon. You might want to add Google ReCaptcha and protect it against spam.
- Alternatively, consider opening it to registered users only –
- There is no admin page for the database orders. Feel free to use PHPMyAdmin, MySQL Workbench, or create your own simple admin panel.
HOW ABOUT MULTIPLE ITEMS?
Quick and dirty way:
- Add more “quantity” fields to the orders database table.
- Add more quantity fields in the HTML form for different items.
- On form submit, “map” the submitted quantities to the database fields.
But yep, I will recommend a proper shopping cart.
LINKS & REFERENCES
- HTML Forms – MDN
- PHP Mail – Official PHP Manual
- Fix “email not working” – Code Boxx
- Simple PHP MYSQL Shopping Cart – Code Boxx
THE END
Thank you for reading, and we have come to the end of this short tutorial. I hope it has helped you to create a better website. If you have anything to share with this guide, please feel free to comment below. Good luck and happy coding!
I haven’t coded anything in years and have little formal training. I’m working on making a very simple order form page for parents’ store, and this site quickly helped me get back in the groove of things.
Thanks a lot!
Im wondering if all these codes are updated to be used in 2019
Oh yeah, this code has probably not been updated since 1990. Not sure if it is still good, because it uses modern HTML5 input fields, form checking, and PHP PDO. Seriously? 😉