Welcome to a quick tutorial on how to set and get HTML data attributes in Javascript. Want to insert your own custom property or data into HTML elements?
- To set data attributes in HTML, we define
data-KEY="VALUE"in the start tag. E.G.<div data-color="red"> - To set data attributes in Javascript, we set the
datasetproperty. E.G.document.getElementById("ID").dataset.color = "red"; - To get data attributes in Javascript, we access the same
datasetproperty. E.G.var color = document.getElementById("ID").dataset.color;
That covers the basics, but read on for more examples!
TLDR – QUICK SLIDES
[web_stories_embed url=”https://code-boxx.com/web-stories/set-get-data-attributes-javascript/” title=”Set & Get Data Attributes In Javascript” poster=”https://code-boxx.com/wp-content/uploads/2021/11/STORY-JS-20230518.webp” width=”360″ height=”600″ align=”center”]
Fullscreen Mode – Click Here
TABLE OF CONTENTS
GET & SET DATA ATTRIBUTES

All right, let us now get into the examples of how to work with the data attributes in Javascript.
1) SET DATA ATTRIBUTE
<!-- (A) SET DATA ATTRIBUTE IN HTML START TAG -->
<div id="demoA" data-color="red">
  This element has custom data attributes.
</div>

<!-- (B) SET DATA ATTRIBUTE IN JAVASCRIPT -->
<script>
document.getElementById("demoA").dataset.priority = "high";
// <div id="demoA" data-color="red" data-priority="high">
</script>
As in the introduction above, there are 2 ways to set HTML data attributes:
- Directly in the HTML start tag itself
data-KEY="VALUE". - Using Javascript
ELEMENT.dataset.KEY = "VALUE".
Yes, we can have multiple data attributes attached to a single element.
2) GET DATA ATTRIBUTE
<!-- (A) ELEMENT WITH DATA ATTRIBUTES -->
<div id="demoB" data-color="red" data-priority="high">
  This element has custom data attributes.
</div>

<!-- (B) GET DATA ATTRIBUTE IN JAVASCRIPT -->
<script>
var el = document.getElementById("demoB");
console.log(el.dataset.color); // red
console.log(el.dataset.priority); // high
</script>
This one is as straightforward as can be. We can also retrieve the data using the same ELEMENT.dataset.KEY.
3) SET ARRAYS INTO DATA ATTRIBUTE
<!-- (A) DUMMY ELEMENT -->
<div id="demoC">Dummy</div>

<!-- (B) JAVASCRIPT -->
<script>
// (B1) GET HTML ELEMENT
var el = document.getElementById("demoC");

// (B2) SET ARRAY TO DATA ATTRIBUTE
// dataset can only be string - json.stringify() to turn array to string
el.dataset.array = JSON.stringify(["Red", "Green", "Blue"]);

// (B3) GET ARRAY BACK FROM STRING
// use json.parse() to turn encoded string back to array
console.log(JSON.parse(el.dataset.array));
</script>
A quick note, HTML data attributes must be a string and will not accept arrays/objects.
- To set an array into the data attribute, we use
JSON.stringify()to encode the array into a string first. - To retrieve the data, we use
JSON.parse()to turn the string back into an array.
4) STORE HTML SNIPPETS IN DATA ATTRIBUTE
<!-- (A) DUMMY ELEMENTS -->
<div id="demoD" data-snippet="<strong>Foo</strong>">Demo D</div>
<div id="demoE">Demo E</div>

<!-- (B) JAVASCRIPT -->
<script>
// (B1) GET HTML SNIPPET
var snippet = document.getElementById("demoD").dataset.snippet;

// (B2) SET HTML SNIPPET
document.getElementById("demoE").innerHTML = snippet;
</script>
Yes, we can set an HTML snippet into data attributes… But the question is, why? If you want to use it as an HTML template, <template> is better for performance and it makes more sense.
5) SET CSS STYLE BASED ON DATA ATTRIBUTE
<!-- (A) CSS STYLES -->
<style>
div[data-color="red"] { background: red; }
div[data-color="green"] { background: green; }
div[data-color="blue"] { background: blue; }
</style>

<!-- (B) DUMMY ELEMENT -->
<div id="demoF">Dummy</div>

<!-- (C) JAVASCRIPT SET COLOR -->
<script>
function setColor (col) {
  document.getElementById("demoF").dataset.color = col;
}
</script>
<input type="button" value="Red" onclick="setColor('red')">
<input type="button" value="Green" onclick="setColor('green')">
<input type="button" value="Blue" onclick="setColor('blue')">
This final example is an extra bit to demonstrate how CSS can also be used to target different data attributes – Kind of useful, but I personally still prefer to stick with CSS classes and variables.
DOWNLOAD & NOTES

Here is the download link to the example code, so you don’t have to copy-paste everything.
SORRY FOR THE ADS...
But someone has to pay the bills, and sponsors are paying for it. I insist on not turning Code Boxx into a "paid scripts" business, and I don't "block people with Adblock". Every little bit of support helps.
Buy Me A Coffee Code Boxx eBooks
EXAMPLE CODE DOWNLOAD
Click here for the source code on GitHub gist, just click on “download zip” or do a git clone. I have released it under the MIT license, so feel free to build on top of it or use it in your own project.
EXTRA BITS & LINKS

That’s all for the tutorial, and here is a small section on some extras and links that may be useful to you.
COMPATIBILITY CHECK
- Dataset – CanIUse
Data attributes are already well-supported in almost every browser.
LINKS & REFERENCES
- Using Data Attributes – MDN
- HTMLElement.dataset – MDN
- How to Use HTML5 Data Attributes – Sitepoint
- [attribute] – CSS-Tricks
- Working With JSON – MDN
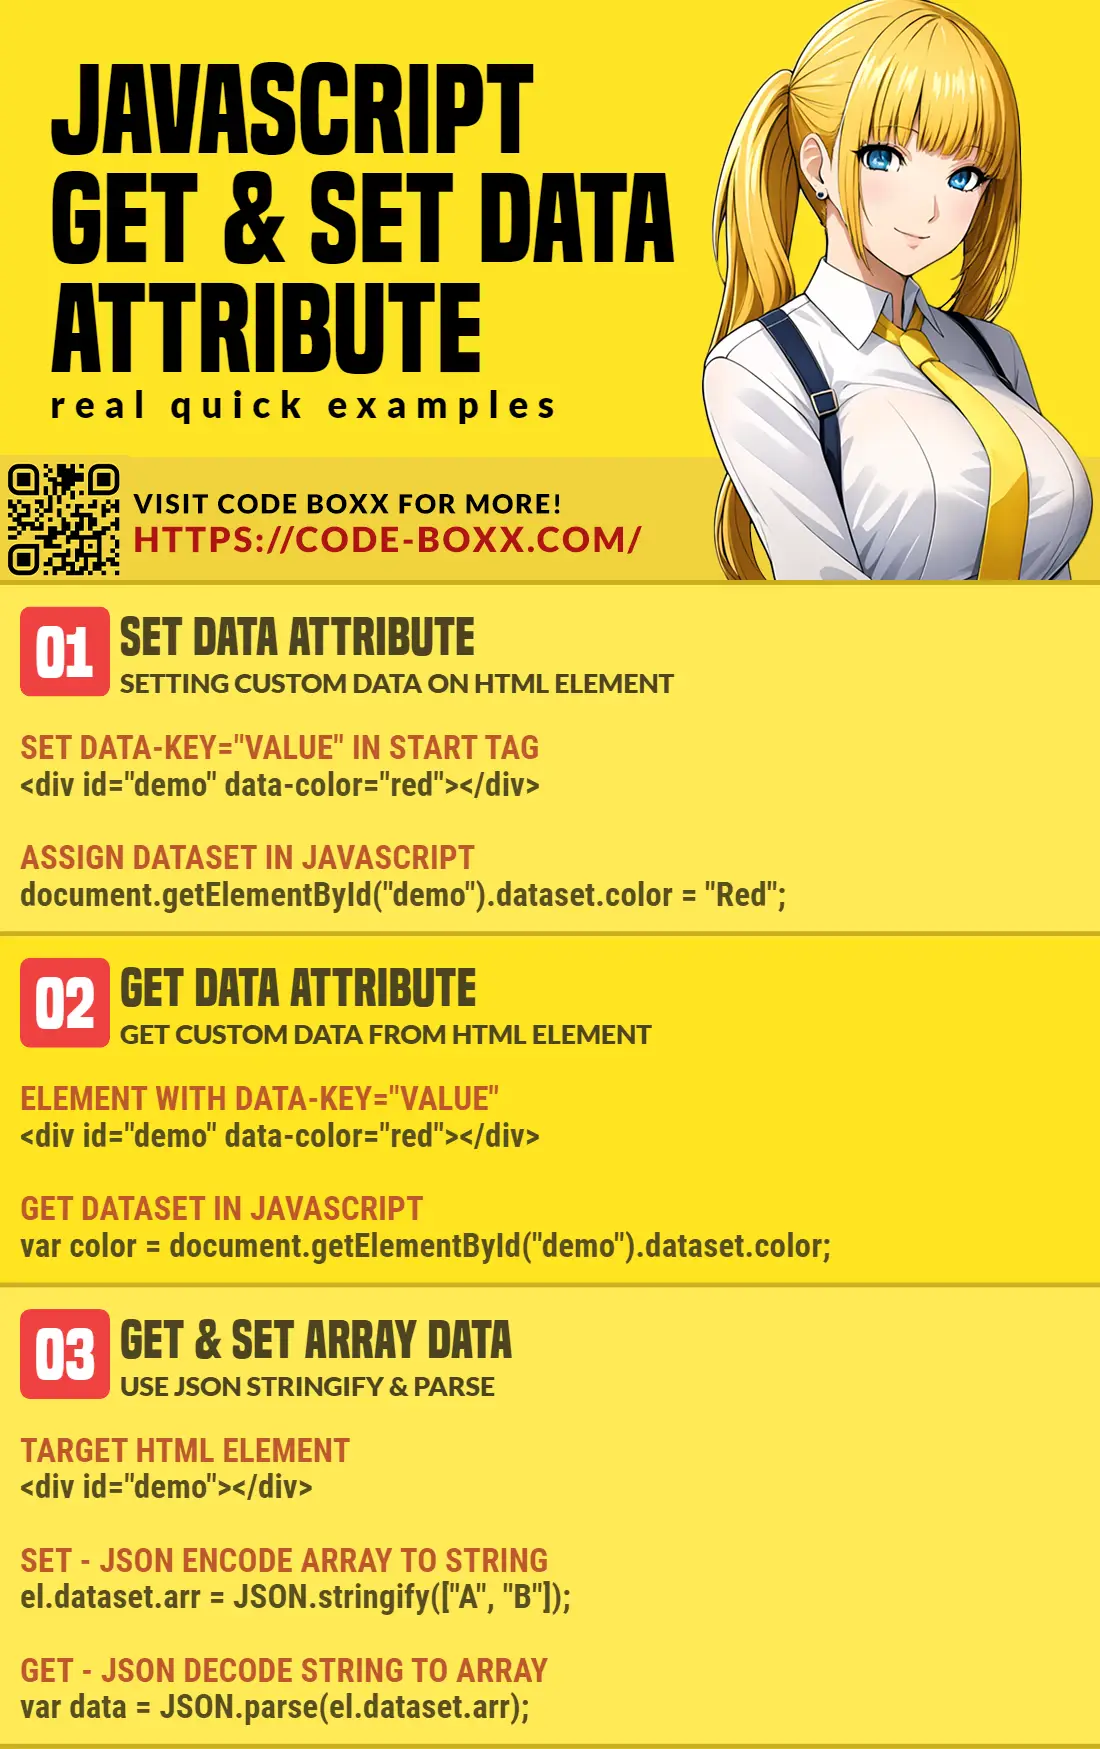
INFOGRAPHIC CHEAT SHEET
THE END

Thank you for reading, and we have come to the end. I hope that it has helped you to better understand, and if you want to share anything with this guide, please feel free to comment below. Good luck and happy coding!