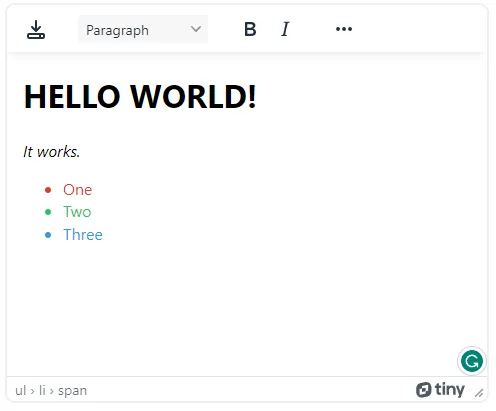
Welcome to a quick tutorial on how to save and load TinyMCE content with PHP MySQL. So you are building your own CMS or want to give users some flexibility to edit their own product pages? Well, TinyMCE is definitely a good choice.
To save and retrieve TinyMCE contents with PHP and MySQL, we need the following components:
- A database table to store the contents.
- A PHP library to manage (save and load) the contents.
- Finally, a page to update the content, and a page to show the content itself.
Let us walk through an example in this guide – Read on!
TABLE OF CONTENTS
DOWNLOAD & NOTES
Here is the download link to the example code, so you don’t have to copy-paste everything.
EXAMPLE CODE DOWNLOAD
Just click on “download zip” or do a git clone. I have released it under the MIT license, so feel free to build on top of it or use it in your own project.
SORRY FOR THE ADS...
But someone has to pay the bills, and sponsors are paying for it. I insist on not turning Code Boxx into a "paid scripts" business, and I don't "block people with Adblock". Every little bit of support helps.
Buy Me A Coffee Code Boxx eBooks
PHP-MYSQL-TINYMCE
All right, let us now go into the PHP-MYSQL-TINYMCE example.
STEP 1) CONTENT DATABASE TABLE
CREATE TABLE `contents` (
  `content_id` bigint(20) NOT NULL,
  `content_text` text NOT NULL
) ENGINE=InnoDB DEFAULT CHARSET=utf8mb4;

ALTER TABLE `contents`
  ADD PRIMARY KEY (`content_id`);

ALTER TABLE `contents`
  MODIFY `content_id` bigint(20) NOT NULL AUTO_INCREMENT;
Yep, this is just a very simple table with only 2 fields:
content_idThe content ID, primary key.content_textThe content itself.
STEP 2) PHP CONTENT LIBRARY
<?php
class Content {
  // (A) CONSTRUCTOR - CONNECT TO DATABASE
  public $pdo = null;
  public $stmt = null;
  public $error = "";
  function __construct () {
    $this->pdo = new PDO(
      "mysql:host=".DB_HOST.";dbname=".DB_NAME.";charset=".DB_CHARSET,
      DB_USER, DB_PASSWORD, [
      PDO::ATTR_ERRMODE => PDO::ERRMODE_EXCEPTION,
      PDO::ATTR_DEFAULT_FETCH_MODE => PDO::FETCH_ASSOC
    ]);
  }

  // (B) DESTRUCTOR - CLOSE DATABASE CONNECTION
  function __destruct () {
    if ($this->stmt!==null) { $this->stmt = null; }
    if ($this->pdo!==null) { $this->pdo = null; }
  }

  // (C) EXECUTE SQL QUERY
  function query ($sql, $data=null) : void {
    $this->stmt = $this->pdo->prepare($sql);
    $this->stmt->execute($data);
  }

  // (D) SAVE CONTENT
  function save ($id, $content) {
    $this->query("REPLACE INTO `contents` (`content_id`, `content_text`) VALUES (?,?)", [$id, $content]);
    return true;
  }

  // (E) GET CONTENT
  function get ($id) {
    $this->query("SELECT `content_text` FROM `contents` WHERE `content_id`=?", [$id]);
    return $this->stmt->fetchColumn();
  }
}

// (F) DATABASE SETTINGS - CHANGE TO YOUR OWN!
define("DB_HOST", "localhost");
define("DB_NAME", "test");
define("DB_CHARSET", "utf8mb4");
define("DB_USER", "root");
define("DB_PASSWORD", "");

// (G) NEW CONTENT OBJECT
$_CONTENT = new Content();
This one looks complicated at first, but keep calm and study closely.
- (A, B, G) The constructor will connect to the database when
$_CONTENT = new Content()is created. The destructor closes the connection when done. - (C)
query()A helper function to run an SQL query. - (D & E) There are only 2 content functions here!
save()Save content into the database.get()Retrieve content from the database.
- (F) Remember to change the settings to your own.
STEP 3) SAVE CONTENT PAGE
<?php
// (A) INIT
// (A1) LOAD LIBRARY, FIXED CONTENT ID FOR DEMO
require "2-lib.php";
$id = 99;

// (A2) SAVE CONTENT ON SUBMIT
if (isset($_POST["content"])) {
  echo $_CONTENT->save($id, $_POST["content"])
    ? "<div>SAVED</div>"
    : "<div>ERROR</div>" ;
}

// (B) HTML EDITOR ?>
<!-- (B1) HTML FORM -->
<form method="post">
  <textarea id="mceDEMO" name="content"><?=$_CONTENT->get($id)?></textarea>
</form>

<!-- (B2) TINY MCE -->
<!-- https://cdnjs.com/libraries/tinymce -->
<!-- https://www.tiny.cloud/docs/configure/ -->
<script src="https://cdnjs.cloudflare.com/ajax/libs/tinymce/6.4.2/tinymce.min.js"></script>
<script>
tinymce.init({
  selector : "#mceDEMO",
  plugins : "save, textcolor, lists",
  menubar : false,
  toolbar: "save | styles | bold italic | forecolor backcolor | alignleft aligncenter alignright alignjustify | bullist numlist"
});
</script>
That’s right, this should be very straightforward.
- (B) Just an HTML form and a text field where we use TinyMCE to create the WYSIWYG editor.
- (A) When the user hits “save” and submits the form, we simply use the PHP library to save the content.
STEP 4) SHOW CONTENT
<?php
require "2-lib.php";
echo $_CONTENT->get(99);
 Does this even need an explanation?
THE END
Thank you for reading, and we have come to the end of this guide. I hope that it has helped you with your project, and if you want to share anything with this guide, please feel free to comment below. Good luck and happy coding!

Thanks a lot
when I echo the content which is what I store on MySQL and it gives back like this good
Fantastic thanks!…