Welcome to a quick tutorial and example on how to post form data using Javascript Fetch. So you have just started with the Javascript Fetch API, and wondering how to send data with it?
To post form data using Javascript Fetch, simply set the send method to “post”, and set the form data in the body.
var form = document.getElementById("FORM");var data = new FormData(form);fetch("URL", { method: "POST", body: data });
That covers the quick basics, but read on for a detailed example!
ⓘ I have included a zip file with all the source code at the start of this tutorial, so you don’t have to copy-paste everything… Or if you just want to dive straight in.
TLDR – QUICK SLIDES
[web_stories_embed url=”https://code-boxx.com/web-stories/post-form-data-with-javascript-fetch/” title=”POST Form Data With Javascript Fetch” poster=”https://code-boxx.com/wp-content/uploads/2021/11/STORY-JS-20230518.webp” width=”360″ height=”600″ align=”center”]
Fullscreen Mode – Click Here
TABLE OF CONTENTS
POST FORM DATA WITH FETCH
All right, let us now get into the example of posting form data with Javascript Fetch.
PART 1) HTML FORM
<form onsubmit="return sendData()" id="demo">
  <input type="text" name="name" value="Jon Doe" required>
  <input type="email" name="email" value="jon@doe.com" required/>
  <input type="submit" value="Go!">
</form>
For this simple example, we have a dummy HTML form with only 2 fields – Name and email.
PART 2) JAVASCRIPT FETCH
function sendData () {
  // (A) GET FORM DATA
  var data = new FormData(document.getElementById("demo"));
  // data.append("KEY", "VALUE");

  // (B) INIT FETCH POST
  fetch("2-dummy.php", {
    method: "POST",
    body: data
  })

  // (C) RETURN SERVER RESPONSE AS TEXT
  .then(res => {
    if (res.status != 200) { throw new Error("Bad Server Response"); }
    return res.text();
  })

  // (D) SERVER RESPONSE
  .then(res => console.log(res))

  // (E) HANDLE ERRORS - OPTIONAL
  .catch(err => console.error(err));

  // (F) PREVENT FORM SUBMIT
  return false;
}
This is pretty much the “full version” of the introduction snippet, should be pretty self-explanatory:
- Create a
FormData()object, collect all the data that needs to be sent to the server.var data = new FormData(HTML-FORM)will automatically adapt all form fieldsname="value"intodata.- We can manually add more entries with
data.append("KEY", "VALUE"). - Also, use
data.delete("KEY")to remove entries if required.
- As in the introduction, set fetch to
method: "POST"and append the form databody: data. - Return the server response as a string. Take note of
if (res.status != 200) { THROW ERROR }here. For you guys who are new, fetch will consider it a “success” as long as the server responds – Even when the server responds with errors like 404 (not found), 403 (unauthorized), and 500 (internal server error). So, it is safer to do a manual 200 (OK) check here. - Do something with the server response. Use this to show a success/failure message to the user
alert(res), or put it into an HTML elementdocument.getElementById("ID").innerHTML = res. - Handle any errors. Optional, but highly recommended.
PART 3) SERVER-SIDE
<?php
print_r($_POST);
Lastly, do processing on the server-side as required – This dummy PHP script simply echos whatever is being posted over.
DOWNLOAD & NOTES
Here is the download link to the example code, so you don’t have to copy-paste everything.
SORRY FOR THE ADS...
But someone has to pay the bills, and sponsors are paying for it. I insist on not turning Code Boxx into a "paid scripts" business, and I don't "block people with Adblock". Every little bit of support helps.
Buy Me A Coffee Code Boxx eBooks
EXAMPLE CODE DOWNLOAD
Click here for the source code on GitHub gist, just click on “download zip” or do a git clone. I have released it under the MIT license, so feel free to build on top of it or use it in your own project.
EXTRA BITS & LINKS
That’s all for the tutorial, and here is a small section on some extras and links that may be useful to you.
COMPATIBILITY CHECK
Fetch is already well-supported in all modern browsers. Just take extra note if you have to support the ancient Internet Exploders.
LINKS & REFERENCES
- Fetch API – MDN
- HTTP Response Codes – Wikipedia
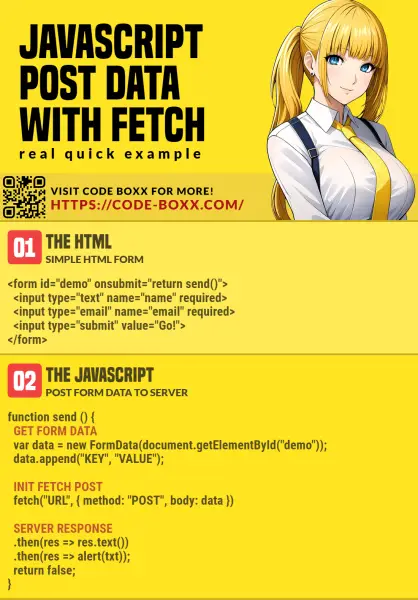
INFOGRAPHIC CHEAT SHEET

THE END
Thank you for reading, and we have come to the end. I hope that it has helped you to better understand, and if you want to share anything with this guide, please feel free to comment below. Good luck and happy coding!
