Welcome to a tutorial on how to build a tag system with PHP and MySQL. Tags are a common feature these days, and it can pretty much be used to describe anything – Posts, products, pictures, videos, audio, and more. Building one yourself is not that difficult actually.
A simple tag system with PHP and MySQL only consists of a few core components:
- A tags database table to store the tag information.
- A tags PHP library to manage the tags (add, update, delete).
- Lastly, implementation into the HTML pages itself to display and/or manage the tags.
So just how do we build a tag system? Let us walk through an example in this guide – Read on!
TABLE OF CONTENTS
DOWNLOAD & NOTES
Here is the download link to the example code, so you don’t have to copy-paste everything.
EXAMPLE CODE DOWNLOAD
Just click on “download zip” or do a git clone. I have released it under the MIT license, so feel free to build on top of it or use it in your own project.
SORRY FOR THE ADS...
But someone has to pay the bills, and sponsors are paying for it. I insist on not turning Code Boxx into a "paid scripts" business, and I don't "block people with Adblock". Every little bit of support helps.
Buy Me A Coffee Code Boxx eBooks
STEP 1) TAGS DATABASE TABLE
-- (A) TAGS
CREATE TABLE `tags` (
  `id` bigint(20) NOT NULL,
  `tag` varchar(32) NOT NULL
) ENGINE=InnoDB DEFAULT CHARSET=utf8mb4;

ALTER TABLE `tags`
  ADD PRIMARY KEY (`id`,`tag`);
Yep, 2 fields are all we need to store the tags.
idPartial primary key and foreign key. Tie this to whatever you want to tag. A post ID, product ID, video ID, or whatever else.tagThe tag itself, also the partial primary key. This is to prevent duplicates and improve search performance.
STEP 2) PHP TAGS LIBRARY
<?php
class Tags {
  // (A) CONSTRUCTOR - CONNECT TO DATABASE
  private $pdo = null;
  private $stmt = null;
  public $error = "";
  function __construct () {
    $this->pdo = new PDO(
      "mysql:host=".DB_HOST.";dbname=".DB_NAME.";charset=".DB_CHARSET,
      DB_USER, DB_PASSWORD, [
      PDO::ATTR_ERRMODE => PDO::ERRMODE_EXCEPTION,
      PDO::ATTR_DEFAULT_FETCH_MODE => PDO::FETCH_ASSOC
    ]);
  }

  // (B) DESTRUCTOR - CLOSE DATABASE CONNECTION
  function __destruct () {
    if ($this->stmt!==null) { $this->stmt = null; }
    if ($this->pdo!==null) { $this->pdo = null; }
  }

  // (C) HELPER FUNCTION - EXECUTE SQL QUERY
  function query ($sql, $data=null) : void {
    $this->stmt = $this->pdo->prepare($sql);
    $this->stmt->execute($data);
  }

  // (D) SAVE TAGS
  function save ($id, $tags=null) {
    // (D1) AUTO-COMMIT OFF
    $this->pdo->beginTransaction();

    // (D2) DELETE OLD ENTRIES
    $pass = $this->query("DELETE FROM `tags` WHERE `id`=?", [$id]);

    // (D3) ADD NEW ENTRIES (IF ANY)
    if (is_array($tags)) {
      $sql = "INSERT INTO `tags` (`id`, `tag`) VALUES ";
      $data = [];
      foreach ($tags as $t) {
        $sql .= "(?,?),";
        array_push($data, $id, $t);
      }
      $sql = substr($sql, 0, -1);
      $this->query($sql, $data);
    }

    // (D4) RESULTS
    $this->pdo->commit();
    return true;
  }

  // (E) GET TAGS FOR ID
  function get ($id) {
    $this->query("SELECT `tag` FROM `tags` WHERE `id`=? ORDER BY `tag`", [$id]);
    $tags = [];
    while ($tag = $this->stmt->fetchColumn()) { $tags[] = $tag; }
    return $tags;
  }

  // (F) SEARCH BY TAG
  function search ($search) {
    $this->query("SELECT `id` FROM `tags` WHERE `tag` LIKE ?", ["%$search%"]);
    $content = [];
    while ($id = $this->stmt->fetchColumn()) { $content[] = $id; }
    return $content;
  }
}

// (G) DATABASE SETTINGS - CHANGE TO YOUR OWN!
define("DB_HOST", "localhost");
define("DB_NAME", "test");
define("DB_CHARSET", "utf8mb4");
define("DB_USER", "root");
define("DB_PASSWORD", "");

// (H) NEW TAGS OBJECT
$TAGS = new Tags();
Yikes! This library looks complicated, but keep calm and look carefully.
- (A, B, H) When
$TAGS = new Tags()is created, the constructor will connect to the database automatically; The destructor will close the connection. - (C)
function query()is only a simple helper function for running SQL queries. - (D To F) There are only 3 essential tag functions.
function save()to update the tags. Just provide$idand an array into$tags– If$tags = null, that will remove all the tags from$id.function get()Self-explanatory, get tags.function search()Search for content by tag.
- (G) Self-explanatory, change the database settings to your own.
STEP 3) USING THE TAGS LIBRARY
<?php
// FOR THIS DEMO, WE HAVE 2 BOOKS
// ID 88 = LORD OF THE MINKS
// ID 99 = ICE IN THE SCENT

// (A) LOAD LIBRARY
require "2-tags-lib.php";

// (B) ATTACH TAGS
echo $TAGS->save(88, ["action", "fantasy", "horror", "popular", "thriller"])
  ? "OK" : $TAGS->error;
echo $TAGS->save(99, ["action", "popular", "romance", "sci-fi"])
  ? "OK" : $TAGS->error;

// (C) GET ALL TAGS FOR BOOK
$tags = $TAGS->get(88);
print_r($tags);

// (D) SEARCH BOOKS BY TAG NAME
$books = $TAGS->search("action");
print_r($books);
Now that the foundations are done – Here is a quick demo of using the tags library.
STEP 4) FETCH & DISPLAY TAGS
<!-- (A) TAGS LIBRARY -->
<?php require "2-tags-lib.php"; ?>
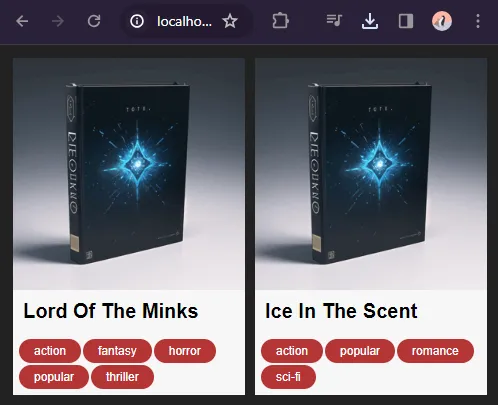
<!-- (B) BOOK ID 88 -->
<div class="book">
<img class="bookImg" src="book.png">
<div class="bookName">Lord Of The Minks</div>
<div class="bookTags"><?php
$tags = $TAGS->get(88);
foreach ($tags as $t) { echo "<div class='tag'>$t</div>"; }
?></div>
</div>
<!-- (C) BOOK ID 99 -->
<div class="book">
<img class="bookImg" src="book.png">
<div class="bookName">Ice In The Scent</div>
<div class="bookTags"><?php
$tags = $TAGS->get(99);
foreach ($tags as $t) { echo "<div class='tag'>$t</div>"; }
?></div>
</div>Lastly, all that’s left is to fetch the tags and show them on the HTML page.
EXTRAS
That’s all for the code, and here are a few small links and extras that may be useful.
NO ADMIN PANEL?
I figured that some people already have an existing admin panel, not reinventing the wheel is the best course of action to keep this guide as simple as possible. If you don’t already have a user login and admin panel, follow up with the links below.
P.S. The lazy alternate way is to use PHPMyAdmin or MySQL Workbench to directly manage the tags in the database. But of course, this option will be “for developers only”.
LINKS & REFERENCES
- Simple User Registration Form In PHP MYSQL – Code Boxx
- User Login System – Code Boxx
- Simple PHP Admin Panel – Code Boxx
- Simple Javascript Tagging Widget – Code Boxx
THE END
Thank you for reading, and we have come to the end of this guide. I hope that it has helped you with your project, and if you want to share anything with this guide, please feel free to comment below. Good luck and happy coding!