Welcome to a tutorial on how to overlap or layer HTML elements. So you want to create your own overlapping elements? Maybe a customized popup dialog box, a “now loading” screen, or an overlay menu.
To overlap or layer HTML elements:
- Set the position of the elements to
relative,absolute, orfixed. - Then, use
z-indexto specify which element is on top or below.
For example:
<div id="top">TOP</div> <div id="bottom">BOTTOM</div>#top, #bottom { position:fixed; top:0; left:0 }#top { z-index:9; } #bottom { z-index:8; }
But just how exactly does this work? Let us walk through a couple of examples in this guide – Read on!
ⓘ I have included a zip file with all the example source code at the start of this tutorial, so you don’t have to copy-paste everything… Or if you just want to dive straight in.
TLDR – QUICK SLIDES
[web_stories_embed url=”https://code-boxx.com/web-stories/how-to-overlap-html-elements/” title=”How To Overlap HTML Elements” poster=”https://code-boxx.com/wp-content/uploads/2022/03/STORY-HTML-20230505.webp” width=”360″ height=”600″ align=”center”]
Fullscreen Mode – Click Here
TABLE OF CONTENTS
DOWNLOAD & NOTES

Firstly, here is the download link to the example code as promised.
QUICK NOTES
If you spot a bug, feel free to comment below. I try to answer short questions too, but it is one person versus the entire world… If you need answers urgently, please check out my list of websites to get help with programming.
EXAMPLE CODE DOWNLOAD
Click here to download the source code, I have released it under the MIT license, so feel free to build on top of it or use it in your own project.
OVERLAPPING HTML ELEMENTS

All right, let us now get into more details on how overlapping elements work in HTML and CSS.
PART 1) POSITION & Z-INDEX
1A) CSS POSITION
<style>
#demoA {
  position: static;
  background: lightsalmon;
}
#demoB {
  position: relative;
  top: 60px; left: 5px;
  background: lightgreen;
}
#demoC {
  position: absolute;
  bottom: 5px; right: 5px;
  background: lightblue;
}
#demoD {
  position: fixed;
  top: 50%; left: 50%;
  background: lightgoldenrodyellow;
}
#demoE {
  position: sticky;
  top: 0; left: 0;
  background: lavender;
}
</style>

<div id="demoA">STATIC</div>
<div id="demoB">RELATIVE</div>
<div id="demoC">ABSOLUTE</div>
<div id="demoD">FIXED</div>
<div id="demoE">STICKY</div>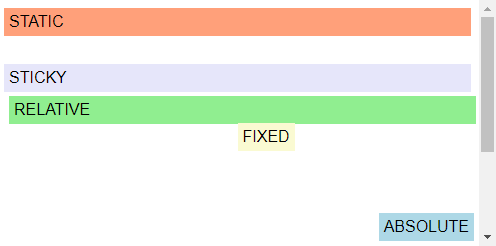
All right, let us now start with “step one” of creating overlapping elements – By positioning elements. In CSS, there are a couple of ways to position an element:
- Static – This is the default “as-it-is” positioning for every element; The element will simply go along with the “normal page flow”.
- Relative – The element will be “displaced” from its static position, we use
top bottom left rightto define how much to offset the element. - Absolute – The element will be positioned with reference to an ancestor that is not
position: static; Will be positioned with reference to<body>if all ancestors areposition: static. - Fixed – The element will be fixed on the screen and cannot be “scrolled away”.
- Sticky – An interesting one, the element acts like
position: staticby default. But as it scrolls out of the screen, it turns intoposition: fixedinstead.
In summary – relative absolute fixed sticky will “disrupt” HTML elements from their “usual layout”, and we can control it using top bottom left right. Overlapping happens when we position one element over another.
1B) Z-INDEX LAYERING ORDER
<style>
#demoA, #demoB, #demoC {
  position: fixed;
  top: 10px;
  padding: 10px;
}
#demoA {
  left: 5px;
  background: lightpink;
  z-index: 1;
}
#demoB {
  left: 70px;
  background: lightgreen;
  z-index: 9;
}
#demoC {
  left: 40px;
  background: lightblue;
  z-index: 5;
}
</style>

<div id="demoA">BOTTOM</div>
<div id="demoB">TOP</div>
<div id="demoC">MIDDLE</div>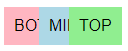
Now, position should be straightforward enough, and here comes the “next easy” – How do we determine which element is on top, which is below when they are layered? Introducing z-index, which is simply an arbitrary number that you assign. The higher the z-index, the more priority it has to be on top. That simple.
PART 2) SET THE WIDTH & HEIGHT
<style>
/* (A) FIXED POSITION */
#demoA, #demoB, #demoC {
  position: fixed;
  display: block;
}
/* (B) EXACT PIXELS */
#demoA {
  top: 0; left: 0;
  width: 100px;
  height: 50px;
  background: #ffcdc9;
}
/* (C) PERCENTAGE DIMENSIONS */
#demoB {
  bottom: 0; left: 0;
  width: 100%;
  height: 15%;
  background: #d5ffc9;
  text-align: center;
}
/* (D) RELATIVE TO VIEWPORT */
#demoC {
  top: 0; right: 0;
  width: 50vw;
  height: 15vh;
  background: #c9cdff;
  text-align: center;
}
</style>

<div id="demoA">Fixed Size Overlay.</div>
<div id="demoB">Percentage Size Overlay.</div>
<div id="demoC">Viewport Size Overlay.</div>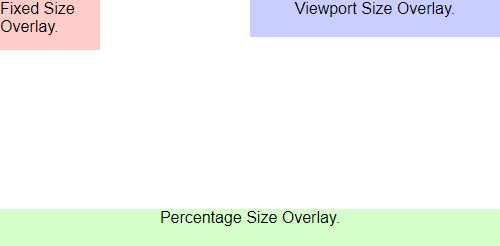
Need to set the dimensions of an overlay? Well, there are a lot of confusing measurement units in CSS, but here are a few common ones to know:
pxPixels, good for specifying an exact size for an overlay with an image or video.%Percentage, one that I will recommend using with today’s responsive design and to better support mobile screens. But take note, the percentage is calculated based on the parent container. E.G. If we have a parent<div>that has300pxwidth, and a child<button>inside with50%width – That will translate to a button with150pxwide.vwfor the percentage of the viewport width, andvhfor the viewport height. This one takes the width and height of the screen instead of the parent container – A very useful unit to use forfixedelements.
That should be good enough in most cases. But if you want to know more sizing units, I will leave a link in the extras section below to another tutorial.
MORE EXAMPLES

With all of the above, you should be able to create overlapping elements well enough. But here are a few more common examples of using layered elements.
CATFISH WITH STICKY POSITION
<style>
#catfish {
  position: sticky;
  bottom: 0; left: 0;
  width: 100%; padding: 30px 10px;
  color: white; background: rgba(0, 0, 0, 0.5);
  text-align: center;
}
</style>

<header>MY SITE</header>
<main>Main Contents</main>
<footer>Copyright My Site</footer>
<div id="catfish">This can be a bottom navigation bar or important message.</div>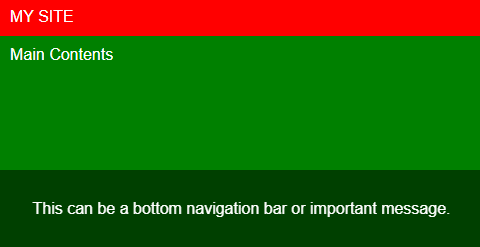
A catfish stays at the bottom, the HTML counterpart does the same too. Very easy to create – Just give it position: sticky; bottom 0; width: 100%; and done. Take note, we define a transparent background color using rgba(RED, GREEN, BLUE, OPACITY).
CENTERED OVERLAY
<style>
/* (A) FULL SCREEN BACKGROUND */
#overA {
  position: fixed; top: 0; left: 0; z-index: 999;
  width: 100vw; height: 100vh;
  background: rgba(0, 0, 0, 0.5);
}
/* (B) CENTERED ON SCREEN */
#overB {
  position: absolute; top: 50%; left: 50%;
  /* "COUNTER" WIDTH & HEIGHT OF BOX TO "TRULY CENTER" ON SCREEN */
  transform: translate(-50%, -50%);
  color: #fff; background: #000;
  padding: 10px;
  text-align: center;
}
</style>

<main>Just some random contents</main>
<div id="overA">
  <div id="overB">This can be a loading screen or dialog box.</div>
</div>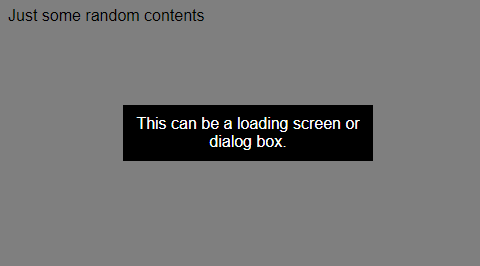
Centering an element can be a little trickier, but still can be done… This one will probably need the help of some Javascript to toggle show/hide the #overA though – document.getElementById("overA").style.display = "none" or document.getElementById("overA").style.display = "block".
EXTRA BITS & LINKS

That’s all for this guide, and here is a small section on some extras and links that may be useful to you.
LINKS & REFERENCES
- Position – CSS Tricks
- CSS values and units – Learn web development – MDN
- Z-Index – MDN
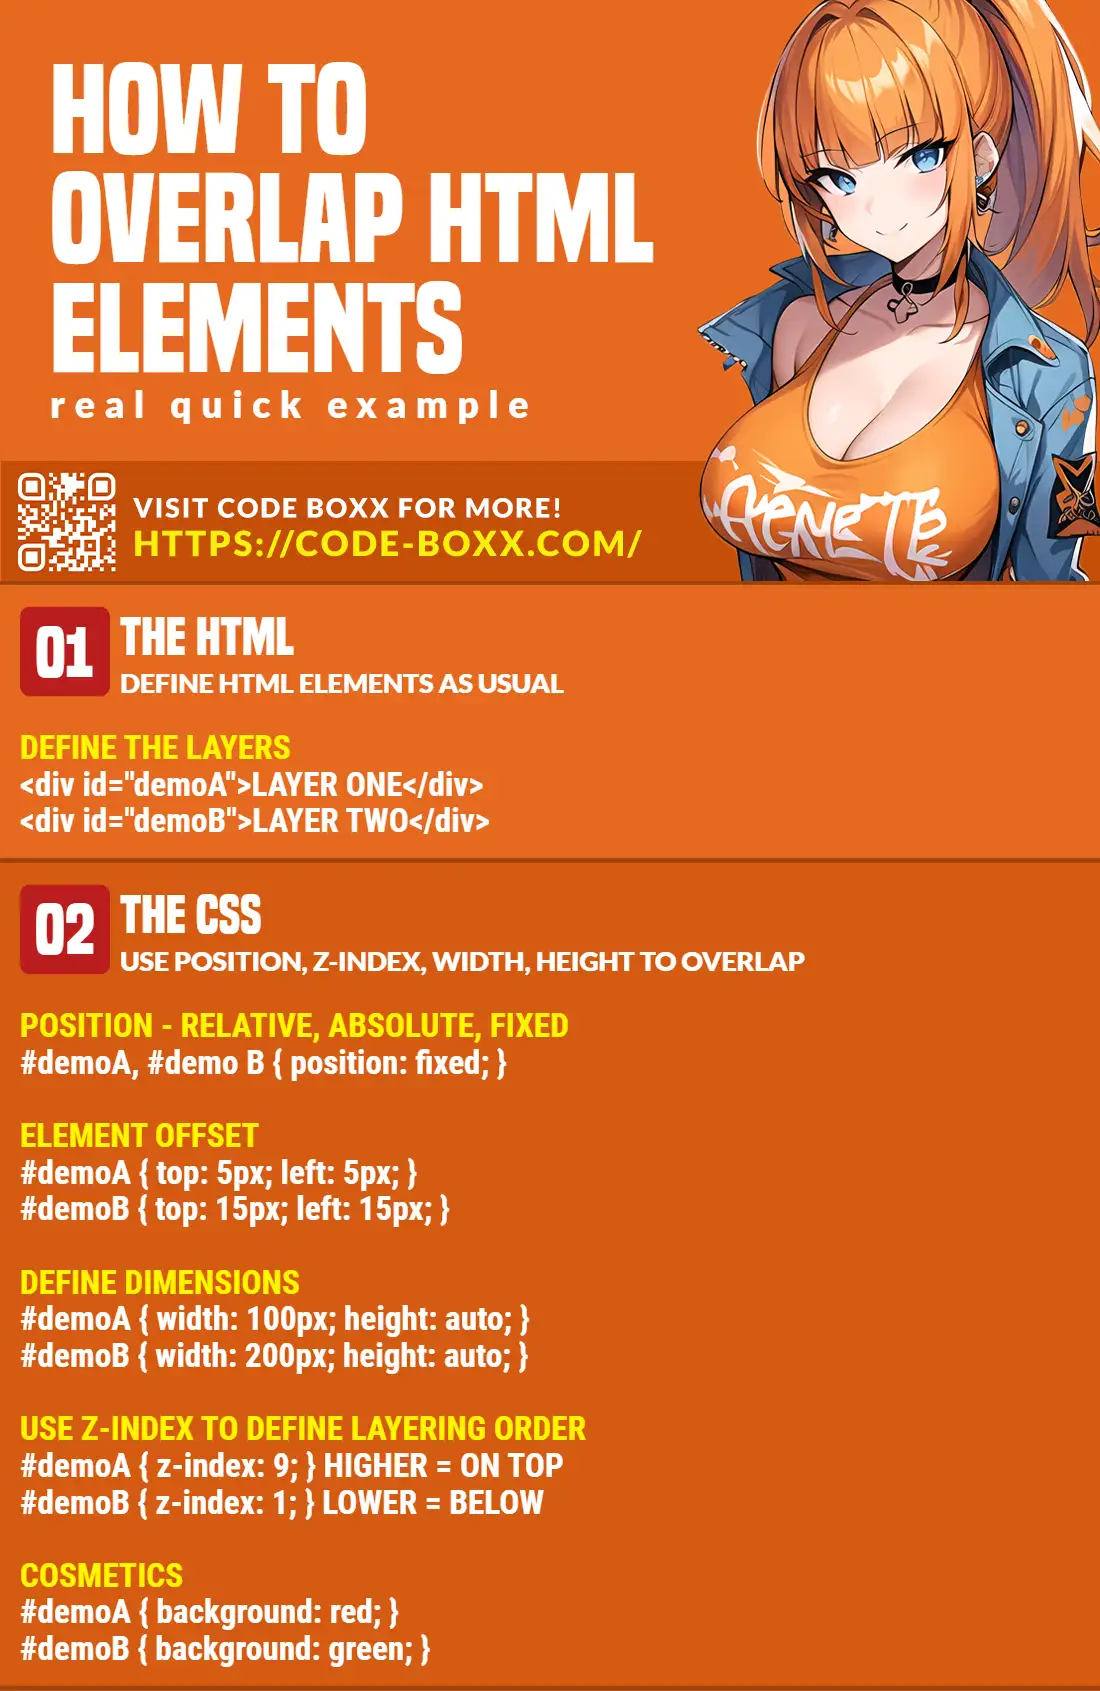
INFOGRAPHIC CHEAT SHEET
THE END

Thank you for reading, and we have come to the end of this guide. I hope that it has helped you with your project, and if you want to share anything with this guide, please feel free to comment below. Good luck and happy coding!