Welcome to a tutorial and sharing on how to create a Javascript notice board. Yep, there are already a couple of examples on the Internet. So I figured to add a little more extra – This one uses pure Javascript, has no reliance on third-party libraries, and is also a progressive web app. Read on!
TABLE OF CONTENTS
JAVASCRIPT NOTICE BOARD

All right, let us now get into more details of how the Javascript notice board works.
JAVASCRIPT NOTICE BOARD DEMO
PART 1) THE HTML
<!-- (A) ADD/UPDATE NOTE -->
<form id="noteform">
  <input type="text" id="notetxt" required disabled>
  <input type="submit" id="notego" value="Add" disabled>
</form>

<!-- (B) NOTICE BOARD -->
<div id="board"></ul>
The HTML should be pretty self-explanatory. There are only 2 sections –
- A simple form to add/update notes.
- The notice board itself. The notes will be generated with Javascript.
PART 2) THE JAVASCRIPT
2A) INITIALIZE & QUICK OVERVIEW
var board = {
  // (A) PROPERTIES
  notes : [],   // current list of notes
  hwrap : null, // html notice board wrapper
  hform: null,  // html add/update note form
  hadd : null,  // html add/update note text field
  hgo : null,   // html add/update note button
  hsel : null,  // current note being dragged or edited

  // (B) INITIALIZE NOTICE BOARD
  init : () => {
    // (B1) GET HTML ELEMENTS
    board.hwrap = document.getElementById("board");
    board.hform = document.getElementById("noteform");
    board.hadd = document.getElementById("notetxt");
    board.hgo = document.getElementById("notego");

    // (B2) LOAD & DRAW HTML NOTES
    let data = localStorage.getItem("notes");
    if (data !== null) { for (let n of JSON.parse(data)) {
      board.draw(n);
    }}

    // (B3) ENABLE ADD NEW NOTE
    board.hform.onsubmit = () => board.add();
    board.hadd.disabled = false;
    board.hgo.disabled = false;
  },

  ...
}
window.addEventListener("DOMContentLoaded", board.init);- (A) Captain Obvious at your service,
var boardcontains all the mechanics of the notice board. - The idea is to save the data in the local storage. So that it will not disappear when the user closes the browser.
- (B) On page load,
board.init()will run.- (B1) Simply fetches all the related HTML elements.
- (B2) Load the saved data from the local storage. The data is nothing but a flat JSON encoded string of
["NOTE", "NOTE", ...] - (B3) Enable the add/update note HTML form.
2B) DRAW HTML NOTE
// (C) HELPER - CREATE HTML NOTE
draw : (note, first) => {
  // (C1) CREATE HTML NOTE
  let div = document.createElement("div");
  div.className = "note";
  div.draggable = true;
  div.innerHTML = `<div class="del" onclick="board.del(this.parentElement)">X</div> <div class="txt">${note}</div>`;

  // (C2) ON DRAG START - ADD DROPPABLE HINTS
  div.ondragstart = e => {
    board.hsel = e.target;
    for (let n of board.notes) {
      n.classList.add("drag");
      if (n != board.hsel) { n.classList.add("hint"); }
    }
  };

  // (C3) ON DRAG ENTER - HIGHLIGHT DROPZONE
  div.ondragenter = e => { if (div != board.hsel) { div.classList.add("active"); }};

  // (C4) DRAG LEAVE - REMOVE HIGHLIGHT DROPZONE
  div.ondragleave = e => div.classList.remove("active");

  // (C5) DRAG END - REMOVE ALL HIGHLIGHTS
  div.ondragend = e => { for (let n of board.notes) {
    n.classList.remove("drag");
    n.classList.remove("hint");
    n.classList.remove("active");
  }};

  // (C6) DRAG OVER - PREVENT DEFAULT "DROP", SO WE CAN DO OUR OWN
  div.ondragover = e => e.preventDefault();

  // (C7) ON DROP - REORDER NOTES & SAVE
  div.ondrop = e => {
    // (C7-1) PREVENT DEFAULT BROWSER DROP ACTION
    e.preventDefault();

    if (e.target != board.hsel) {
      // (C7-2) GET CURRENT & DROPPED POSITIONS
      let idrag = 0, // index of currently dragged
      idrop = 0; // index of dropped location
      for (let i=0; i<board.notes.length; i++) {
        if (board.hsel == board.notes[i]) { idrag = i; }
        if (e.target == board.notes[i]) { idrop = i; }
      }

      // (C7-3) REORDER HTML NOTES
      if (idrag > idrop) {
        board.hwrap.insertBefore(board.hsel, e.target);
      } else {
        board.hwrap.insertBefore(board.hsel, e.target.nextSibling);
      }

      // (C7-4) REORDER & SAVE NOTES ARRAY
      board.save();
    }
  };

  // (C8) DOUBLE CLICK TO EDIT NOTE
  div.ondblclick = () => {
    // (C8-1) SELECTED NOTE
    board.hsel = div.querySelector(".txt");

    // (C8-2) LOCK - NO DRAG NO DELETE WHILE EDITING
    for (let n of board.notes) { n.classList.add("lock"); }

    // (C8-3) UPDATE NOTE FORM
    board.hadd.value = board.hsel.innerHTML;
    board.hgo.value = "Update";
    board.hform.onsubmit = () => board.update();
    // board.hadd.focus();
    board.hadd.select();
  };

  // (C9) DONE - PUSH INTO ARRAY & ATTACH TO CONTAINER
  if (first) {
    board.notes.unshift(div);
    board.hwrap.insertBefore(div, board.hwrap.firstChild);
  } else {
    board.notes.push(div);
    board.hwrap.appendChild(div);
  }
},
Right, not going to explain line-by-line. But this function is as it is, a helper function used to generate <div class="note"> during the init phase, and also when the user adds a new note.
- (C1) Creates the
<div class="note">. - (C2 to C7) The drag-and-drop mechanism.
- (C8) Double click to edit note.
- (C9) Attach the note to
<div id="board">.
2C) ADD UPDATE DELETE NOTES
// (D) ADD NEW NOTE
add : () => {
  board.draw(board.hadd.value, true);
  board.hadd.value = "";
  board.save();
  return false;
},

// (E) DELETE NOTE
del : note => { if (confirm("Delete note?")) {
  note.remove();
  board.save();
}},

 // (F) UPDATE NOTE
update : () => {
  // (F1) UPDATE NOTE
  board.hsel.innerHTML = board.hadd.value;
  board.hadd.value = "";
  board.hgo.value = "Add";

  // (F2) "RESTORE" ADD NOTE FORM
  board.hform.onsubmit = () => board.add();

  // (F3) SAVE
  board.save();

  // (F4) UNLOCK - ALLOW DRAG & DELETE
  for (let n of board.notes) { n.classList.remove("lock"); }
  return false;
},

 // (G) UPDATE & SAVE NOTES
save : () => {
  // (G1) REORDER NOTES ARRAY
  let data = [];
  board.notes = [];
  for (let n of board.hwrap.getElementsByClassName("note")) {
    board.notes.push(n);
    data.push(n.querySelector(".txt").innerHTML);
  }

  // (G2) SAVE DATA
  localStorage.setItem("notes", JSON.stringify(data));
}
These should be pretty self-explanatory once you catch the gist.
- (D) Add a new note – Simply use
board.draw()to create a new<div class="note">, then update the local storage. - (E) Delete note – Remove the selected
<div class="note">, update the local storage. - (F) Update note – Update the text of the selected
<div class="note">, update the local storage. - (G) To save the notes – Get all
<div class="note">, extract the text, and save it into the local storage.
3) PROGRESSIVE WEB APP
3A) HTML META
<head>
  <!-- MANIFEST & WORKER -->
  <link rel="manifest" href="manifest.json">
  <script>
  if ("serviceWorker" in navigator) {
    navigator.serviceWorker.register("worker.js");
  }
  </script>
</head>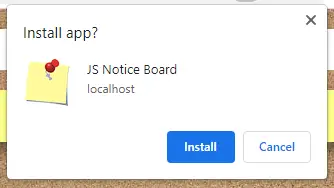
With the above HTML and Javascript, we already have a working notice board. This step is optional, to create an installable and offline-capable notice board. Some people think that creating a PWA is difficult, but it is really not that bad.
3B) SERVICE WORKER
// (A) CREATE/INSTALL CACHE
self.addEventListener("install", evt => {
  self.skipWaiting();
  evt.waitUntil(
    caches.open("StorageBoxx")
    .then(cache => cache.addAll([
      "notice-board.html",
      "notice-board.css",
      "notice-board.js",
      "images/cork.jpg",
      "images/favicon.png",
      "images/icon-512.png"
    ]))
    .catch(err => console.error(err))
  );
});

// (B) CLAIM CONTROL INSTANTLY
self.addEventListener("activate", evt => self.clients.claim());

// (C) LOAD FROM CACHE FIRST, FALLBACK TO NETWORK IF NOT FOUND
self.addEventListener("fetch", evt => evt.respondWith(
  caches.match(evt.request).then(res => res || fetch(evt.request))
));
For those who have not heard of “service worker”, it is basically a Javascript that we “install” to run in the background.
- (A) Save the notice board HTML, CSS, and Javascript into a storage cache.
- (C) Load the files from the cache if it exists, and fall back to the network if not found.
In other words, effectively turning this notice board into an offline app.
3C) MANIFEST
{
  "short_name": "JS Board",
  "name": "JS Notice Board",
  "icons": [{
    "src": "images/favicon.png",
    "sizes": "64x64",
    "type": "image/png"
  }, {
    "src": "images/icon-512.png",
    "sizes": "512x512",
  "type": "image/png"
  }],
  "start_url": "notice-board.html",
  "scope": "/",
  "background_color": "white",
  "theme_color": "white",
  "display": "standalone"
}
Lastly, this manifest file is self-explanatory – The app name, icons, preferences, etc…
DOWNLOAD & NOTES

Here is the download link to the example code, so you don’t have to copy-paste everything.
SORRY FOR THE ADS...
But someone has to pay the bills, and sponsors are paying for it. I insist on not turning Code Boxx into a "paid scripts" business, and I don't "block people with Adblock". Every little bit of support helps.
Buy Me A Coffee Code Boxx eBooks
EXAMPLE CODE DOWNLOAD
Click here for the source code on GitHub gist, just click on “download zip” or do a git clone. I have released it under the MIT license, so feel free to build on top of it or use it in your own project.
EXTRA BITS & LINKS

That’s all for the tutorial, and here is a small section on some extras and links that may be useful to you.
COMPATIBILITY CHECKS
- Arrow Functions – CanIUse
- HTML Draggable – CanIUse
- Service Worker – CanIUse
- Add To Home Screen – CanIUse
This example will work on some of the older browsers. But for the “installable” to work, a modern “Grade A” browser is required.
LINKS & REFERENCES
THE END

Thank you for reading, and we have come to the end. I hope that it has helped you to better understand, and if you want to share anything with this guide, please feel free to comment below. Good luck and happy coding!