Welcome to a quick tutorial on how to create an email queue system in PHP and MYSQL. So you are working on a project that needs to send out a ton of emails… Only to realize that it will crash the mail server if you send them out all at once. Well, let us walk through a simple email queue system that may help – Read on!
TABLE OF CONTENTS
DOWNLOAD & NOTES
Here is the download link to the example code, so you don’t have to copy-paste everything.
EXAMPLE CODE DOWNLOAD
Click here to download. I have released it under the MIT license, so feel free to build on top of it or use it in your own project.
SORRY FOR THE ADS...
But someone has to pay the bills, and sponsors are paying for it. I insist on not turning Code Boxx into a "paid scripts" business, and I don't "block people with Adblock". Every little bit of support helps.
Buy Me A Coffee Code Boxx eBooks
PHP MYSQL EMAIL QUEUE
The basic idea of an email queue system is simple – “Push” the emails to send into the database, and “pop” them out one by one.
PART 1) THE DATABASE
CREATE TABLE `email_queue` (
  `email_queue` datetime(3) NOT NULL DEFAULT current_timestamp(3),
  `email_to` varchar(255) NOT NULL,
  `email_subject` text NOT NULL,
  `email_message` text NOT NULL
) ENGINE=InnoDB DEFAULT CHARSET=utf8 COLLATE=utf8_general_ci;

ALTER TABLE `email_queue`
  ADD PRIMARY KEY (`email_queue`,`email_to`);
Pretty self-explanatory, a table to hold the email queue.
email_queueTimestamp when the email is added to the queue.email_toEmail address to send the email to.email_subjectEmail subject.email_messageEmail message.
PART 2) EMAIL QUEUE LIBRARY
<?php
class MailQ {
  // (A) PROPERTIES
  public $pdo = null; // database connection
  public $stmt = null; // sql statement

  // (B) HELPER - CONNECT TO DATABASE
  function connect () : void {
    $this->pdo = new PDO(
      "mysql:host=". DB_HOST .";charset=". DB_CHARSET .";dbname=". DB_NAME,
      DB_USER, DB_PASSWORD, [
      PDO::ATTR_ERRMODE => PDO::ERRMODE_EXCEPTION,
      PDO::ATTR_DEFAULT_FETCH_MODE => PDO::FETCH_ASSOC
    ]);
  }

  // (C) HELPER - DISCONNECT FROM DATABASE
  function disconnect () : void {
    $this->stmt = null;
    $this->pdo = null;
  }

  // (D) HELPER - RUN SQL QUERY
  function query ($sql, $data=null) : void {
    $this->stmt = $this->pdo->prepare($sql);
    $this->stmt->execute($data);
  }

  // (E) ADD EMAIL TO THE QUEUE
  function push ($to, $subject, $message) : void {
    $this->connect();
    $this->query(
      "INSERT INTO `email_queue` (`email_to`, `email_subject`, `email_message`) VALUES (?,?,?)",
      [$to, $subject, $message]
    );
    $this->disconnect();
  }

  // (F) SEND EMAIL TO NEXT IN QUEUE
  // returns true if send ok
  // returns false if send failed
  // returns null if no more in queue
  function pop () {
    // (F1) GET NEXT EMAIL
    $this->connect();
    $this->query("SELECT * FROM `email_queue` ORDER BY `email_queue` ASC LIMIT 1");
    $mail = $this->stmt->fetch();

    // (F2) END OF QUEUE
    if ($mail == null) { $result = null; }

    // (F3) SEND EMAIL
    else {
      echo "Sending to " . $mail["email_to"] . PHP_EOL;
      $result = @mail($mail["email_to"], $mail["email_subject"], $mail["email_message"]);
      $this->query(
        "DELETE FROM `email_queue` WHERE `email_queue`=? AND `email_to`=?",
        [$mail["email_queue"], $mail["email_to"]]
      );
    }

    // (F4) DONE
    $this->disconnect();
    return $result;
  }
}

// (G) SETTINGS - CHANGE TO YOUR OWN!
define("DB_HOST", "localhost");
define("DB_NAME", "test");
define("DB_CHARSET", "utf8mb4");
define("DB_USER", "root");
define("DB_PASSWORD", "");

// (H) MAIL QUEUE ENDPOINT
define("MQ_POINT", "127.0.0.1:8000");

// (I) GO!
$_MQ = new MailQ();
Don’t need to panic. Keep calm and look closely.
- (B, C, D) Helper functions. Connect and disconnect to the database, run an SQL query
- (E & F) There are only 2 “main functions”.
push()Add an email to the queue.pop()Send the next email in the queue, “first in first out”.
That’s about it. Remember to change the database settings (G) to your own.
PART 3) EMAIL ENDPOINT
<?php
// (A) LOAD LIBRARIES
// composer require react/socket
require "2-mail-lib.php";
require "vendor/autoload.php";

// (B) FLAG
$sending = false; // is currently sending emails
$result = null; // last run result

// (C) CREATE ENDPOINT - "PING TO RUN"
$socket = new React\Socket\SocketServer(isset($argv[1]) ? $argv[1] : MQ_POINT, [
  "tls" => ["local_cert" => isset($argv[2]) ? $argv[2] : (__DIR__ . "/localhost.pem")]
]);
$socket->on("connection", function (React\Socket\ConnectionInterface $connection) {
  $connection->close();
  global $sending, $result, $_MQ;
  if (!$sending) {
    $sending = true;
    do {
      $result = $_MQ->pop();
      if ($result==null) { $sending = false; }
      usleep(200000); // 0.2 seconds pause
    } while ($result != null);
  }
});
echo "Listening on " . $socket->getAddress() . PHP_EOL;
Now that the library is in place, it’s time to tie in the rest:
- Install Composer, a package manager.
- Open the command line, navigate to your project folder
cd YOUR/PROJECT/FOLDER. - Run
composer require react/socketand this will download the PHP React Socket module into thevendor/folder. - Run
3-mail-server.phpto start the “service endpoint”. - Long story short – Just connect to
tcp://127.0.0.1:8000, and this will start clearing out the email queue. - Take note that there is a small
usleep(200000)delay between each send to not flood the mail server. Go ahead and shorten this delay if your mail server is capable of handling more.
PART 4) PUSH & POP
<?php
// (A) LOAD LIBRARY
require "2-mail-lib.php";

// (B) DUMMY EMAIL TO SEND
$_MQ->push("job@doe.com", "Test 1", "Message A");
$_MQ->push("joe@doe.com", "Test 2", "Message B");
$_MQ->push("jon@doe.com", "Test 3", "Message C");
$_MQ->push("jou@doe.com", "Test 4", "Message D");
$_MQ->push("joy@doe.com", "Test 5", "Message E");

// (C) GO!
$ch = curl_init();
curl_setopt($ch, CURLOPT_URL, MQ_POINT);
curl_exec($ch);
curl_close($ch);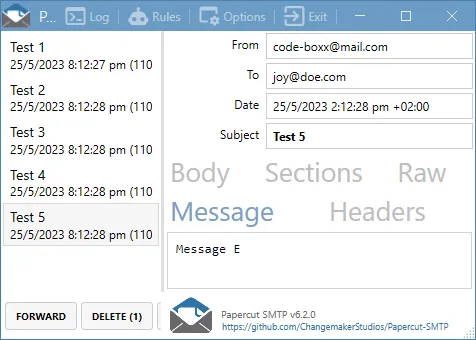
Yep, just add emails to the queue. Then, “ping” the tcp://127.0.0.1:8000 email endpoint to start sending.
EXTRAS
That’s all for the tutorial, and here is a small section on some extras and links that may be useful to you.
POSSIBLE SIMPLIFICATION?
I can hear the “experts” screaming. Just run $_MQ->pop() in an endless loop, there’s no need to create some stupid and useless “endpoint”. Well, if that works for you, go ahead and make your own changes. I am just looking at a much bigger picture:
tcp://127.0.0.1:8000is an independent endpoint. It’s much more capable than “AJAX long poll”.- The email endpoint can be deployed on another server as a “backend background service”. It does not take up resources on your front-end HTTP server.
- Even if the front-end HTTP server is down, it will continue to send emails as an independent process.
- The endpoint can be shared among various different apps within the same network/company.
- There are many ways to improve on it – See below.
IMPROVEMENT IDEAS
- Expand on
3-mail-server.php. Yes, we can do a$connection->on("data", function ($data) { switch ($data) { ... }}to process different “requests”. Examples:runAs above, start sending emails.stopStop sending emails.statGet performance stats.
- Modify
2-mail-lib.php.- Link to your own newsletters/campaigns/subscribers.
- Add more functions to help yourself – Mass add, mass delete, etc…
- Delivery reports. Which email for which campaign is sent/not sent, error messages, and stats.
- Email templates. See the links below.
- A little more on the advanced side – If you have more than one SMTP server, you can do “load balancing”. Maybe even workers to send in parallel.
LINKS & REFERENCES
- React PHP Socket – GitHub
- PHP Email Template – Code Boxx
- Bulk Send Email in PHP – Code Boxx
THE END
Thank you for reading, and we have come to the end. I hope that it has helped you to better understand, and if you want to share anything with this guide, please feel free to comment below. Good luck and happy coding!