Welcome to a tutorial on how to create a date range in Javascript. Need to create a range of dates in Javascript? No worries, it is actually pretty easy.
To create a date range in Javascript:
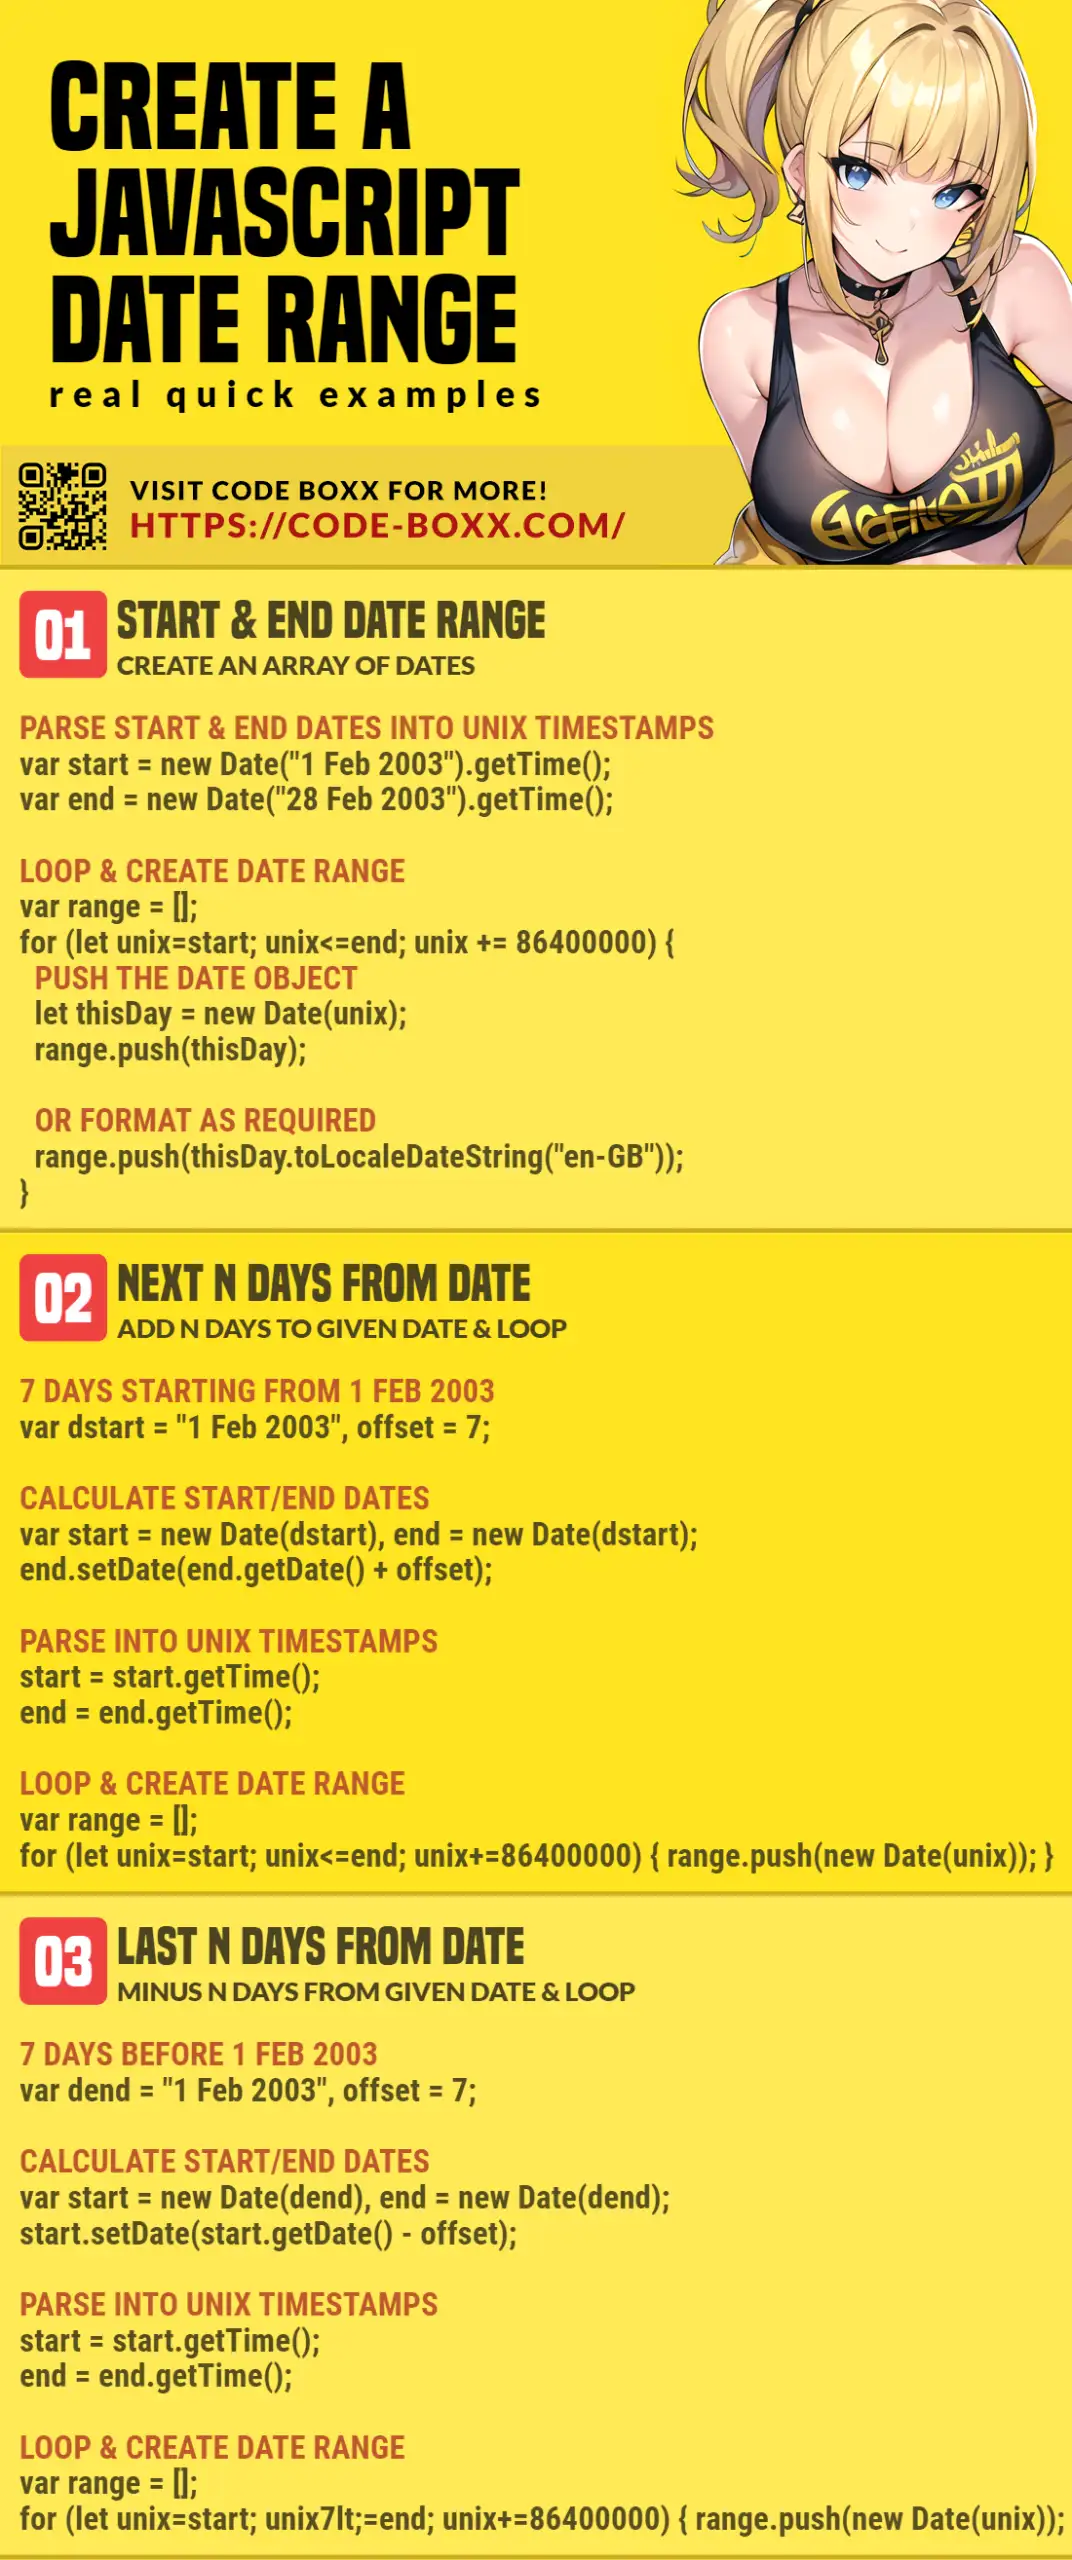
- Parse the start and end dates into date objects.
var start = new Date("1 Feb 2020");var end = new Date("28 Feb 2020");
- Get the Unix Timestamps of both start and end dates.
var ustart = start.getTime();var uend = end.getTime();
- Lastly, loop through the timestamps to create the date range.
for (unix = ustart; unix<=uend; unix+=86400000) { var thisDay = new Date(unix); }
That should cover the basics, but read on for more examples!
ⓘ I have included a zip file with all the source code at the start of this tutorial, so you don’t have to copy-paste everything… Or if you just want to dive straight in.
TABLE OF CONTENTS
DOWNLOAD & NOTES

Firstly, here is the download link to the example code as promised.
QUICK NOTES
If you spot a bug, feel free to comment below. I try to answer short questions too, but it is one person versus the entire world… If you need answers urgently, please check out my list of websites to get help with programming.
EXAMPLE CODE DOWNLOAD
Click here to download all the example source code, I have released it under the MIT license, so feel free to build on top of it or use it in your own project.
DATE RANGE

All right, let us now get into the examples of how to create a date range in Javascript.
1) DATE RANGE BETWEEN START & END
// (A) CREATE DATE RANGE FUNCTION
function dateRange (start, end) {
  // (A1) EMPTY DATE RANGE + PARSE INTO DATE OBJECTS
  var range = [],
      start = new Date(start),
      end = new Date(end);

  // (A2) CREATE RANGE BY LOOPING THROUGH IN UNIX TIMESTAMP
  // 1 DAY = 24 HRS * 60 MINS * 60 SECS * 1000 MS = 86400000
  for (let unix = start.getTime(); unix <= end.getTime(); unix += 86400000) {
    // (A2-1) UNIX TIMESTAMP TO DATE
    let thisDay = new Date(unix);
    range.push(thisDay);

    // (A2-2) FORMAT IF REQUIRED
    // range.push(thisDay.toLocaleDateString("en-GB"));
  }

  // (A3) RETURN RESULTS
  return range;
}

// (B) TEST
var range = dateRange("1 Feb 2003", "28 Feb 2003");
console.log(range);
Look no further, this is doing the same thing as the snippet in the introduction – Except that it is “packaged” into a function. Simply plug the start and end date into dateRange(), and it returns the date range in an array.
2) LAST/NEXT N DAYS
// (A) LAST/NEXT DAYS
function daysRange (dstart, offset, direction) {
  // (A1) PARSE INTO DATE OBJECT
  let start = new Date(dstart),
      end = new Date(dstart);

  // (A2) OFFSET END DATE
  if (direction) { end.setDate(end.getDate() + offset); }
  else { start.setDate(start.getDate() - offset); }

  // (A3) CREATE DATE RANGE
  let range = [];
  for (let unix = start.getTime(); unix < end.getTime(); unix += 86400000) {
    // (A3-1) UNIX TIMESTAMP TO DATE
    let thisDay = new Date(unix);
    range.push(thisDay);

    // (A3-2) FORMAT IF REQUIRED
    // range.push(thisDay.toLocaleDateString("en-GB"));
  }

  // (A4) RETURN RESULTS
  return range;
}

// (B) TEST
// (B1) 7 DAYS FROM "1 FEB 2003"
var range = daysRange("1 Feb 2003", 7, true);
console.log(range);

// (B2) 14 DAYS BEFORE "3 APR 2005"
range = daysRange("3 Apr 2005", 14, false);
console.log(range);
This is an alternative for you guys who want to do stuff like “7 days from DATE” or “last 30 days” – Just feed 3 parameters into daysRange().
dstartThe starting date.offsetNumber days offset.directionTrue for “next N days from starting date”, false for “last N dates from starting date”.
That’s all the calculations are pretty much the same, based on looping through the Unix Timestamp.
EXTRA BITS & LINKS

That’s all for the tutorial, and here is a small section on some extras and links that may be useful to you.
LINKS & REFERENCES
INFOGRAPHIC CHEAT SHEET
THE END

Thank you for reading, and we have come to the end. I hope that it has helped you to better understand, and if you want to share anything with this guide, please feel free to comment below. Good luck and happy coding!