Welcome to a quick tutorial on how to create a custom HTML range slider. So I was trying to create a custom audio player, and using the range input field as the audio timeline immediately came to mind. But as things turn out, customizing the range picker isn’t that straightforward.
The general steps to create a custom HTML range slider is to:
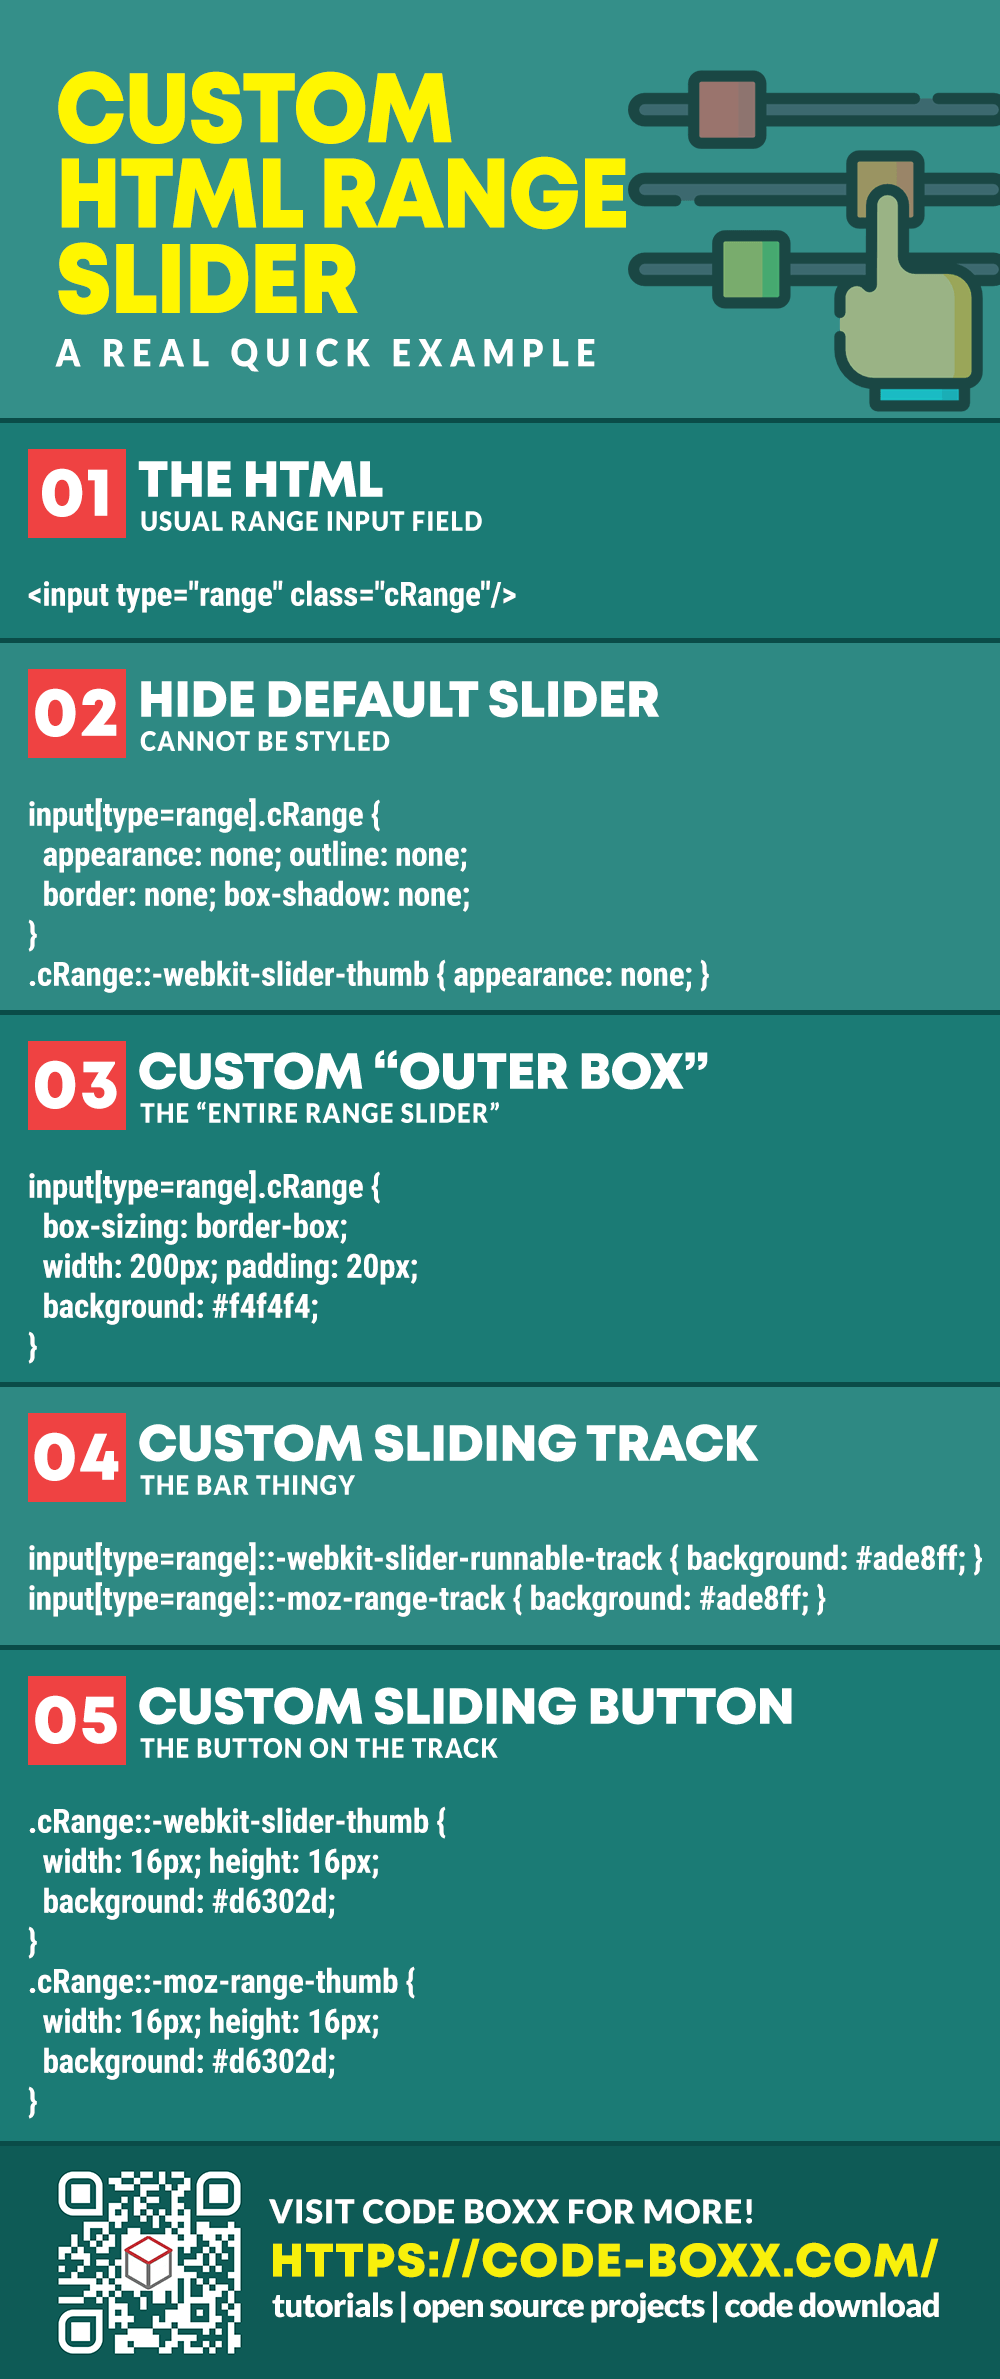
- Hide the original range slider.
input[type="range"] { appearance: none; border: none; outline: none; box-shadow: none; }input[type="range"]::-webkit-slider-thumb { appearance: none; }
- Customize the slider track.
input[type="range"]::-webkit-slider-runnable-track { background: red; }input[type="range"]::-moz-range-track { background: red; }
- Customize the slider button.
input[type="range"]::-webkit-slider-thumb { width: 16px; height: 16px; background: black; }input[type="range"]::-moz-range-thumb { width: 16px; height: 16px; background: black; }
That covers the quick basics, but read more for the detailed examples!
ⓘ I have included a zip file with all the source code at the start of this tutorial, so you don’t have to copy-paste everything… Or if you just want to dive straight in.
QUICK SLIDES
[web_stories_embed url=”https://code-boxx.com/web-stories/custom-html-range-slider/” title=”Custom HTML Range Slider” poster=”https://code-boxx.com/wp-content/uploads/2022/03/STORY-HTML-20230505.webp” width=”360″ height=”600″ align=”center”]
TABLE OF CONTENTS
 Download & Notes Download & Notes |
 Custom Slider Custom Slider |
 Useful Bits & Links Useful Bits & Links |
 The End The End |
DOWNLOAD & NOTES
Firstly, here is the download link to the example code as promised.
QUICK NOTES
If you spot a bug, feel free to comment below. I try to answer short questions too, but it is one person versus the entire world… If you need answers urgently, please check out my list of websites to get help with programming.
EXAMPLE CODE DOWNLOAD
Click here to download all the example source code, I have released it under the MIT license, so feel free to build on top of it or use it in your own project.
CUSTOM RANGE SLIDER
All right, let us now get into the examples of customizing an HTML range slider.
PART 1) CSS ONLY CUSTOMIZATION
CUSTOM SLIDER DEMO
THE HTML
<input type="range" class="cRange"/>That’s all, we only attached a cRange CSS class to the range slider.
THE CSS
/* (A) HIDE DEFAULT SLIDER */
input[type=range].cRange {
  appearance: none;
  outline: none;
  border: none;
  box-shadow: none;
}
.cRange::-webkit-slider-thumb { appearance: none; }

/* (B) CUSTOM "OUTSIDE BOX" */
input[type=range].cRange {
  box-sizing: border-box;
  width: 200px;
  padding: 20px;
  background: #f4f4f4;
}

/* (C) CUSTOM SLIDER TRACK */
/* -WEBKIT-SLIDER-RUNNABLE-TRACK, -MOZ-RANGE-TRACK WILL NOT WORK */
/* SO WE ANNOYINGLY HAVE DUPLICATE STYLES */
input[type=range]::-webkit-slider-runnable-track {
  background: #ade8ff;
}
input[type=range]::-moz-range-track {
  background: #ade8ff;
}

/* (D) CUSTOM SLIDER BUTTON */
.cRange::-webkit-slider-thumb {
  width: 16px; height: 16px;
  border-radius: 50%;
  border: 2px solid #9c230c;
  background: #d6302d;
}
.cRange::-moz-range-thumb {
  width: 16px; height: 16px;
  border-radius: 50%;
  border: 2px solid #9c230c;
  background: #d6302d;
}
This may seem like quite a bit, but keep calm and look carefully.
- As in the introduction above, we have to first hide the default slider… Or things will look very funky later.
- Styles for the “outer box” of the range slider.
- Customizing the slider bar itself. Captain Obvious to the rescue –
-webkit-slider-runnable-trackand-moz-range-trackare pseudo-classes used to select the slider bar, but they are non-standard.- The bad part is that we cannot do a
::-webkit-slider-runnable-track, ::-moz-range-trackto “carpet support” all the browsers… Thus the annoying duplicate styles.
- Customizing the slider button, same old story –
-webkit-slider-thumbfor webkit browsers,-moz-range-thumbfor Firefox.
PART 2) RANGER SLIDER WITH VALUE DISPLAY
CUSTOM SLIDER DEMO
THE HTML
<div class="cWrap">
  <input class="cRange" type="range" min="0" max="100" value="0"
         oninput="document.getElementById('cVal').innerHTML=this.value"/>
  <div class="cVal" id="cVal">0</div>
</div>
If you want to display the current value of the range slider, quite a bit of addition need to be included:
- On the range slider itself, set the
min,max, and defaultvalue. - Create a
<div id="cVal">to show the current value. - Wrap the range slider and current value in yet another wrapper
<div class="cWrap">. - Finally, a small bit of Javascript on the slider –
oninput = "document.getElementById('cVal').innerHTML=this.value". Basically, update the current value as the user slides.
THE CSS
/* (A) WRAPPER */
.cWrap {
  display: flex;
  align-items: center;
  max-width: 250px;
  background: #f4f4f4;
}

/* (B) CURRENT VALUE */
.cVal { font-size: 18px; }
This should be self-explanatory… Just align the number on the right side of the slider.
USEFUL BITS & LINKS
That’s all for the tutorial, and here is a small section on some extras and links that may be useful to you.
BROWSER SUPPORT – WEBKIT? MOZ?
For you guys who are new:
- The major Webkit-based browsers are – Chrome, Opera, Edge, and Safari.
- While Moz… Is just Firefox.
So yes, this custom range slider will pretty much work across the majority of modern browsers. But there are still some browsers (earlier versions of Edge) that are neither Webkit nor Moz, these customizations will not work on those.
LINKS & REFERENCES
- Webkit Runnable Track – MDN
- Moz Range Track – MDN
- Webkit Slider Thumb – MDN
- Moz Range Thumb – MDN
INFOGRAPHIC CHEAT SHEET
THE END
Thank you for reading, and we have come to the end. I hope that it has helped you to better understand, and if you want to share anything with this guide, please feel free to comment below. Good luck and happy coding!