So you have heard of ChatGPT and the AI craze. But the million-dollar question is, how do we add an AI chatbot to a website? After reading many “guides”, I finally found a free local Chatbot project called PrivateGPT. I was hoping that a prebuilt project would be easy, but the rabbit hole turned out to be an abyss.
Yep, AI is not as simple as some think. So here’s a compressed guide of my journey to develop a local AI chatbot on a website, I hope this will save you from days of research. Read on!
TLDR – This is a technical guide intended for the more established developers.
TABLE OF CONTENTS
DOWNLOAD & NOTES
Here is the download link to the example code, so you don’t have to copy-paste everything.
EXAMPLE CODE DOWNLOAD
Just click on “download zip” or do a git clone. I have released it under the MIT license, so feel free to build on top of it or use it in your own project.
SORRY FOR THE ADS...
But someone has to pay the bills, and sponsors are paying for it. I insist on not turning Code Boxx into a "paid scripts" business, and I don't "block people with Adblock". Every little bit of support helps.
Buy Me A Coffee Code Boxx eBooks
IMPLEMENTING AN AI CHATBOT
My research began with PrivateGPT, but as it turns out, the real MVPs are 2 libraries called LangChain and Llama.cpp – Here are the details of “how to create a free local AI chatbot” using these 2 libraries.
PART 1) SETUP
1A) REQUIREMENTS
- Python – At the time of writing, 3.9 ~ 3.10 works fine.
- Microsoft C++ Build Tools
- CMake
- Nvidia CUDA Toolkit – If you have an Nvidia graphics card.
- A decent Nvidia graphics card with at least 8GB VRAM is highly recommended. You can TRY to run “CPU-only”, but it will be painfully slow.
1B) PROJECT SETUP
@echo off
md docs
md models
md templates
md static
move x_dummy.txt docs/
move d_web.html templates/
move d_web.css static/
move d_web.js static/
virtualenv venv
call venv\Scripts\activate
pip install langchain chromadb sentence_transformers Flask
if "%1"=="CPU" (
  pip install torch torchvision torchaudio --force-reinstall
  set FORCE_CMAKE=1
  set CMAKE_ARGS=-DLLAMA_CUBLAS=OFF
) else (
  pip install torch torchvision torchaudio --force-reinstall --index-url https://download.pytorch.org/whl/cu117
  set FORCE_CMAKE=1
  set CMAKE_ARGS=-DLLAMA_CUBLAS=ON
)
pip install --no-cache-dir --upgrade --force-reinstall llama-cpp-python
echo "Install complete"
Chill, I got you covered – Download and unzip the above GIST.
- If you have an Nvidia graphics card – Run
a_setup.bat(Windows)a_setup.sh(Linux). - For “CPU only” –
a_setup.bat CPUora_setup.sh CPU. - This will create a virtual environment, install all the required modules, and create the necessary folders.
docsDocuments that you want the AI to “learn”. Company information, operating hours, products, etc…modelsPlace your AI model files in here.templatesHTML templates.staticCSS, JS, images.
1C) DOWNLOAD AN AI MODEL
For simplicity, we will stick with Llama models in this tutorial.
- I usually use 7B models, which is the best my potato PC can handle –
- Llama2 7B model (
llama-2-7b.Q5_K_M.gguf). - Or Mistral 7B (
mistral-7b-openorca.Q5_K_M.gguf). - Go ahead and download larger models if your PC can handle it.
- Llama2 7B model (
- If you search HuggingFace, there will be many different models.
GGMLOptimized for CPU.GGUFNew version/replacement forGGML. Optimized for GPU.CHATA chatty Llama, tuned for chat.CODEA coding assistant Llama.MATHMath guru Llama.INSTRUCTA “less creative but disciplined” Llama that better follows instructions.
- Put the downloaded model into the
modelsfolder.
PART 2) CREATE A DOCUMENT DATABASE
# (A) LOAD MODULES
import os, glob
from langchain.vectorstores import Chroma
from langchain.embeddings import LlamaCppEmbeddings
from langchain.text_splitter import RecursiveCharacterTextSplitter
from langchain.document_loaders import (
  CSVLoader, PyMuPDFLoader, TextLoader,
  UnstructuredEPubLoader, UnstructuredHTMLLoader, UnstructuredMarkdownLoader,
  UnstructuredODTLoader, UnstructuredPowerPointLoader, UnstructuredWordDocumentLoader
)

# (B) PATHS
path_base = os.path.dirname(os.path.realpath(__file__))
path_docs = os.path.join(path_base, "docs")
path_db = os.path.join(path_base, "db")
path_models = os.path.join(path_base, "models")
if os.path.exists(path_db):
  exit(path_db + " already exist")
model_file = os.path.join(path_models, "mistral-7b-openorca.Q5_K_S.gguf")

# (C) DOCUMENTS TO IMPORT
# (C1) MAP FILE TYPES TO RESPECTIVE LOADER
mapload = {
  ".csv" : CSVLoader, ".doc" : UnstructuredWordDocumentLoader, ".docx" : UnstructuredWordDocumentLoader,
  ".epub" : UnstructuredEPubLoader, ".html" : UnstructuredHTMLLoader, ".md" : UnstructuredMarkdownLoader,
  ".pdf" : PyMuPDFLoader, ".odt" : UnstructuredODTLoader, ".ppt": UnstructuredPowerPointLoader,
  ".pptx": UnstructuredPowerPointLoader, ".txt" : TextLoader
}

# (C2) GET DOCUMENTS
all = []
for ext in mapload:
  all.extend(glob.glob(os.path.join(path_docs, "*" + ext), recursive=True))
if (len(all) == 0):
  exit("No documents to import in " + path_docs)

# (D) IMPORT PROCESS
# (D1) CREATE EMPTY-ISH DATABASE
print("Creating database")
db = Chroma.from_texts(
  texts = [""],
  embedding = LlamaCppEmbeddings(model_path = model_file),
  persist_directory = path_db
)
db.persist()

# (D2) ADD DOCUMENTS
splitter = RecursiveCharacterTextSplitter(
  chunk_size = 512, chunk_overlap = 30
)
for doc in all:
  print("Adding - " + doc)
  name, ext = os.path.splitext(doc)
  db.add_documents(splitter.split_documents(mapload[ext](doc).load()))
db.persist()
db = None
print("Done")
TLDR – Grab all the files in the docs folder and create a database. Just 3 settings to take note of:
chunk_sizeLarge documents will be split into chunks of this size.chunk_overlapThe amount of overlapping data between each chunk. Helps to “combine chunks back nicely”.- “Chunking” allows the AI to better handle data in smaller pieces. But beware – Small chunks result in less efficiency with “fragmentation”, large chunks require more resources to work with.
- Lastly, set
model_fileto your own!
PART 3) CREATE AN AI CHATBOT
3A) INIT
# (A) LOAD MODULES
import os, torch
from langchain.llms import LlamaCpp
from langchain.chains import RetrievalQA
from langchain.vectorstores import Chroma
from langchain.embeddings import LlamaCppEmbeddings
from langchain.prompts import PromptTemplate

# (B) PATHS
path_base = os.path.dirname(os.path.realpath(__file__))
path_db = os.path.join(path_base, "db")
path_models = os.path.join(path_base, "models")
if not os.path.exists(path_db):
  exit(path_db + " does not exist")
model_file = os.path.join(path_models, "mistral-7b-openorca.Q5_K_S.gguf")
The first part of this script shouldn’t be any trouble – Load the required modules and set “auto file path”.
P.S. Set model_file to your own!
3B) MODEL DATABASE PROMPT
# (C) "RESOURCE POOL"
# (C1) IT'S A LLAMA!
llama = LlamaCpp(
  model_path = model_file,
  n_gpu_layers = 32 if torch.cuda.is_available() else 0,
  streaming = False,
  repeat_penalty = 1.15,
  temperature = 0.8,
  top_k = 30, top_p = 0.2,
  # f16_kv = False, n_ctx = 512, max_tokens = 1000, n_batch = 512,
)

# (C2) IT'S A DATABASE
db = Chroma(
  persist_directory = path_db,
  embedding_function = LlamaCppEmbeddings(model_path=model_file)
)

# (C3) IT'S A PROMPT
prompt = """Use the following context section and only that context to answer the question at the end. Do not use your internal knowledge. If you don't know the answer, just say that you don't know, don't try to make up an answer.

Context: {context}
Question: {question}

Answer:"""
Next, we deal with the “main players”:
llamaThe AI model. There are a lot of settings, which are actually important in “fine-tuning”. Take your time to go through them.dbThe documents database we created earlier.promptSimply put, it modifies the user’s original query.- We insert the user’s question into
{question}. - The AI will automatically do a database search and insert relevant document pieces in
{context}. - The entire
promptwill then be fed tollama. - This is another important piece in “fine-tuning”. E.G. We can ask the Llama to respond with “step-by-step instructions”.
- We insert the user’s question into
3C) CHAIN
# (D) CHAIN THE LLAMA-DATABASE-PROMPT TOGETHER
chain = RetrievalQA.from_chain_type(
chain_type = "stuff",
return_source_documents = True,
verbose = True,
llm = llama,
retriever = db.as_retriever(),
chain_type_kwargs = {
"prompt": PromptTemplate (
template = prompt,
input_variables = ["context", "question"]
)
}
)
# (E) TEST IF YOU WANT
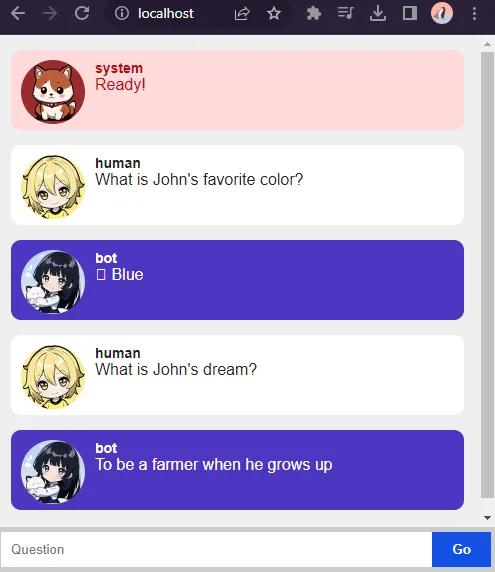
# print(chain("What is John's favorite color?"))
Lastly, we chain the Llama, database, and prompt together – To form the ultimate AI chatty Llama. Go ahead, test run the script if you want.
PART 4) WEB CHATBOT
4A) FLASK HTTP SERVER
# (A) LOAD MODULES
import c_bot as aibot
from flask import Flask, render_template, Response, request

# (B) FLASK SERVER
app = Flask(__name__)

# (B1) DEMO PAGE
@app.route("/")
def index():
  return render_template("d_web.html")

# (B2) AI BOT ENDPOINT
@app.route("/bot", methods = ["POST"])
def bot():
  data = dict(request.form)
  if "query" in data:
    ans = aibot.chain(data["query"])
    print(ans)
    ans = ans["result"]
  else:
    ans = "Where's the question, yo?"
  response = Response(ans, status = 200)
  return response

# (C) START!
if __name__ == "__main__":
  app.run("localhost", 80)
How do we “put the Llama on a webpage”?
- (B1) Serve a chatbot demo page at
http://localhost. - (B2) Deploy the Llama behind
http://localhost/bot. Yes, just POST aqueryto this endpoint.
4B) DEMO HTML PAGE
<!-- (A) CHAT HISTORY -->
<div id="ai-chat"></div>

<!-- (B) QUESTION -->
<form id="ai-query" onsubmit="return chat.send()">
  <input type="text" id="ai-txt" placeholder="Question" autocomplete="off" disabled>
  <input type="submit" id="ai-go" value="Go" disabled>
</form>
Very simple page.
ai-chatChat history.ai-queryQuestion form.
4C) JAVASCRIPT
var chat = {
  // (A) SETTINGS & FLAGS
  hMsg : null, hQn : null,
  hTxt : null, hGo : null,

  // (B) INIT
  init : () => {
    // (B1) GET HTML ELEMENTS
    chat.hMsg = document.getElementById("ai-chat");
    chat.hQn = document.getElementById("ai-query");
    chat.hTxt = document.getElementById("ai-txt");
    chat.hGo = document.getElementById("ai-go");

    // (B2) ENABLE CONTROLS
    chat.controls(1);
    chat.draw("Ready!", "system");
  },

  // (C) TOGGLE HTML CONTROLS
  controls : enable => {
    if (enable) {
      chat.hTxt.disabled = false;
      chat.hGo.disabled = false;
    } else {
      chat.hTxt.disabled = true;
      chat.hGo.disabled = true;
    }
  },

  // (D) SEND MESSAGE TO CHAT SERVER
  send : () => {
    // (D1) DATA TO SEND
    let data = new FormData();
    data.append("query", chat.hTxt.value);

    // (D2) UPDATE HTML INTERFACE
    chat.controls();
    chat.draw(chat.hTxt.value, "human");
    chat.hTxt.value = "";

    // (D3) FETCH
    fetch("http://localhost/bot", {
      method : "POST",
      body : data
    })
    .then(async res => {
      txt = await res.text();
      if (res.status == 200) { return txt; }
      else {
        console.error(txt);
        throw new Error("Bad server response");
      }
    })
    .then(res => chat.draw(res, "bot"))
    .catch(e => {
      chat.draw("ERROR - " + e.message, "system");
      console.error(e);
    })
    .finally(() => chat.controls(1));

    // (D4) PREVENT HTML FORM SUBMIT
    return false;
  },

  // (E) DRAW MESSAGE IN HTML
  draw : (msg, css) => {
    let row = document.createElement("div");
    row.className = "ai-" + css;
    row.innerHTML = `<img class="ai-ico" src="static/ai-${css}.png">
    <div class="ai-chatName">${css}</div>
    <div class="ai-chatMsg">${msg}</div>`;
    chat.hMsg.appendChild(row);
    row.classList.add("ai-show");
    chat.hMsg.scrollTop = chat.hMsg.scrollHeight;
 }
};
window.addEventListener("load", chat.init);
Don’t panic, most of these just deal with “HTML interface cosmetics”. The functional part is (D) – We send the query to http://loaclhost/bot and get a response from the chatbot. The end.
EXTRAS
That’s all for the tutorial, and here is a small section on some extras and links that may be useful to you.
FETCH TIMEOUT
Fetch calls do have a timeout limit. If you have a slow PC, you may want to do some additional research on “set fetch API timeout”, and “python flask timeout setting”.
LINKS & REFERENCES
THE END
Thank you for reading, and we have come to the end. I hope that it has helped you to better understand, and if you want to share anything with this guide, please feel free to comment below. Good luck and happy coding!