Welcome to a tutorial on how to create a simple web scraper in NodeJS. So you need to get data from a website automatically? That calls for a web scraper, and it is actually easy to create one in NodeJS.
fetch to get the raw HTML from the website, then using an HTML parser such JSDOM to extract information.Yes, but just how does that work? Read on for an example!
TABLE OF CONTENTS
DOWNLOAD & NOTES
Here is the download link to the example code, so you don’t have to copy-paste everything.
EXAMPLE CODE DOWNLOAD
Just click on “download zip” or do a git clone. I have released it under the MIT license, so feel free to build on top of it or use it in your own project.
SORRY FOR THE ADS...
But someone has to pay the bills, and sponsors are paying for it. I insist on not turning Code Boxx into a "paid scripts" business, and I don't "block people with Adblock". Every little bit of support helps.
Buy Me A Coffee Code Boxx eBooks
NODEJS WEB SCRAPER
All right, let us now get into the example of creating a very simple web scraper in NodeJS.
QUICK SETUP
Run npm i jsdom to install the required modules.
PART 1) DUMMY PRODUCT PAGE
<div id="product">
  <img src="basketball.png" id="pImg">
  <div id="pName">Basketball</div>
  <div id="pPrice">$12.34</div>
  <div id="pDesc">It's a ball. Horray?</div>
  <input type="button" value="Add To Cart" id="pAdd">
</div>
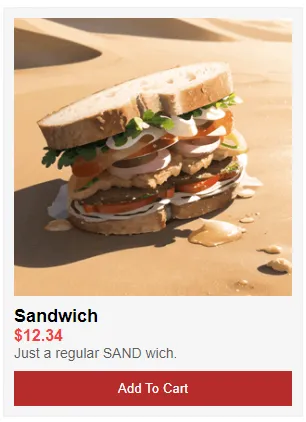
First, we need a dummy page to work with, and here is a simple product page – We will be extracting the product information from this page in the NodeJS web scraper below.
PART 2) NODEJS WEB SCRAPER
// (A) LOAD JSDOM
const jsdom = require("jsdom");
const { JSDOM } = jsdom;

// (B) FETCH
fetch("http://localhost/1-dummy.html")
.then(res => res.text())
.then(txt => {
  // (B1) PARSE HTML
  const dom = new JSDOM(txt);
  const doc = dom.window.document;

  // (B2) EXTRACT INFORMATION
  console.log(doc.getElementById("pName").innerHTML);
  console.log(doc.getElementById("pPrice").innerHTML);
  console.log(doc.getElementById("pDesc").innerHTML);
  console.log(doc.getElementById("pImg").src);
})
.catch(err => console.log(err));
D:\http> node .\2-scrape.js
Empty Box
$12.34
It's an... empty box. Horray?
box.pngYep, that’s all for the “very difficult” web scraper. As in the introduction:
- We use
fetch(URL).then(res => res.text())to get the web page as a string. - Technically, we can use
substring()andmatch()to extract data from the “raw HTML string”… But it’s smarter to use an HTML parser here –const dom = new JSDOM(txt). - Finally, you should already know all the “get HTML element” functions –
getElementById() querySelector() querySelectorAll()… If you don’t it’s time to catch up with the basics. Links below.
P.S. Take note that fetch() is only available in Node 17.5 and later. If you are still using an older version, it’s time to update or consider using other modules such as CURL.
EXTRAS
That’s all for the tutorial, and here is a small section on some extras and links that may be useful to you.
LINKS & REFERENCES
- JSDOM – NPM
- http-server – NPM
- CURL – NPM
- DOM Navigation – Javascript.info
THE END
Thank you for reading, and we have come to the end. I hope that it has helped you to better understand, and if you want to share anything with this guide, please feel free to comment below. Good luck and happy coding!
