Welcome to a tutorial on how to add text to an image in NodeJS. In client-side Javascript, we can use the native Canvas API to write text on an image. Thankfully in NodeJS, we also have a canvas library to simulate that – Read on for the examples!
TABLE OF CONTENTS
DOWNLOAD & NOTES
Here is the download link to the example code, so you don’t have to copy-paste everything.
EXAMPLE CODE DOWNLOAD
Just click on “download zip” or do a git clone. I have released it under the MIT license, so feel free to build on top of it or use it in your own project.
SORRY FOR THE ADS...
But someone has to pay the bills, and sponsors are paying for it. I insist on not turning Code Boxx into a "paid scripts" business, and I don't "block people with Adblock". Every little bit of support helps.
Buy Me A Coffee Code Boxx eBooks
NODEJS ADD TEXT TO IMAGE
All right, let us now get into the examples of adding text to an image in NodeJS.
QUICK SETUP
Run npm i express canvas to install the required modules.
1) SIMPLE ADD TEXT TO AN IMAGE
// (A) LOAD MODULES
const fs = require("fs"),
      { createCanvas, loadImage } = require("canvas");

// (B) SETTINGS
const
sFile = "demo.png",   // source image
sSave = "demoA.png",  // "save as"
sText = "FRIED RICE", // text to write
sX = 80, sY = 80;     // text position

// (C) LOAD IMAGE + DRAW TEXT
loadImage(sFile).then(img => {
  // (C1) CREATE CANVAS
  const canvas = createCanvas(img.width, img.height),
        ctx = canvas.getContext("2d");

  // (C2) DRAW IMAGE ONTO CANVAS
  ctx.drawImage(img, 0, 0);

  // (C3) WRITE TEXT ONTO IMAGE
  ctx.fillText(sText, sX, sY);

  // (C4) SAVE
  const out = fs.createWriteStream(sSave),
        stream = canvas.createPNGStream();
  stream.pipe(out);
  out.on("finish", () => console.log("Done"));
});
For you guys who are somehow lost, it’s easier to focus on section (C) only:
- (C) Load the image first.
- (C1) When the image is loaded, create an empty canvas.
- (C2) “Copy” the entire image onto the canvas.
- (C3) Then write the text on top.
- (C4) Finally, save the canvas as an image file.
2) MORE TEXT OPTIONS
// (A) LOAD MODULES
const fs = require("fs"),
      { createCanvas, loadImage } = require("canvas");

// (B) SETTINGS
const
sFile = "demo.png",   // source image
sSave = "demoA.png",  // "save as"
sText = "FRIED RICE", // text to write
sX = 80, sY = 80;     // text position
registerFont("C:/Windows/Fonts/arialbd.ttf", { family: "Arial Bold" }); // CHANGE TO YOUR OWN!

// (C) LOAD IMAGE + DRAW TEXT
loadImage(sFile).then(img => {
  // (C1) CREATE CANVAS
  const canvas = createCanvas(img.width, img.height),
        ctx = canvas.getContext("2d");

  // (C2) DRAW IMAGE ONTO CANVAS
  ctx.drawImage(img, 0, 0);

  // (C3) WRITE TEXT ONTO IMAGE
  ctx.font = '36px "Arial Bold"';
  ctx.fillStyle = "rgba(255, 0, 0, 0.4)";
  ctx.lineWidth = 2;
  ctx.strokeStyle = "rgb(0, 0, 0)";
  ctx.fillText(sText, sX, sY);
  ctx.strokeText(sText, sX, sY);

  // (C4) SAVE
  const out = fs.createWriteStream(sSave),
        stream = canvas.createPNGStream();
  stream.pipe(out);
  out.on("finish", () => console.log("Done"));
});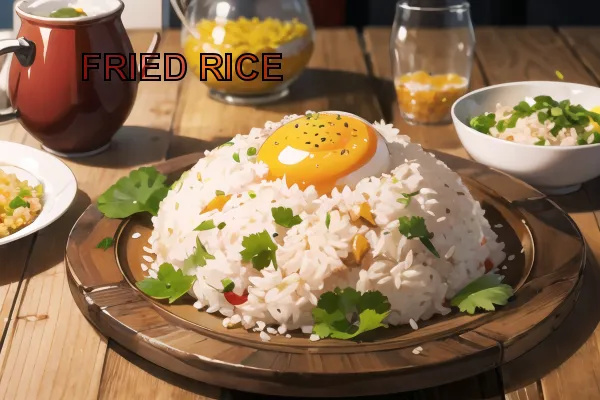
As you can see, the above text is nearly illegible and needs some improvements. There are quite a number of ways we can work with the text, and here are a few of the common ones:
- To use a custom font:
- (B) We have to
registerFont()first – Remember to change this to your own. - (C3) Use
ctx.fontto specify the font size, font weight, and font family.
- (B) We have to
- To set transparent text, use
ctx.fillStyle = "rgba(R,G,B,A)". - To stroke (outline) the text:
- Use
ctx.lineWidthto control the thickness. - Use
ctx.strokeStyleto control the outline color and opacity. - Draw the outline using
ctx.strokeText(). - Take note,
strokeText()will only draw the outline. It is necessary to callfillText()if you want to fill in the text.
- Use
3) CENTER TEXT ON IMAGE
// (A) LOAD MODULES
const fs = require("fs"),
      { registerFont, createCanvas, loadImage } = require("canvas");

// (B) SETTINGS - CHANGE FONT TO YOUR OWN!
const
sFile = "demo.png",   // source image
sSave = "demoC.png",  // "save as"
sText = "FRIED RICE"; // text to write
registerFont("C:/Windows/Fonts/arialbd.ttf", { family: "Arial Bold" }); // CHANGE TO YOUR OWN!

// (C) LOAD IMAGE + DRAW TEXT
loadImage(sFile).then(img => {
  // (C1) CREATE CANVAS + DRAW IMAGE
  const canvas = createCanvas(img.width, img.height),
        ctx = canvas.getContext("2d");
  ctx.drawImage(img, 0, 0);

  // (C2) TEXT DIMENSIONS
  ctx.font = '36px "Arial Bold"';
  ctx.fillStyle = "rgba(255, 0, 0, 0.4)";
  ctx.lineWidth = 2;
  ctx.strokeStyle = "rgb(0, 0, 0)";
  let td = ctx.measureText(sText),
      tw = td.width,
      th = td.actualBoundingBoxAscent + td.actualBoundingBoxDescent;

  // (C3) CALCULATE CENTER & WRITE ON CENTER
  let x = Math.floor((img.naturalWidth - tw) / 2),
      y = Math.floor((img.naturalHeight + th) / 2);
  ctx.strokeText(sText, x, y);
  ctx.fillText(sText, x, y);

  // (C4) SAVE
  const out = fs.createWriteStream(sSave),
        stream = canvas.createPNGStream();
  stream.pipe(out);
  out.on("finish", () => console.log("Done"));
});
Lastly, centering the text is unfortunately Mathematical.
- (C2) Define the “text settings” as usual, then use
ctx.measureText()to get the text box dimensions. - (C3) To calculate the center XY coordinates:
X = FLOOR((IMAGE WIDTH - TEXT WIDTH) ÷ 2)Y = FLOOR((IMAGE HEIGHT + TEXT HEIGHT) ÷ 2)
EXTRAS
That’s all for the tutorial, and here is a small section on some extras and links that may be useful to you.
A COUPLE OF ISSUES…
- The Node Canvas library does not support
WEBPat the time of writing. You can try using Sharp to convert the image file format. - There’s some funny custom font issue in Windows. The font has to be installed in Windows, or the script will throw an error.
LINKS & REFERENCES
- Node Canvas – GitHub
- Node Canvas – NPM
THE END
Thank you for reading, and we have come to the end. I hope that it has helped you to better understand, and if you want to share anything with this guide, please feel free to comment below. Good luck and happy coding!