Welcome to a quick tutorial on how to move an HTML element to another container. Working on a custom selection list? Or just want to move a piece of content?
To move an element from one container to another:
- Get the element to move –
var s = document.getElementById("TOMOVE"); - Get the target container –
var t = document.getElementById("TARGET"); - Simply use
appendChild()to move the element –t.appendChild(s);
That should cover the basics, but read on for more examples!
TLDR – QUICK SLIDES
[web_stories_embed url=”https://code-boxx.com/web-stories/move-html-elements-in-javascript/” title=”Move HTML Elements In Javascript” poster=”https://code-boxx.com/wp-content/uploads/2021/11/STORY-JS-20230518.webp” width=”360″ height=”600″ align=”center”]
Fullscreen Mode – Click Here
TABLE OF CONTENTS
MOVE HTML ELEMENTS IN JAVASCRIPT

All right, let us now get into the ways to move HTML elements in Javascript.
1) MOVE SINGLE ELEMENT
<!-- (A) DEMO STYLES -->
<style>
.first { background: #ffddf1; }
.second { background: #ddfff7; }
</style>

<!-- (B) HTML CONTAINERS -->
<div class="first">
  <p>First container.</p>
  <p id="source">Paragraph to move.</p>
</div>
<div class="second" id="target">
  <p>Second container.</p>
</div>

<!-- (C) MOVE! -->
<script>
function move () {
  // (C1) GET SOURCE & TARGET ELEMENTS
  var source = document.getElementById("source"),
      target = document.getElementById("target");

  // (C2) MOVE!
  target.appendChild(source);
}
</script>
<input type="button" value="Move" onclick="move()">
First container.
Paragraph to move.
Second container.
This is the “full version” of the above introduction snippet – To move an HTML element, simply use appendChild() to move it into the new container.
2) MOVE ALL CONTENT
<!-- (A) DEMO STYLES -->
<style>
.first { background: #ffddf1; }
.second { background: #ddfff7; }
</style>

<!-- (B) HTML CONTAINERS -->
<div class="first" id="source">
  <p>First container.</p>
  <p>Some content.</p>
</div>
<div class="second" id="target">
  <p>Second container.</p>
</div>

<!-- (C) MOVE! -->
<script>
function move () {
  // (C1) GET SOURCE & TARGET ELEMENTS
  var source = document.getElementById("source"),
  target = document.getElementById("target");

  // (C2) MOVE!
  target.innerHTML += source.innerHTML;
  source.innerHTML = "";
}
</script>
<input type="button" value="Move" onclick="move()">
First container.
Some content.
Second container.
What if we want to move all content to another container? Just a couple of minor changes here.
- The source element is now the entire
<div class="first">container, the target element is still<div class="second">. - We duplicate the HTML from
firsttosecond–target.innerHTML += source.innerHTML. - Then empty out the
first–source.innerHTML = "".
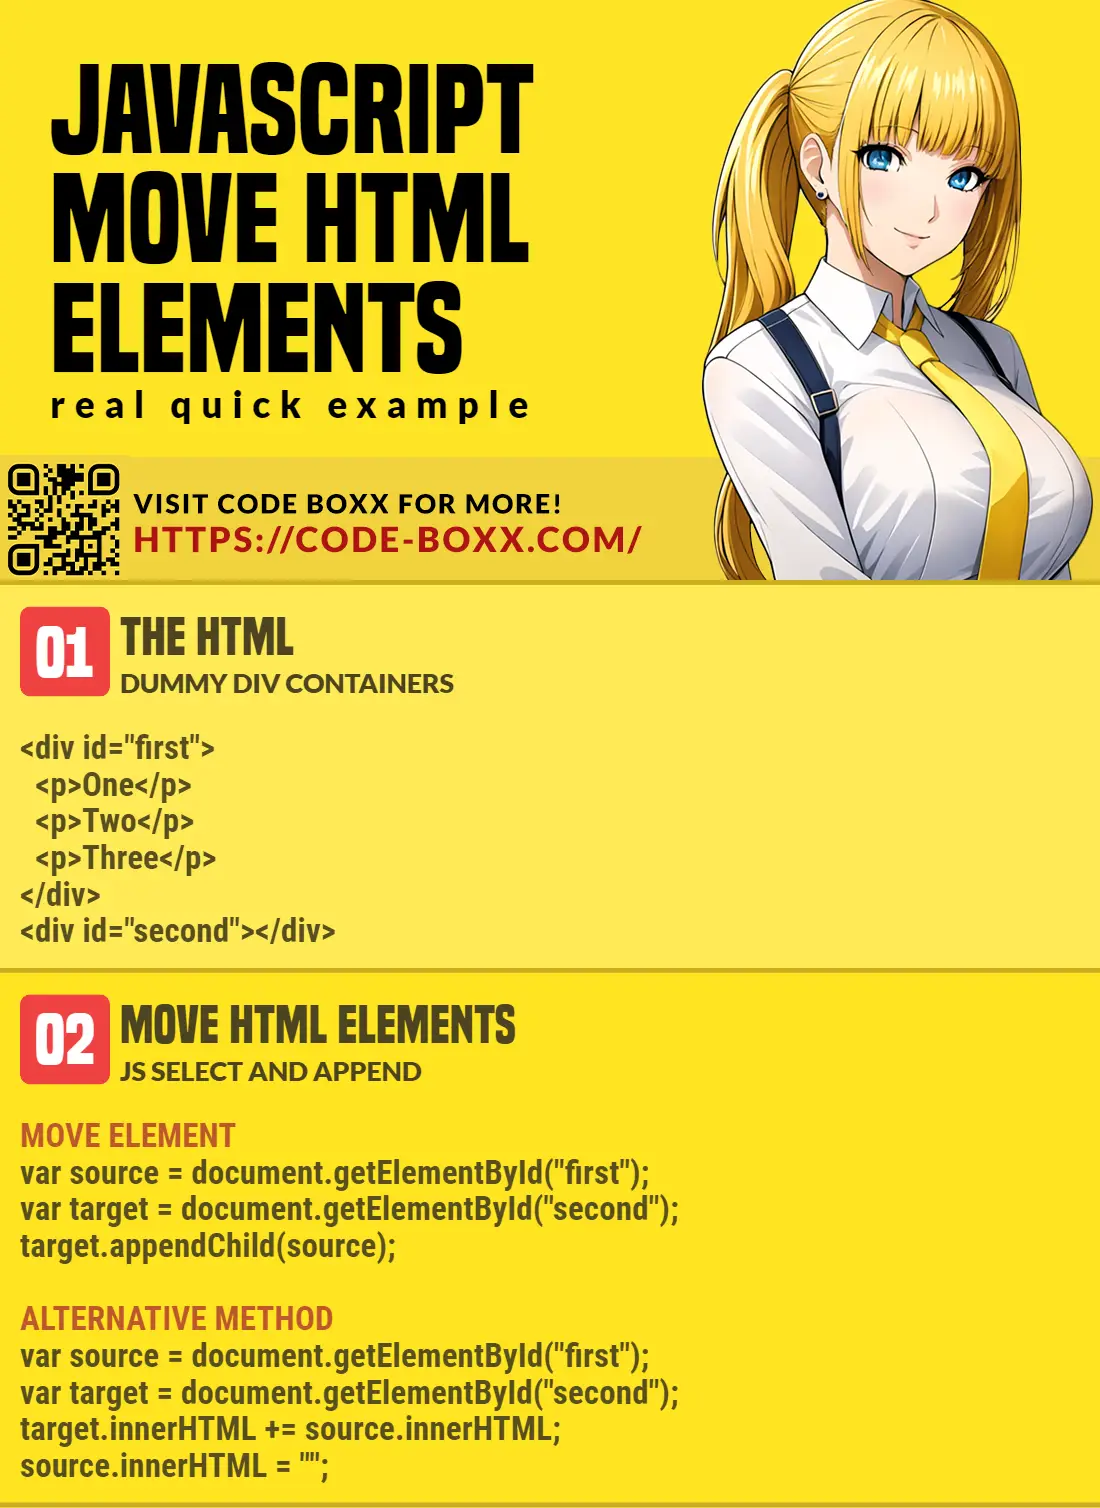
3) CUSTOM SELECTION LIST
<!-- (A) DEMO STYLES -->
<style>
#clist { display: flex; }
#first, #second { width: 50%; }
.first { background: #ffddf1; }
.second { background: #ddfff7; }
</style>

<!-- (B) HTML CONTAINERS -->
<div id="clist">
  <div class="first" id="first">
    <p>One</p>
    <p>Two</p>
    <p>Three</p>
  </div>
  <div class="second" id="second"></div>
</div>

<!-- (C) JAVASCRIPT -->
<script>
window.addEventListener("load", () => {
  // (C1) GET ALL HTML ELEMENTS
  var first = document.getElementById("first"),
      second = document.getElementById("second"),
      all = document.querySelectorAll("#first p");

  // (C2) TOGGLE CONTAINER
  for (let p of all) {
    p.onclick = function () {
      if (this.parentElement == first) {
        second.appendChild(this);
      } else {
        first.appendChild(this);
      }
    }
  }
});
</script>
One
Two
Three
Lastly, this is a slightly more advanced example of a “toggle list”. But how it works is actually stupidly simply, to toggle an item:
- We simply check which parent container the selected item is currently in –
this.parentElement. - Then let the opposite container adopt the selected item –
second.appendChild(this)orfirst.appendChild(this).
DOWNLOAD & NOTES

Here is the download link to the example code, so you don’t have to copy-paste everything.
SORRY FOR THE ADS...
But someone has to pay the bills, and sponsors are paying for it. I insist on not turning Code Boxx into a "paid scripts" business, and I don't "block people with Adblock". Every little bit of support helps.
Buy Me A Coffee Code Boxx eBooks
EXAMPLE CODE DOWNLOAD
Click here for the source code on GitHub gist, just click on “download zip” or do a git clone. I have released it under the MIT license, so feel free to build on top of it or use it in your own project.
EXTRA BITS & LINKS

That’s all for the tutorial, and here is a small section on some extras and links that may be useful to you.
LINKS & REFERENCES
- Get Element By Id – MDN
- Append Child – MDN
- Create & Append Elements In HTML – MDN
INFOGRAPHIC CHEAT SHEET
THE END

Thank you for reading, and we have come to the end. I hope that it has helped you to better understand, and if you want to share anything with this guide, please feel free to comment below. Good luck and happy coding!